Category: Blondes can cook too!

3 Ingredient Cookies

Sundays are for baking! Well, most of the time!

Keeping today’s post short and sweet because I’ve been focusing on spending time with the boys today and not playing on my phone!

These cookies are SO EASY, they are pretty healthy and definitely are tasty enough to cure your sweet tooth!

Here’s all you need

• 2 ripe mashed bananas

• 1 1/2 cup oats

• 2/3 cups chocolate chips

Here’s whatcha do

• Heat oven to 350

• In a mixing bowl mix mashed bananas, oats & chocolate chips until all combined well.

• Spoon tablespoon sized amount of mixture onto wax paper or a silpat sheet.

• Flatten spoonfuls our a little with your fingers & pop them in the oven.

• Bake for 15 – 20 minutes until the ends are a little golden brown!

• REMOVE, LET COOL, & SHOVEL IN YOUR MOUTH 😜

That’s it! So easy & so yummy!! Sometimes I add a little bit of cinnamon spice or even a 1/2 teaspoon of vanilla. You could even replace the choc. Chips with raisins or nuts if you want to try something different!

Hope y’all had a great weekend! Let a sista know if y’all make these & how they come out!

XoXo, Chelsey Rae

-SHOP THE POST-

Chocolate Chip + Raisin, Oatmeal Cookies

So, I have to toot my own horn and say I am pretty known for making awesome chocolate chip cookies! while I definitely bask in that glory – I wanted to step up my cookie game and try out some new things! who doesn’t love a good oatmeal cookie when they are done right? I’m talking the soft, chewy kind that have just the right amount of everything! yum!

I also always feel like oatmeal cookies remind me of the holidays so that’s why I worked on this recipe and got the kinks out just in time to share them with you guys! of course, oatmeal cookies have a tad more steps than your normal cookie baking but they are worth it! I did a batch with raisins + chocolate chips  & a batch just plain chocolate chips, no raisins & enjoyed them both but I think my winner was just chocolate chips lol or maybe just half the raisins!

Listing all your ingredients down below! This is for a batch with both chocolate chips & raisins, obviously if you want to do one or the other omit whichever you don’t want! Add extra of the thing you do want! Baking doesn’t have to be hard! Make it your own 🙂 Also, this recipe makes about 4 dozen cookies, if you double it, double everything just as shown!

• 2 sticks of butter

• 1 cup light brown sugar

• 1/2 cup granulated sugar

• 2 eggs

• 1 tsp vanilla extract

• 1 1/2 cups flour

• 1 tsp baking soda

• 1 1/2 tsp ground cinnamon

• 1/2 tsp salt

• 3 1/2 cups rolled oats

• 1/2 cup raisins

• 3/4 cup chocolate chips

Save for later & optional

• 5 tbsp cinnamon sugar

Time to get baking, here are the steps…

  1. Preheat your oven to 350 degrees
  2. Mix sugars and butter together with a mixer until they reach a creamy texture.
  3. Add eggs + vanilla and mix in.
  4. Mix flour, baking soda, cinnamon and salt. At this point I stop using a mixer and use a spoon.
  5. Add oats, raisins & chocolate chips. Keep folding them in till they are all mixed in with the dough.
  6. Chill dough. You can either do this for 45 mins or for a few hours if you have the extra time. A few hours makes for a chewier cookie.
  7. Take tablespoons full of dough and round them out, or use a cookie scooper, and place them spread out in uniform order onto parchment paper or a silpat mat. (I never use foil or a greased cookie sheet. I don’t love how this makes things bake. One you use parchment paper or a silpat mat you’ll understand).
  8. Bake cookies for 10 – 12 minutes or until they are goldenish brown.
  9. Optional – after cookies are taken from oven sprinkle cinnamon sugar you had set aside on top.
  10. Transfer cookies to a plate or place them on a wire rack to cool.

Let me know if you guys have any questions & if you make them let me know whatcha think!

Heres to hoping these cookies keep ya warm! Happy baking!

XoXo, Chelsey Rae

-SHOP THE POST-

Chocolate, pumpkin pie buttercream, acorn cupcakes!

Whoa, now THAT is a title! You guys voted for a thanksgiving cupcake idea, so I delivered! I am more then happy to get to mess around in the kitchen trying different things! And, even more so, now that Ryan just ordered a new normal stove, THANK JESUS! The stove im working with now is a commercial stove, and im kinda not really the best at using it – sooo to be honest im glad it’s going lol! Now, on to the main event….

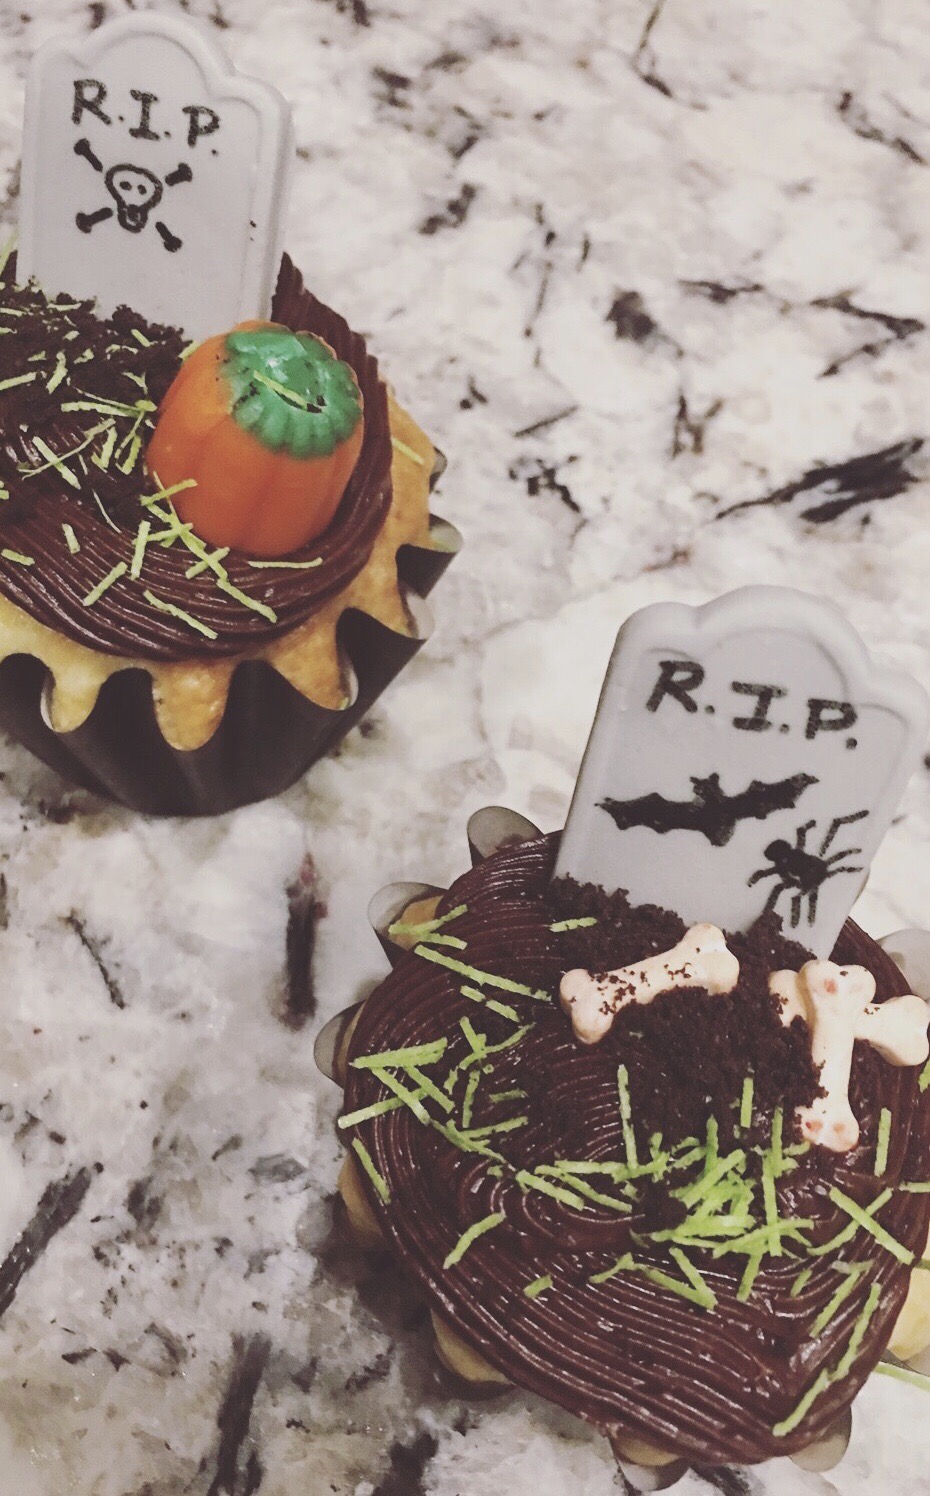
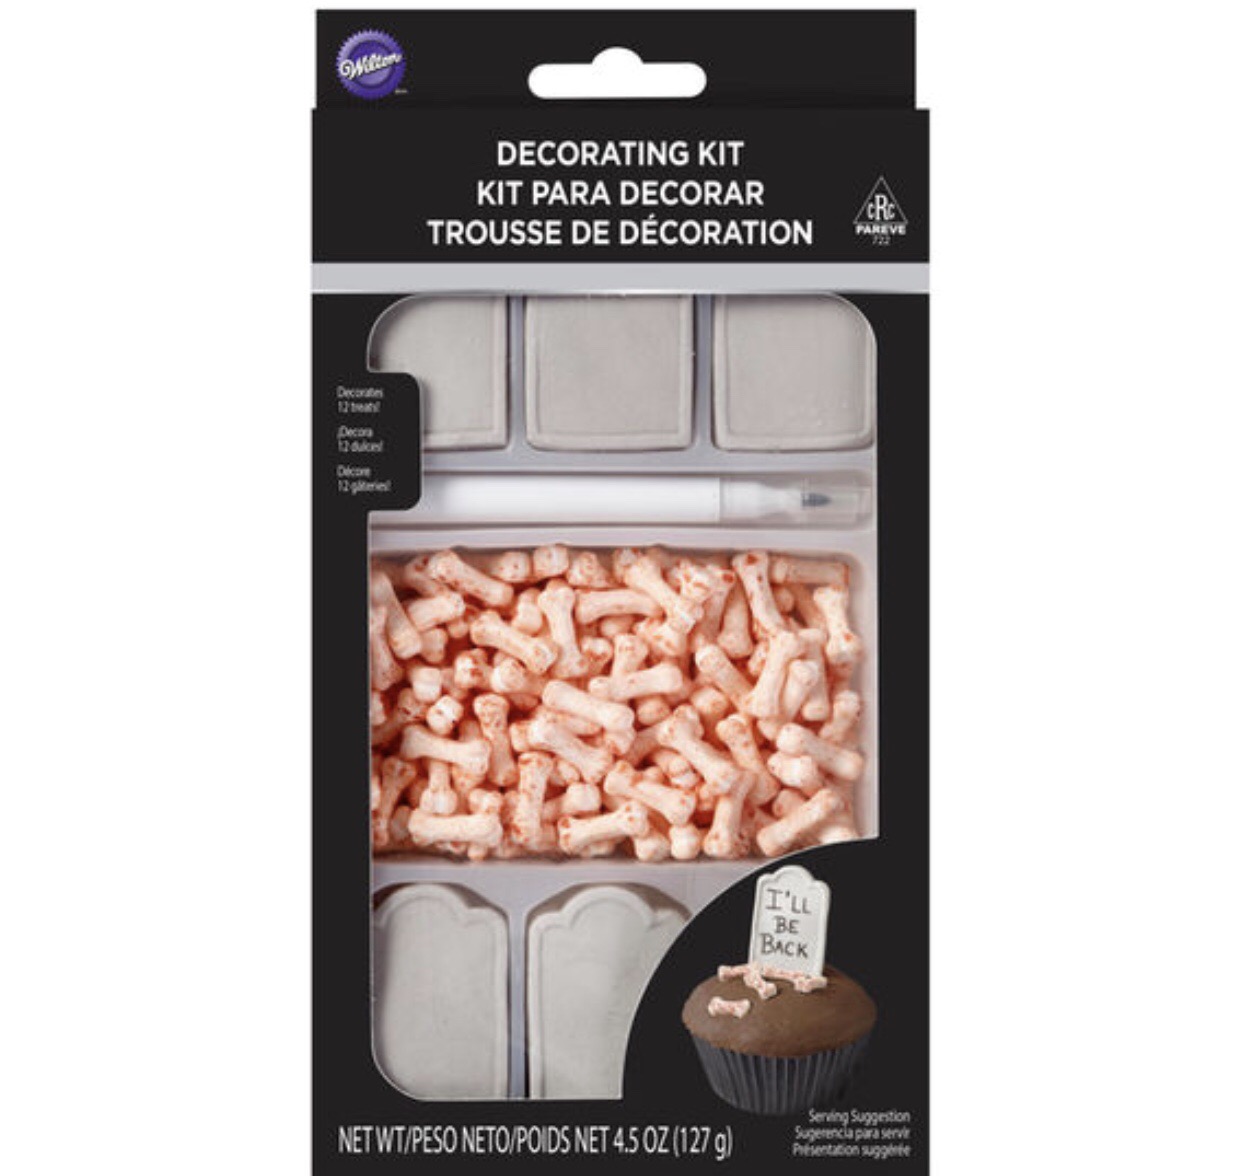
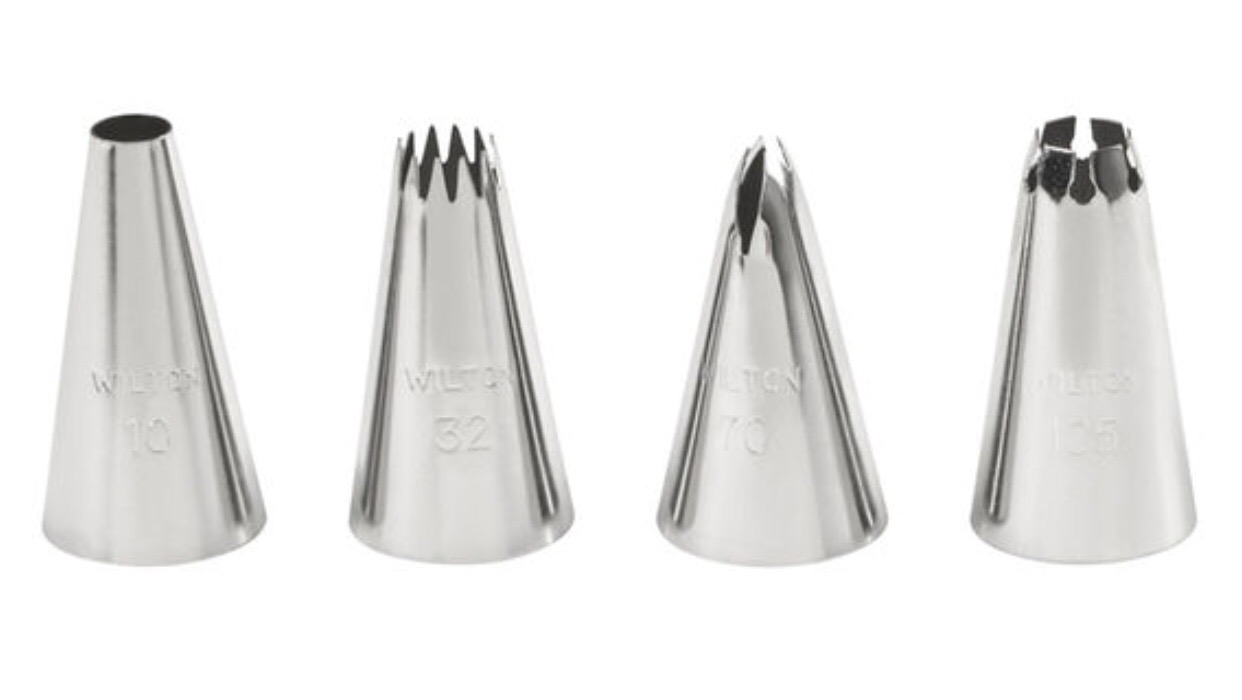
I was just messing around and was pretty surprised that these turned out bombbbb (I never say that but its the only appropriate word right now!). I brought them to work the day after and everyone gave them two thumbs up so that’s means they were a win! And the best part? THEY WERE SO EASY! I will list bellow the things you need (to do the icing fancy you will need the list of icing accessories I posted in my last cupcake blog post, you can find it if you click here)   …

• Your favorite box of chocolate cake mix (I used devils food)

• Your favorite brand of BUTTERCREAM frosting (Or you can make your own but who has time for that?)

• Cinnamon spice

• Cinnamon sugar

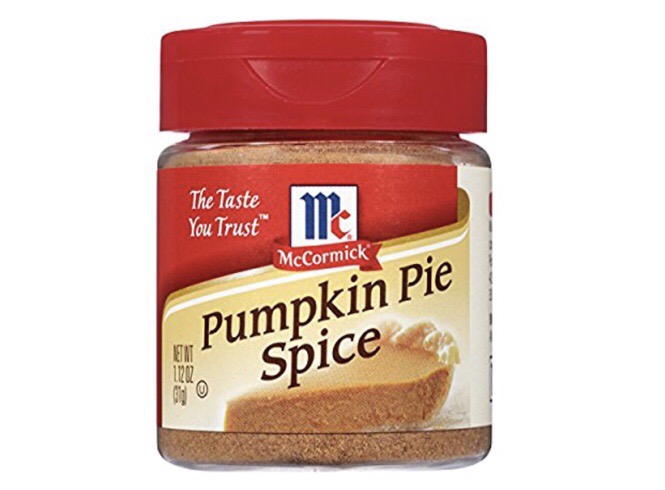
• Pumpkin pie spice (it looks like this, if its not in your store you can amazon prime it HERE )

• Powdered sugar

• Caramel candy squares

• Tootsie rolls

• Raw cut sugar (looks like this, you want it to have a bit of a golden color)

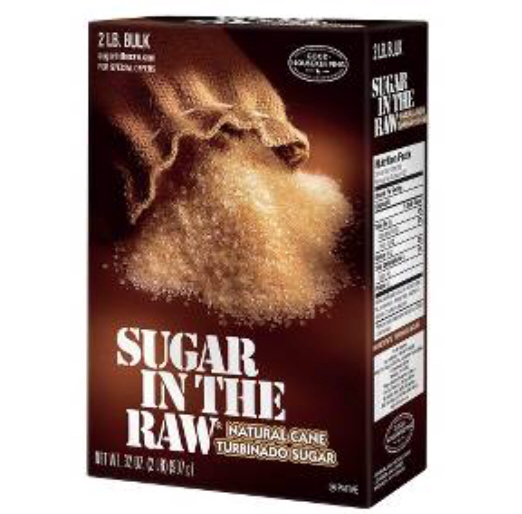
So once you have made your cupcakes and popped them in the oven you can start making your pumpkin pie buttercream icing while they are baking/cooling. Scoop your icing into a large bowl, add one heaping tablespoon of pumpkin pie spice, add one tablespoon of cinnamon sugar and 1/2 tablespoon of cinnamon spice. Mix it together and make sure you like the taste, if you want more of a pumpkin pie taste you can add more but I think the one tablespoon should be enough!

Once you get the taste right, its time to get the consistency right (skip this step if your like “forgetttt that im just slapping this icing on with a knife!” More power to ya sista!), add one cup of powdered sugar to your icing. This should make it thicker, that way, when you are piping the icing you have a nice dense swirl! You want to consistency to be somewhat like peanut butter, or softened cream cheese kinda.

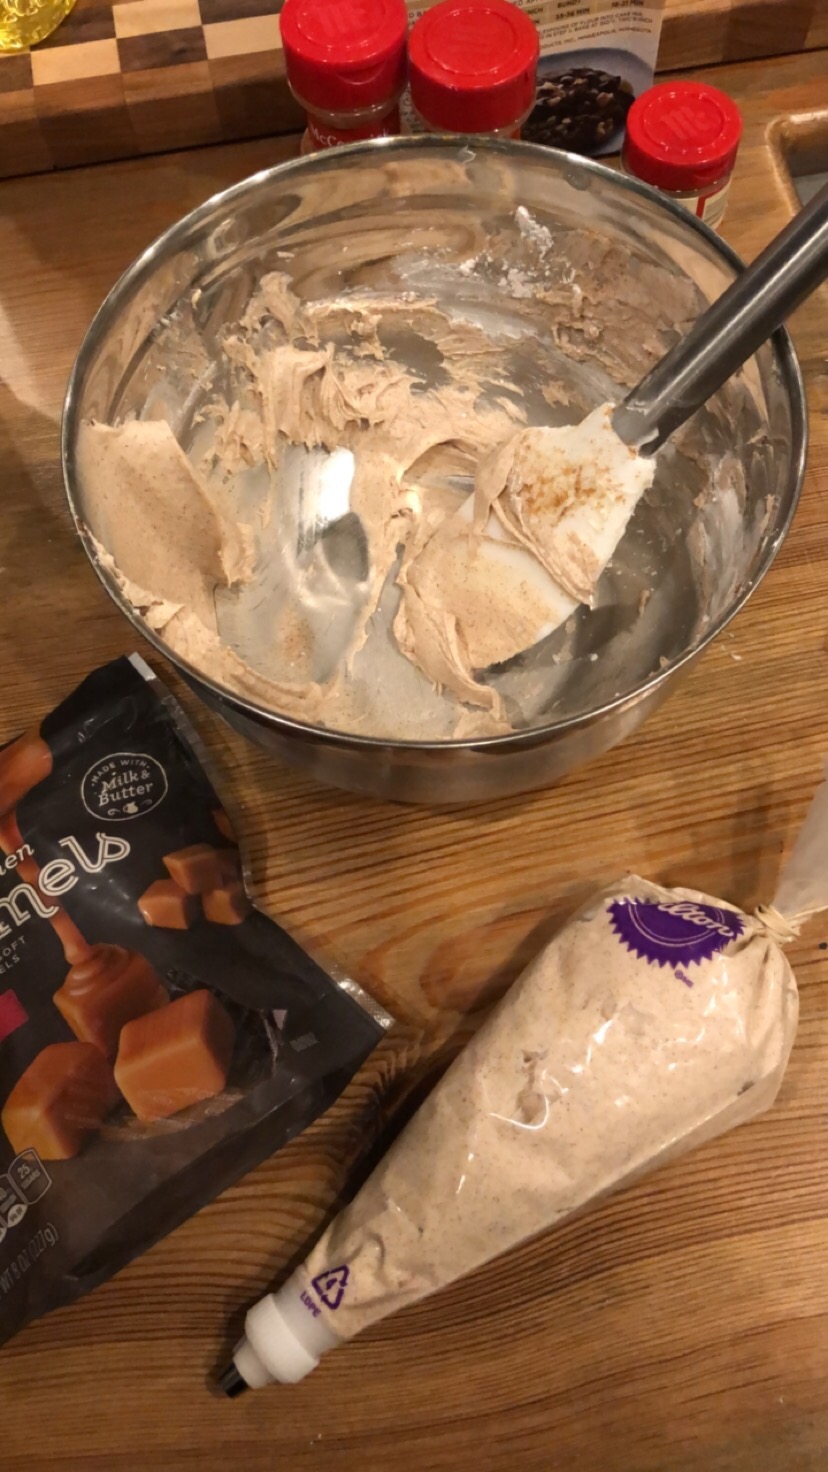
Once consistency and flavor are right, fill your pipping bag with the icing, tie it off & put it in the fridge for about 15 minutes.

From here let cupcakes completely cool down, take icing bag and create the swirls on top of your cupcake (practice a few first). If you feel like you want more add another swirl on top to make it look fuller. I ended up adding on top of mine so it would as well! The take your raw sugar packets and sprinkle them lightly over your icing.

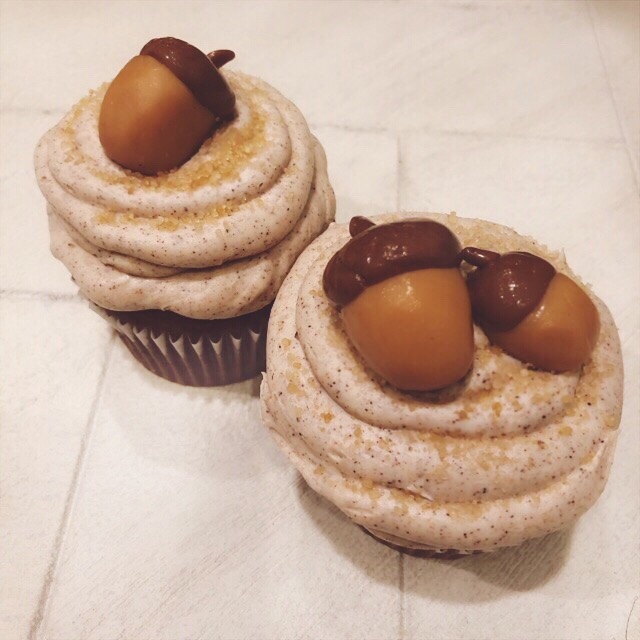
Once all cupcakes are Iced and sprinkled, it’s time to make your decorative acorns! This is where the caramel and tootsies come in! Using the heat of your hands roll the caramel into a ball, this is going to be the base of your acorn! You should make it come to a roundish point at the bottom! Then grab a tootsie roll, again, using the heat of your hand make a top for your acorn, you want this to be around the same size width as your caramel base. Use your thumb to make a indent on the bottom side so your caramel bottom will fit snug in. Take a small piece of tootsie roll & make a stem. Put these together to make your acorn, caramel bottom first, tootsie top second, and stem right on top! I opted to make a few smaller acorns as well so I had a little variety!

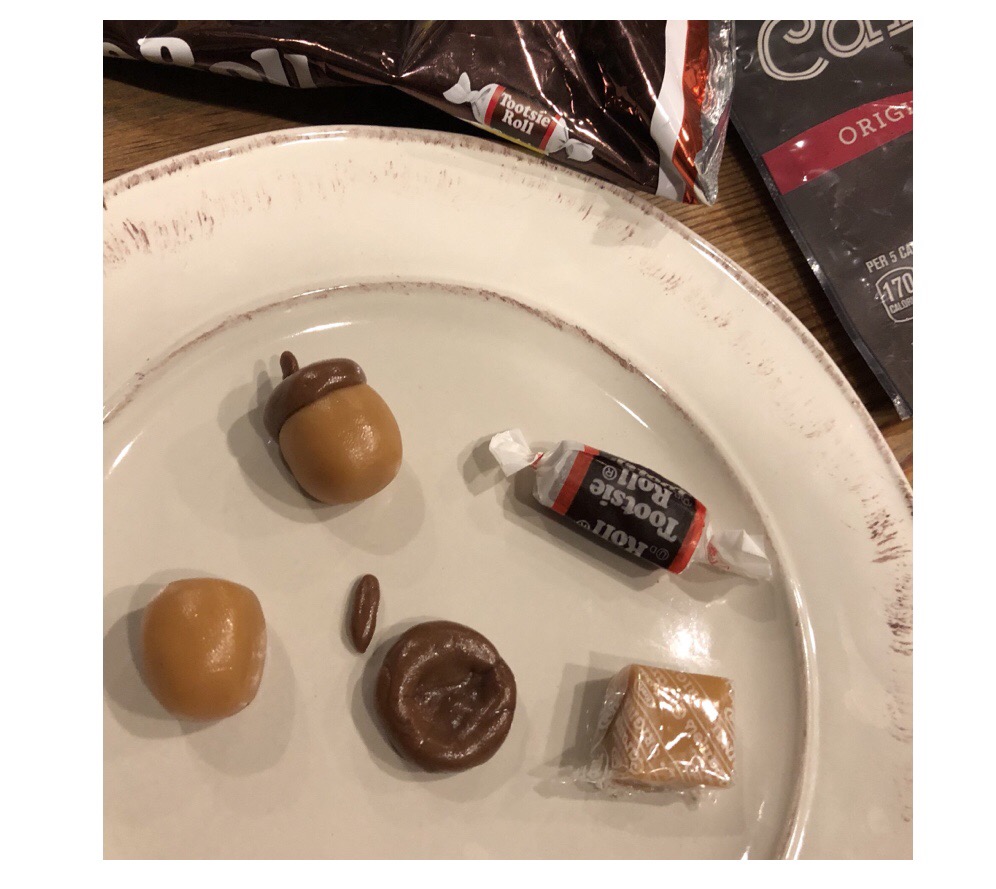
Once I was done making my acorns I took a toothpick and scraped criss-crosses on the front of them, this step was a little unnecessary & extra but whatever lol you can skip it!!

Then when they are totally to your liking, place them on top of your sugared icing. Place one big acorn on some and a big acorn with a little next to it on others, that way they don’t look so uniform!

Then, take a picture of your cuteee cupcake and SERVE!!

I think this recipe is really easy & the flavor in the icing wows people! You could also defiantly pair it with another cake flavor besides chocolate if that’s not your thing! Hope you guys think they are delicious!!!

XoX0, Chelsey Rae

Spooky cupcakes

Hey y’all! I know it’s a little late but at the same time I feel like you can reuse this idea for next Halloween and/or go out and grab a few of these things for future cup cake making blog posts!


Of course I am by no means a chef, or a professional baker – but I love to do and be able to share with you guys some of the simple little fun things that we all probably think are hard and we couldn’t do haha! I do love to bake but I love the easy short cuts that will still kinda wow people! Most things look more complicated than they are after all!

Giving you guys a list of things you need with pictures & links below, snag them + your favorite box cake mix/icing & you are set!

  • Halloween decorations

Candy bones & grave 


Mellowcreme pumpkins

Grass Sprinkles

+ a bag of Oreos, we all know what those look like and where to get them!

  • Cupcake decorating tools

Decorating tips

Decorating bags (they sell rubber bands for these to tie at the end, I use hair ties because obviously I am a hairdress)

Tip coupler

Now that you’ve got all your supplies, it’s time to start decorating! Now I know this all probably looks overwhelming and your probably like “no way can I do this” again, if I can do this you can! TRUST ME! My first few times doing this I would fill my bags with icing and practice doing a spiral (for icing on the cupcake) on a paper plate! IT IS SO MUCH EASIER THEN YOU THINK!

Anyway grab your bag, cut a small hole in the tip, put the silver decorating tip in the top of the tip coupler and put that through the whole you cut in the icing bag (you may have to cut more once it’s on to make it come through), then screw on the bottom of the tip coupler. If my directions seem difficult don’t worry there are picture directions on the box – so follow those lol!! Fill your bag with icing but leave enough room to be able to twist the top and tie it! And ALWAYS make sure you have more icing then anticipated, running out of icing sucks!!!

Once your cupcakes are VERY COOLED start using your icing tips to make your spirals on top (I know this isn’t the correct terminology but whatever lol)! Then place your decorated candy graves on your cupcake, these started to fall back a tad so I placed a toothpick behind them to help keep them up! Then I alternated placing bones on some cupcakes next to the grave or pumpkins!

After that I added a few sprinkles of grass to each cupcake. While in a separate bowl Ryan crushed up some Oreo cookies without the filling, which I then sprinkled closer to the grave and bones!

Viola! THATS ALL! These were so cute and easy, the most complicated part is getting your “spirals” right!

Give me some feedback on wether or not you guys think this was easy to follow and let me know if you’d maybe like to see a thanksgiving cupcake idea?!

XoXo, Chelsey Rae

Roasted chickpeas


I know the main purpose of this blog was to focus on hair, even still, y’all know I can’t help but share yummy recipes!! Snacking on roasted chickpeas is obviously better than grabbing a bag of chips, plus they are quick, easy & so good (I wonder how many times I’ve typed that exact line on other posts pahaha) anyway, leaving you guys with the instructions/recipe down below.

First preheat your oven to roast 425•

Open, rinse & drain 2 cans of garbanzo beans. Place them on a paper towel, blot well and allow to dry in open air for about 10 minutes. Then get yourself a big bowl and combine the beans with all of the following ingredients. 

  • 2 tbsp EVOO 
  • 1/2 tsp chili powder
  • 1/2 tsp cumin 
  • 1/2 tsp garlic power 
  • 1/2 tsp onion powder 
  • Cayenne pepper to taste 
  • Salt to taste 
  • 1/2 tsp paprika 

Place chickpeas on a baking sheet lined with parchment paper and pop into the oven anywhere between 20-30 minutes, checking frequently and giving the pan a small shake to move them around a bit (I say small shake so yours don’t end up all over the bottom of the oven like mine did). 

Remove from oven and add 1/2 tsp sea salt and a little more spices if you like, here I added a few more sprinkles of chili powder and cayenne! 

thennn, lastly – enjoy! They are the best when they are right out of the oven and all warm!  

XoXo, Chelsey Rae 

Sausage, white bean, & kale soup!

Sharing this yummmy & quickkkk (the most important part) soup with you guys! This should come in handy since the temperature decided to drop today and that groundhog saw its shadow!!

Now ya’ll know I barely measure anything and just add season to taste so bare with me – I pretty much give y’all a base for a recipe and there’s always room to make it your own! 

So here’s what you’ll need:

  • 1 tablespoon EVOO
  • About 3/4ths cup of the holy trinity 
  • 1 and 1/2 teaspoons minced garlic 
  • 48oz of chicken stock (box and 1/2)
  • 2 15oz cans of white beans 
  • 1 medium (thickly) chopped onion 
  • 1 bunch of kale leaves pulled from the stem and chopped to your liking
  • Italian or Cajun spicy chicken/pork sausage, again, the type & how much is your preference. 

Season to your taste with:

  • Tony’s, cracked pepper,  Italian seasoning, cayenne pepper, and garlic salt. 

Side note: you can obviously use dry white beans and soak them overnight but this time I was using canned for time purposes! I prefer not to, but when I do I make sure to put the beans in a strainer and rinse very well…The juices canned stuff sits in freaks me out! 

First, I throw my sausage or chicken sausage in the pan and get it browned then I remove it and set it aside. In the same pan I throw my holy trinity and chopped onions into a tablespoon of heated EVOO, I allow this to cook until unions get tender and see-through. Then I add my minced garlic and sauté for about 3 more minutes before adding my two cans of drained white beans. Once my beans are all mixed in I add my seasoning and continue to try to smush some of the beans to get a little bit of that creamy texture. 

Once everything’s all in there and mixed well I throw my sausage back in and add my 48oz of chicken broth. The last thing to go in is your kale, this cooks down fairly quick and after I see it’s wilted I put at medium to low heat and let it simmer for about 20 minutes to get all the flavors going! 

I tend to eat this just on its own for the most part but I have served over rice a time or two just to make it a little more filling if I’m feeding the boyfriend or friends! 

Happy soup eating people! 

XoXo, Chelsey Rae

Roasted pumpkin seeds

  
I’m a little late on posting this, I probably should have done it in the beginning of the week beforeeee everyone carved their pumpkins but my family always waits to carve ours kinda late so they aren’t all rotten by Halloween. One of my favorite parts every year is roasting the pumpkin seeds! I like mine superrrr spicey but you can really season them however you want! I hear they are good with some butter, sugar and cinnamon but I’ve never tried them that way yet!  


 Here’s what you’ll need. As I’ve said before in some of my blogs I don’t cook with a lot of salt, so feel free to add whatever you choose. My measurements are from seeds out of two large pumpkins, about 2 cups of seeds I’d say. 

  • 2 tablespoon olive oil (or you can choose to do 1 tablespoon olive oil and 1 tablespoon melted unsalted butter)
  • 1 teaspoon garlic powder 
  • 1 teaspoon cayenne pepper 
  • 1 teaspoon cracked pepper 
  • 1 teaspoon sodium free tony’s chachere’s 

This is really so simple and fast, exactly how I like it! Preheat oven to 375 on roast. After your seeds are washed and semi dried, lay them onto some parchment paper and put in the oven for 3 minutes, this makes them dry super fast and get a little hard. Then take them out and in a bowl and toss them with your olive oil or olive oil and butter mix.  Add seasonings and mix well making sure everythings coated with your seasonings. Lay back out on the parchment paper (you can use a silicone baking sheet here too but I like the parchment paper because it’s easy clean up) and put back in oven for anywhere between 15-20 minutes. I like to mix them around every 5 minutes to keep an eye on them! Once they are done they should keep well for several weeks! 

Happy Halloween Dolls!

XoXo | Chelsey Rae 

Cheesecake brownies

Hitting y’all with a second blog post this week… Who am I?! 


Most of my clients, family & friends that follow this blog know I’m not one with a super crazy amount of time on my hands. Always moving, when I’m not at work, I’m working, and when I’m not working and working on the side, I’m running my one woman show around this house, and trying to maintain a decent social life for a 27 year old. I’ve mentioned before I don’t like recipes that take a lot of time, this my friends is SUPER quick and easy, it will fool anyone into thinking your a Betty Crocker Jr.! 

Here’s what you’ll need, including a little vegetable oil and water which isn’t pictured.  


And here’s the simple steps… 
Your going to start with preheating the oven to 350• while that heats start with your brownie mix following the directions for fudge like brownies on the back of the box. You’re only using one egg here. Complete steps and pour into a buttered 8inch square baking pan. Then get on to the cheesecake. 
Cheesecake batter ingredients

12 oz cream cheese, well softened

1/2 cup sugar

1 large egg plus 2 egg whites

1/2 teaspoon pure vanilla extract

1/2 cup semisweet chocolate chips

Whisk all of this together in a bowl until smooth and pour directly on top of brownie batter. Then use a butter knife to fold and swirl chunks of brownie batter up over the cheesecake almost looking like a marbled affect. Once you feel like it’s looking as gawgeoussss as you’d like (hello, you want them to be pretty), sprinkle the chocolate chips over the whole pan. 

Put in the oven and bake until edges are slightly puffed and center is set, about 33 minutes.

Let cool and then place in fridge-the longer these guys sit the yummier they are. They are great warm and straight out the oven but being that they are cheesecake I love them chilled for a few hours and they are much easier to slice when cold.

Y’all know I’m bad with recipes so any question y’all know the drill shoot me an e-mail or comment below! 

XoXo | Chelsey Rae 

Parmasan Roasted Cauliflower

okay, now y’all know when I do recipes that y’all have to bear with me! This time, to save you guys the texting, calling and emailing, I kinda tried to give messurments! Honestly though, everything I cook I just put a little of this a little of that, whatever I’m feeling that day! To me it’s always yummier if you make it your own anyway ; p 
This recipie is super easy and isn’t so bad for you! It’s QUICK, which is my kinda thing and requires barely any clean up! #winning. No salt is used, but parmasan is and that gives it enough of a salty taste but that’s my preference. Sometimes I’ll cook this up and eat it for dinner by itself. Cauliflower to me is such a meaty vegetable when cooked the right way and not made all smushy! I normally get going on this the night before and let it sit in the fridge till the next day that way it really sucks up all the flavors and all I have to do is pop it in the oven when I get home from work. 


You are going to need a large head of cauliflower, rinse of course, then cut off the nasty bottom & leaves. Then cut it into 4s, as you see in the picture above, and pull off the florets. Make it random- big ones & little ones (the little ones get all crunchie and those are the best).

Then put it all in a big ziploc and pour everything into it – a little less then a 1/4 cup EVOO  that has about 1 tsb minced garlic mashed into it (literally I take freshly minced garlic, put into the olive oil and mash it with a small spoon). 1/4 cup 100% grated parmasan cheese. And then any seasonings you’d like, I go for a little salt free Tony Chachere’s, Mrs. Dash onion and herb seasoning, and tons of cracked pepper. (This is where you make it your own so throw whatever else you think will taste good in there! In this particular batch I sprinkled just the smallest amount of Italian bread crumbs and it ended up being fab) when your done give the ziploc bag a serious Shake, I move it all around and make sure everything gets coated. Then if you have the time refrigerate over night or go straight into cooking!


The oven needs to be preheated to 400 degrees on ROAST. Take out a baking pan, lay out some parchment paper and evenly distribute the contents of the ziploc bag. You want to make sure none of it’s really on top of each other. Place in oven anywhere between 20-25 minutes depending on how much browning you’d like. Some people like to flip half way through but I’m not a fan because I like how the bottoms get a little crunchier when you don’t flip. THE END! So easy, and so yummy! 


XoXo | Chelsey Rae 

Chicken & Veggie soup

So apparently, since we live in Alaska and not Louisiana (maybe i’m being dramatic?) it’s the perfect chilly night for some soup! It’s super easy to make, low sodium & no major carbs like rice or noodles, but of course you can add them very easily to make it your own! 

SideNote-Every Monday lately since I’ve been on diet patrol, I start off the week by taking a pack of boneless/skinless chicken breasts, normally 3 to a pack, adding about a cup of chicken stock in my slow cooker, season the breasts how I’d like, cracked pepper, sodium free tonys & a little garlic powder and then turn it on high for 4 hours or low for 6 hours depending on what I’m doing that day. When it’s done you take the chicken out and shred it with two forks. This can be great for a number of recipes and just makes it easy having that on hand.  

Soo, Back to the soup, as I’ve said before when I’ve done recipes, I don’t measure anything out really so season how you’d like and bare with me, this is pretty fool proof! 
 
I start off by sautéing Louisiana’s choice creole seasoning mix (this is in the veggie isle of any local grocery store, you know, already chopped onion, celery, bell pep, parsley, all that good stuff) in a tbsp evoo and a tbsp smart balance butter. Then add however much finally chopped garlic to that. I wait till all that softens a little bit and add 1 medium chopped onion, a pack of ORGANIC FRESH chopped carrots (I don’t mess around with carrots that are in little plastic bags, those things taste like chemicals yall, I swearrrr!)  and a can of “pieces and stems” cut mushrooms. 

I normally season everything at this point withhh… Salt free Tony’s, a little bit of garlic salt, Mrs.Dash table blend, cayenne pepper,  TONS of cracked pepper, and emeril’s Italian seasoning, put the top on the pot and just let the vegetables cook through.

Once the veggies are done I add about 51/2cups of sodium free or low sodium chicken broth and add in my shredded chicken! Wait for it to all heat up and then alllllll doneeee! 

Clearly it’s lent and a Friday, sooooo I shouldn’t be eating chicken, but I’ll assume God will still love me ; ) 
XoXo, Chelsey Rae