So, if you’ve followed along for a while now you know that decorating is one of my favorite things ever!
I can’t believe I’m saying this, but Halloween has fallen through the cracks at our house lol! We didn’t even pull out one scary skeleton! Of course we have tons of pumpkins, but that’s about as spooky as it’s gotten!
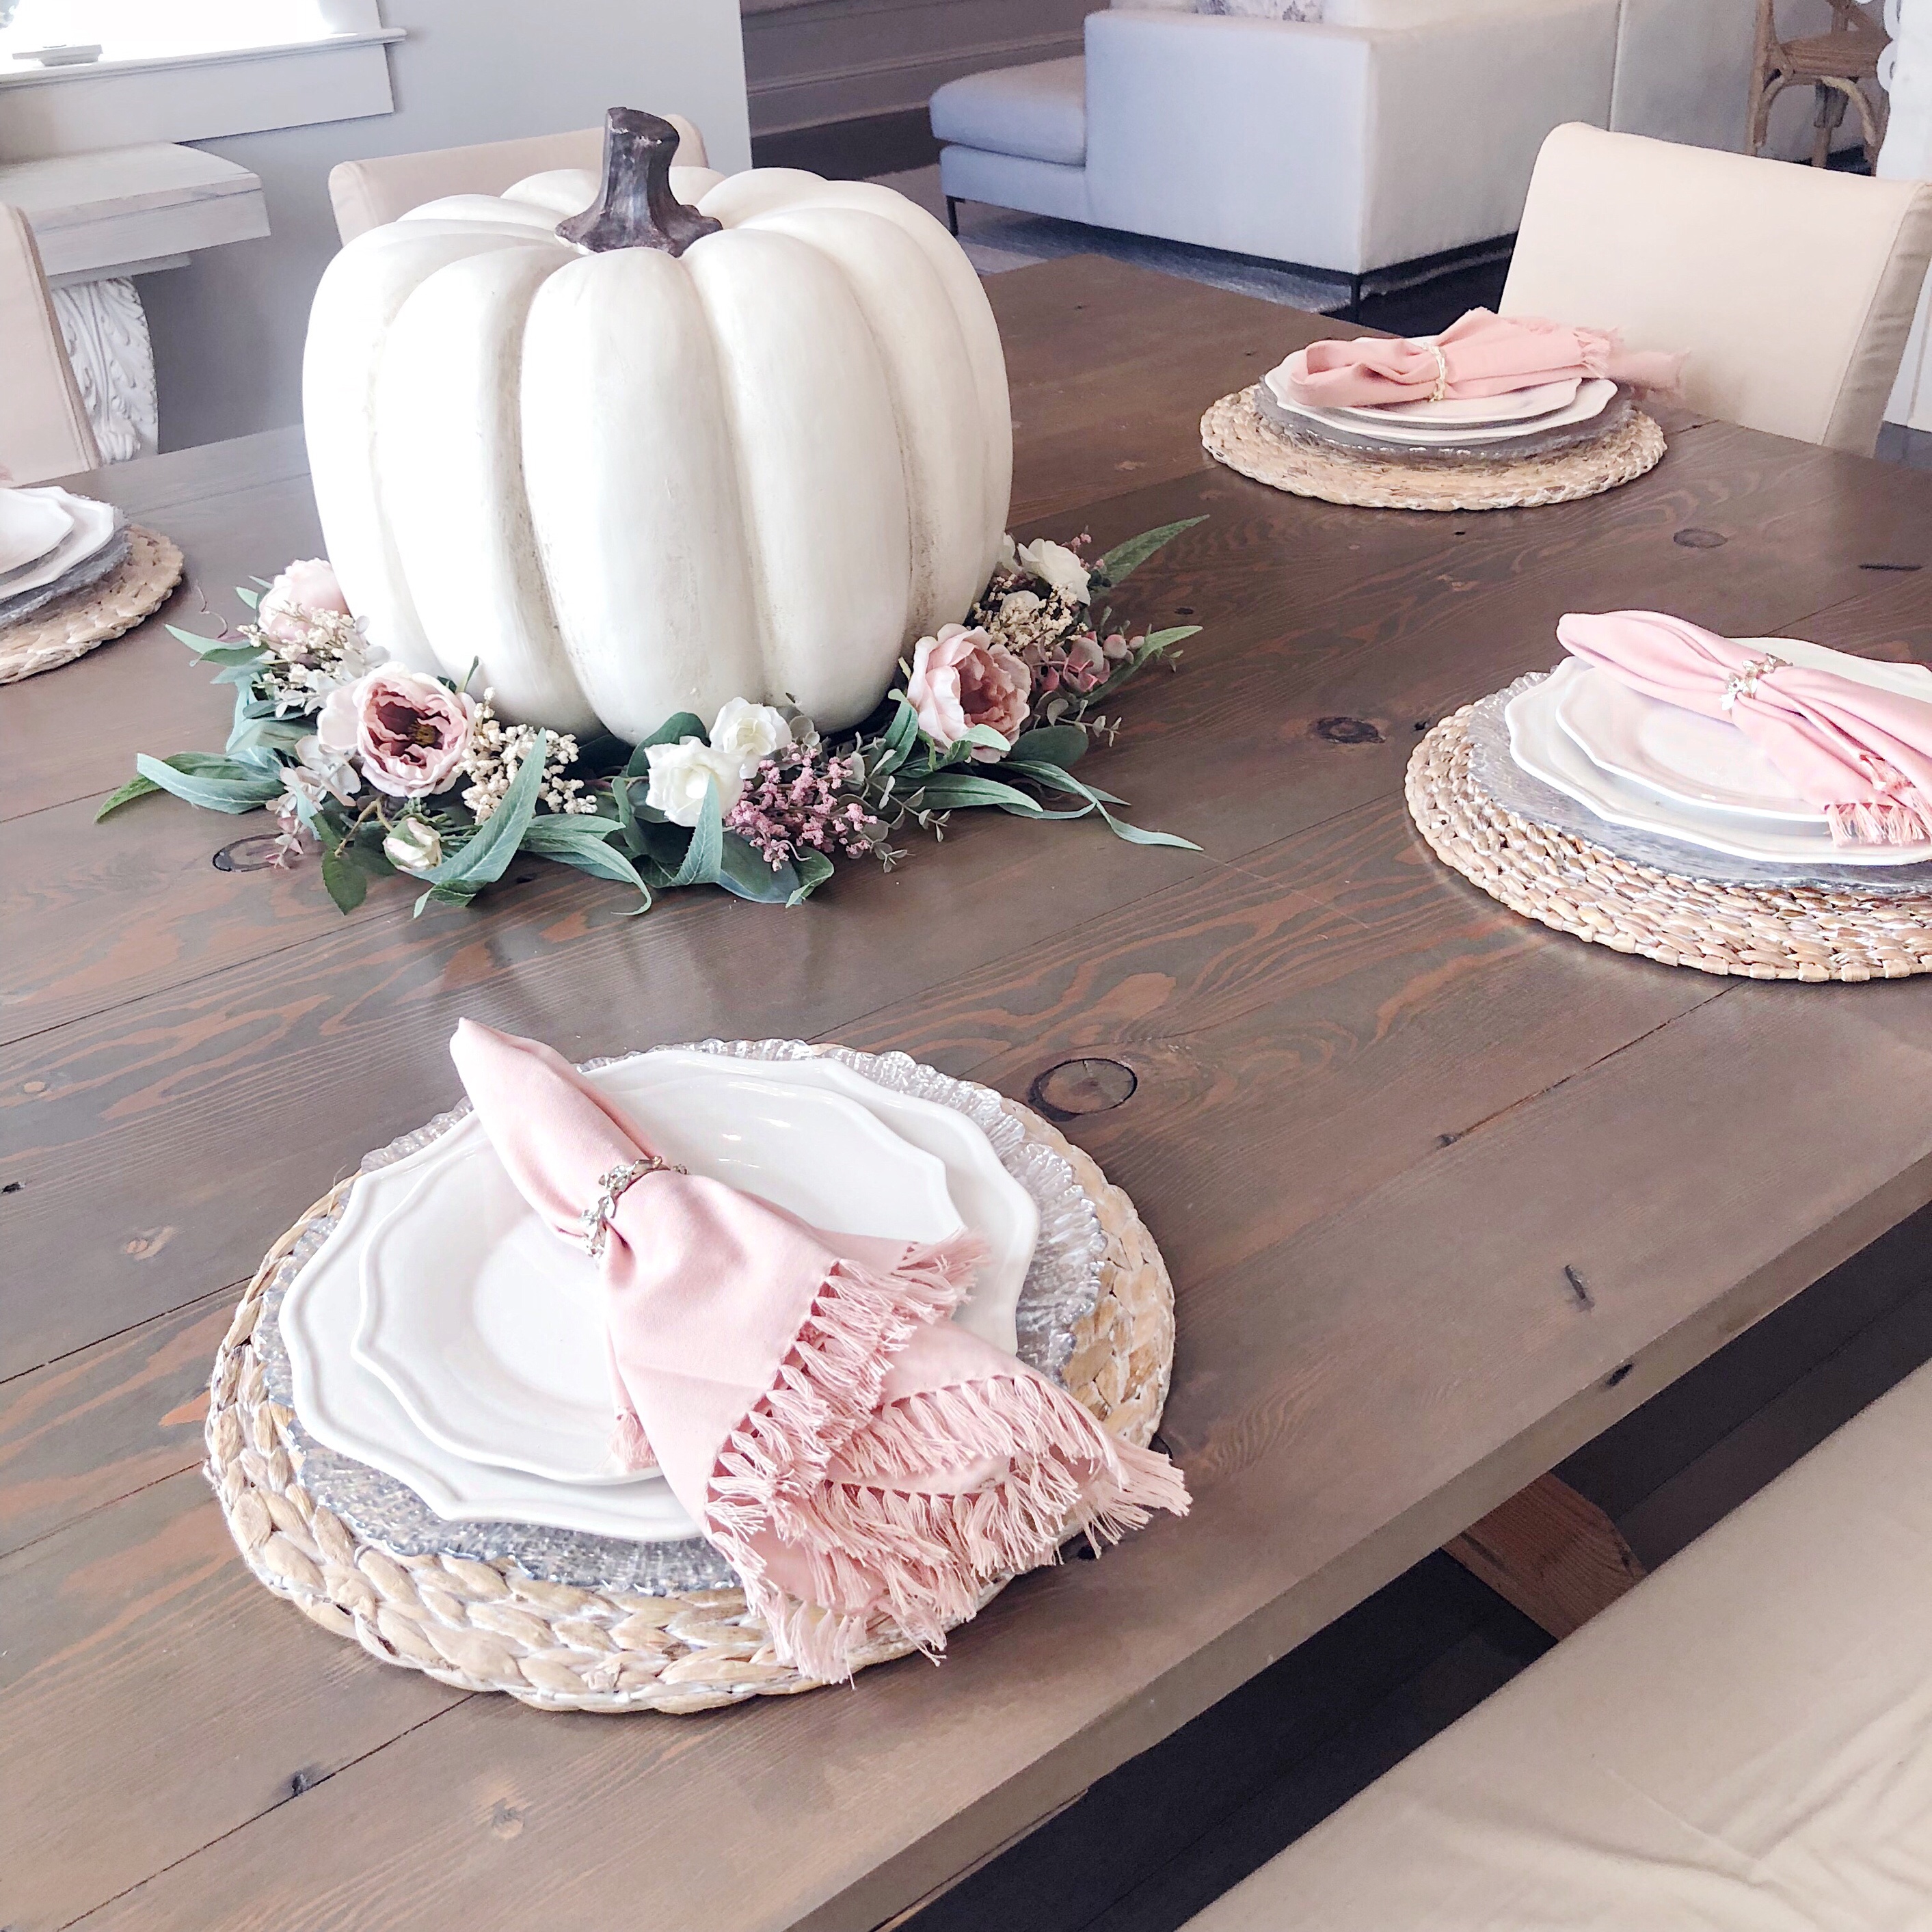
This year Ryan allowed me, out of the kindness of his freaking heart, to include PINK in my life (my dinner table life that is). Y’all I was shocked and amazed when him and Hayden got home to see our table fall ready and they didn’t make a peep about the pink napkins!
Anyway, me and Ryan found this GIGANTIC pumpkin at home goods! I searched for something similar online but couldn’t find it.
HOWEVER, you could definitely do this at home with a smaller size pumpkin. Ryan made our kitchen table and it’s actually a little obnoxiously big lol – so on a regular size table you should definitely be able to find a pumpkin that fills out the area!
We ran to Michaels and found greenery that we liked and created a “nest” (if you will) around the pumpkin! Obviously making it look like it was sitting on a bed of flowers!
I can’t lie. I love this tablescape this year – I love it even more because it’s perfect for thanksgiving too! With planning a wedding, my time has been so consumed so I love the fact that I won’t be pulling this down in a few weeks and redecorating! Double holiday decor for the win!
Tagging all the goodies on my table below incase y’all want to join the blush table linen movement with me!
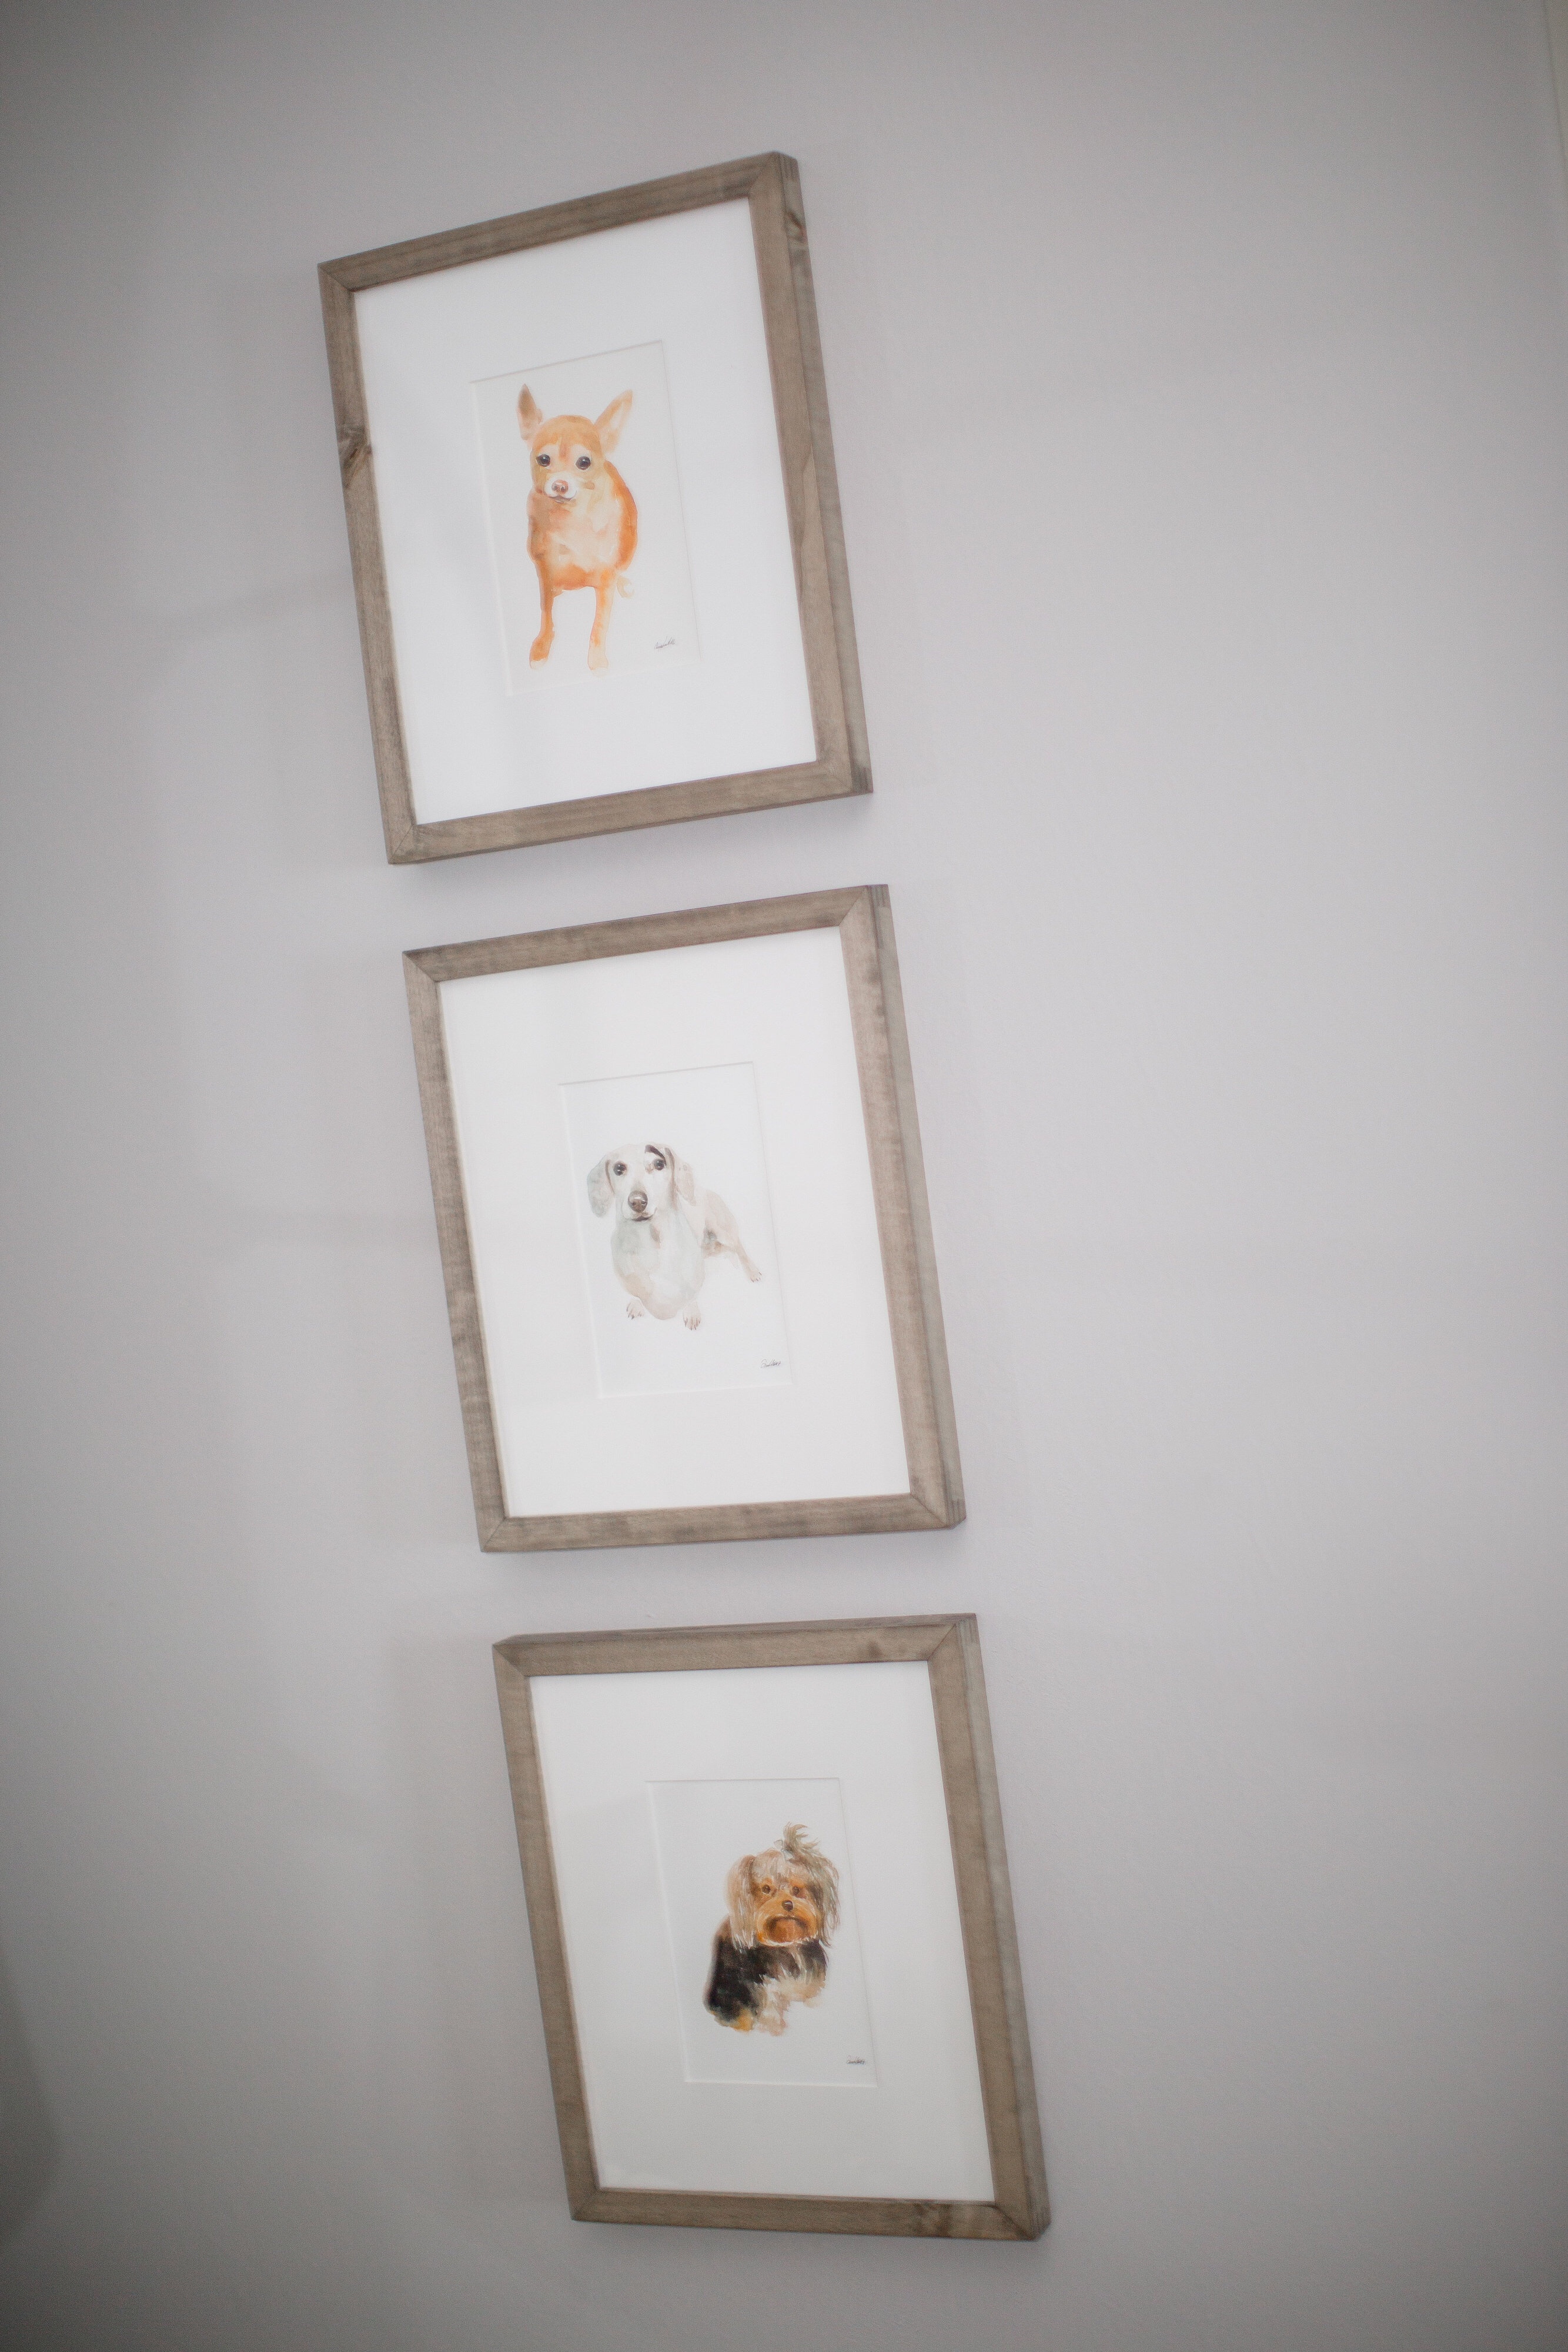
Hey yall! Happy Tuesday! Today I’m hopping on to share something I know y’all will love because apparently my blog lovers are also major dog lovers!
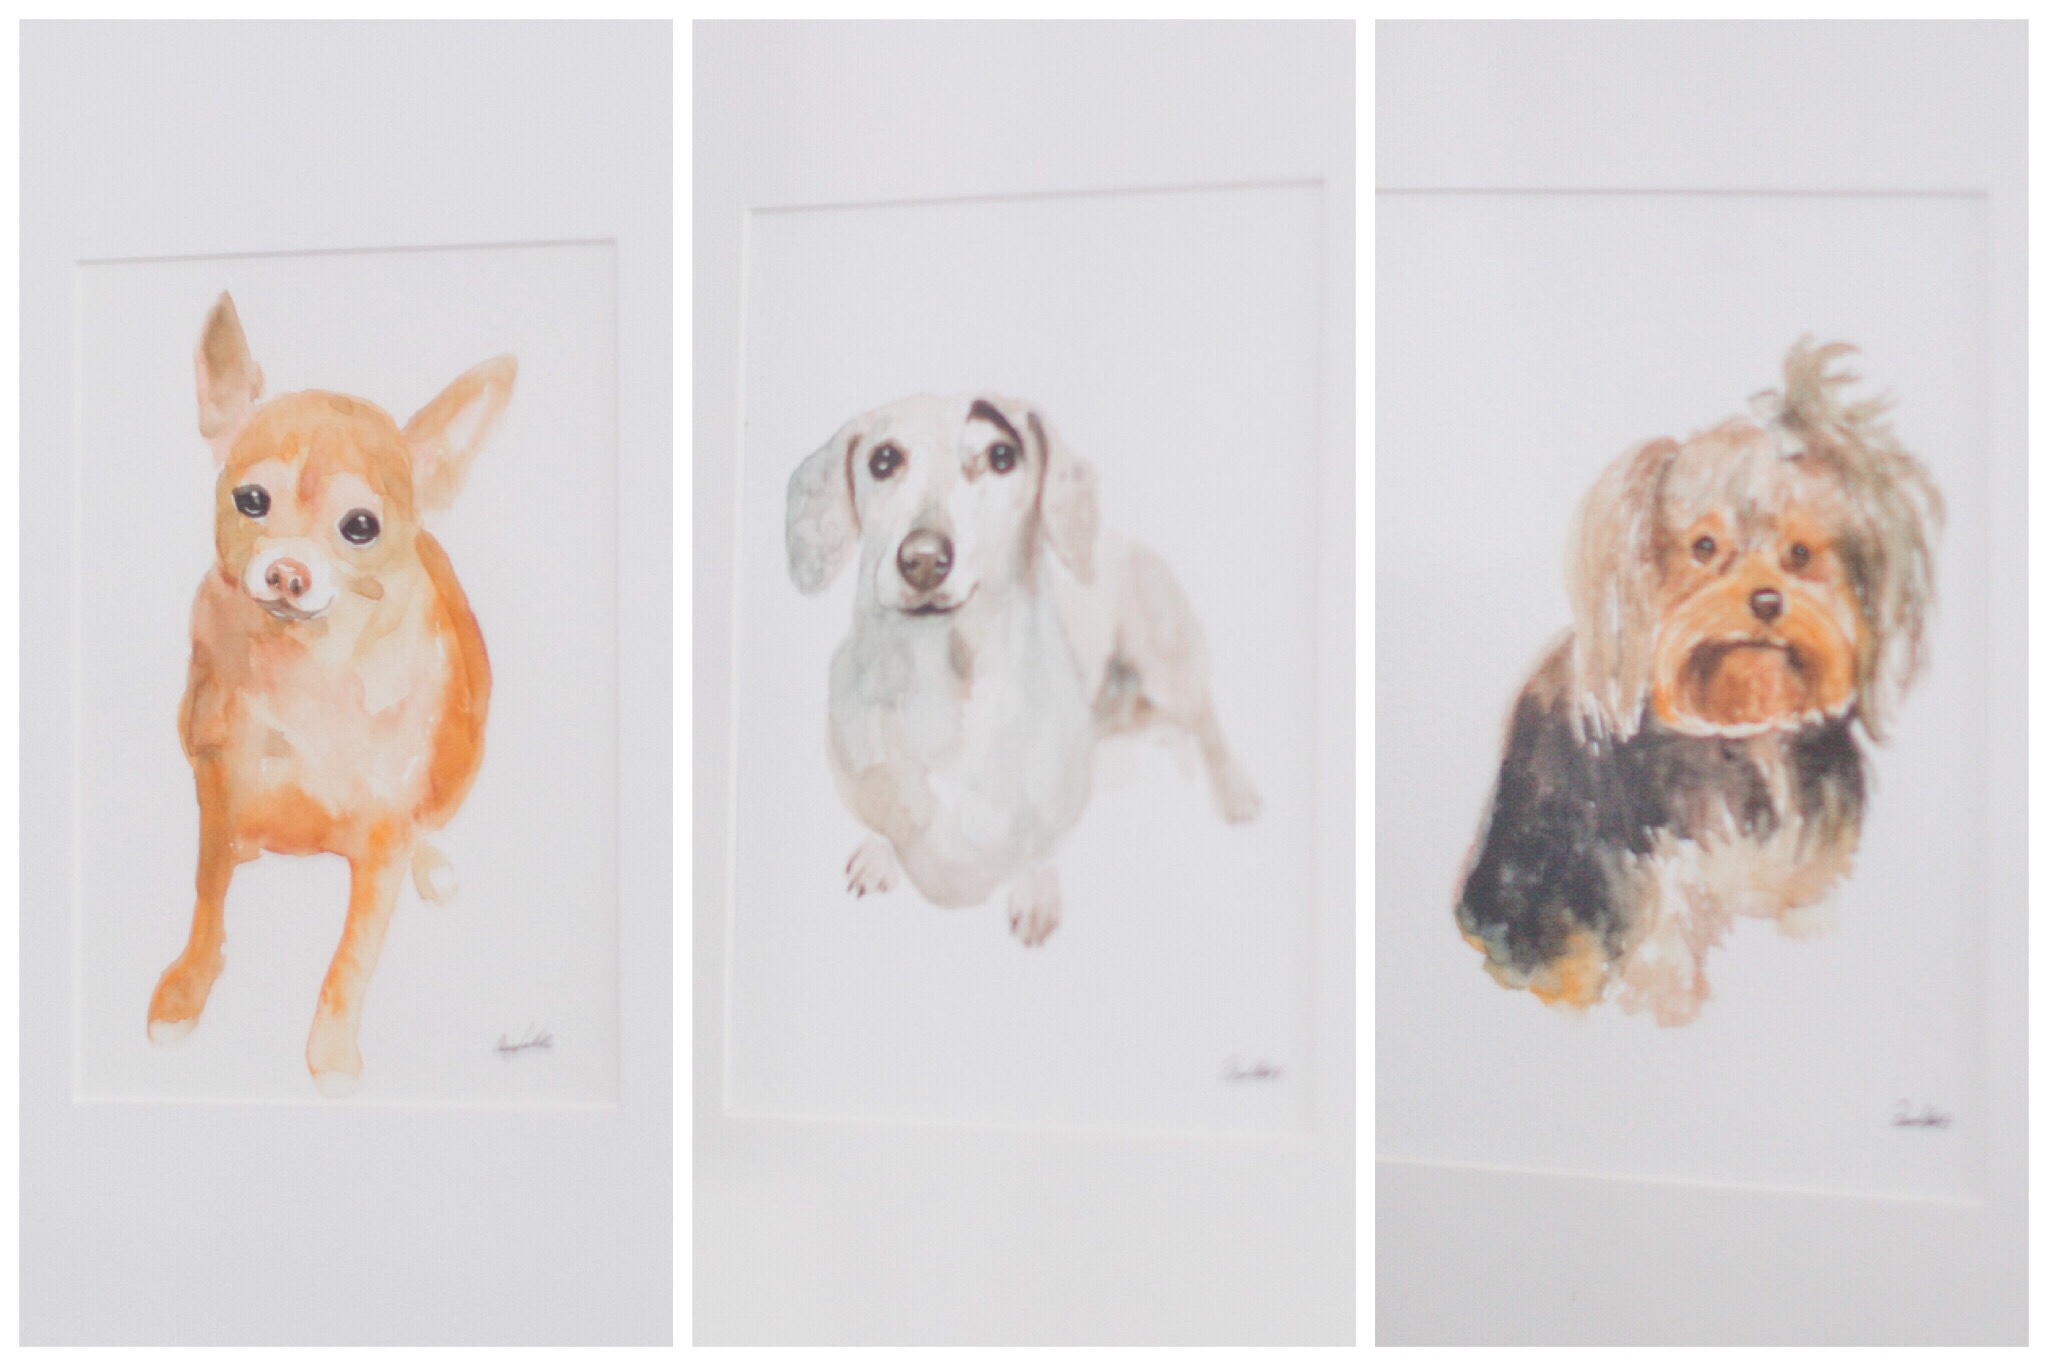
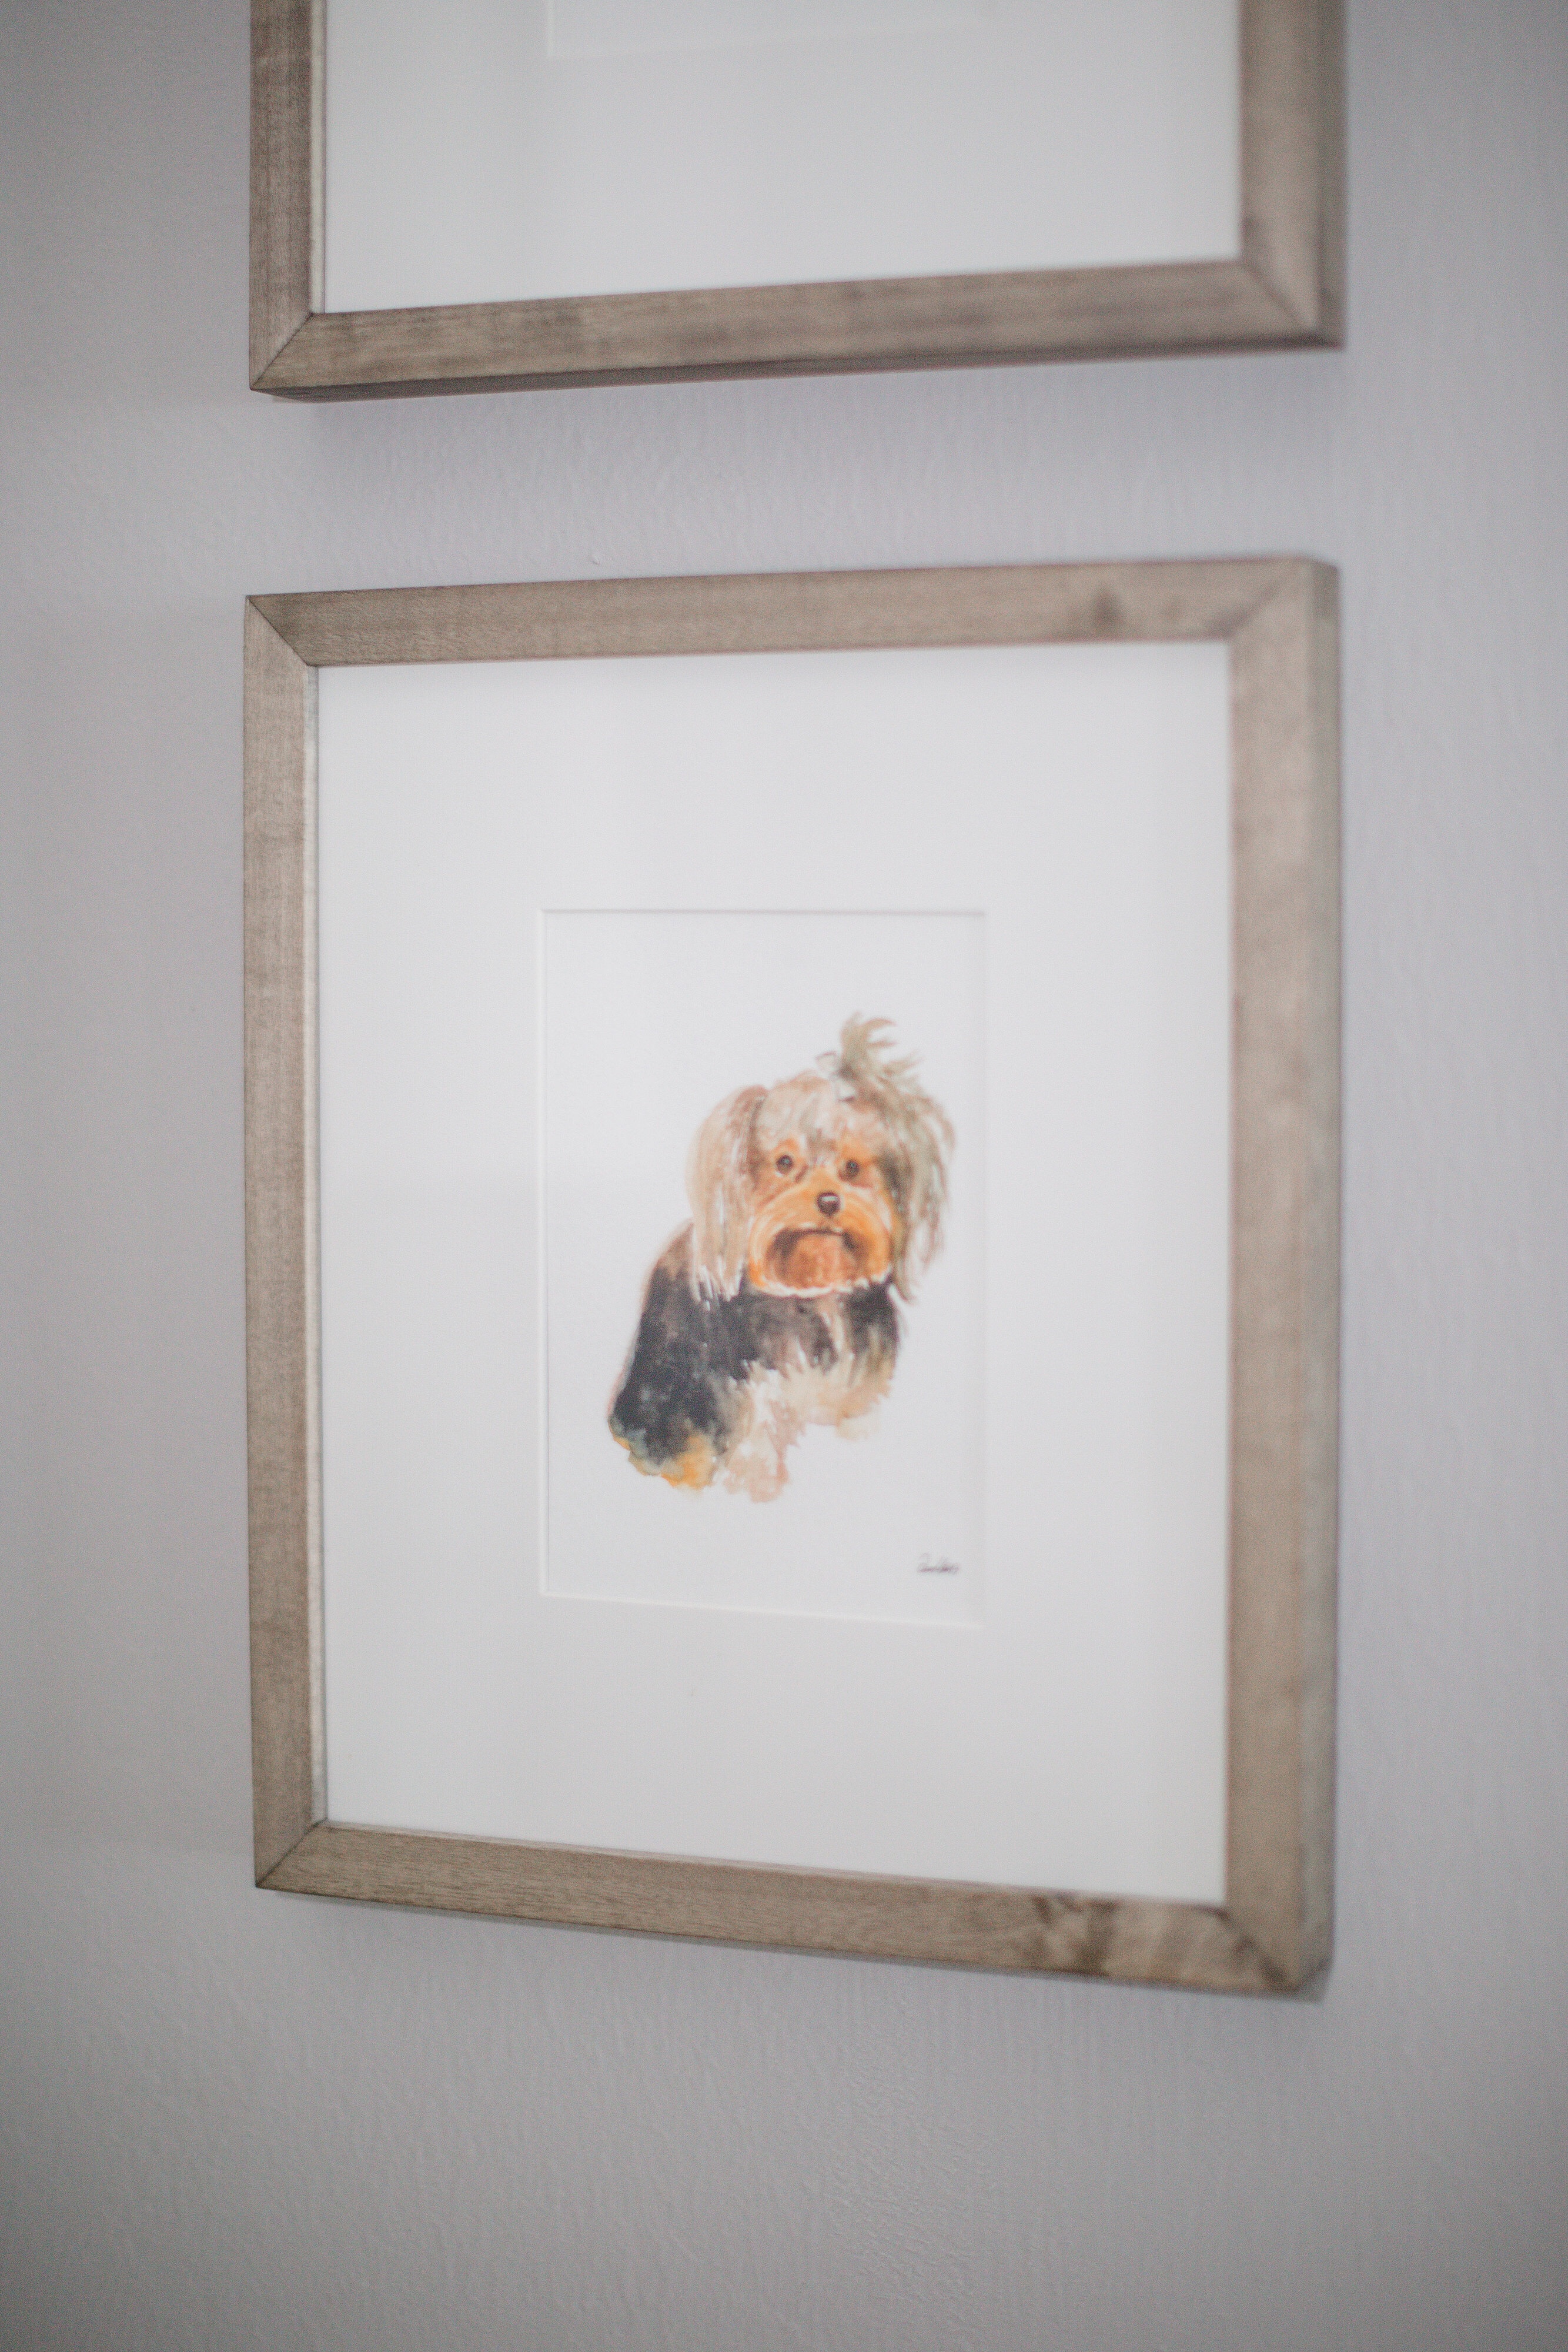
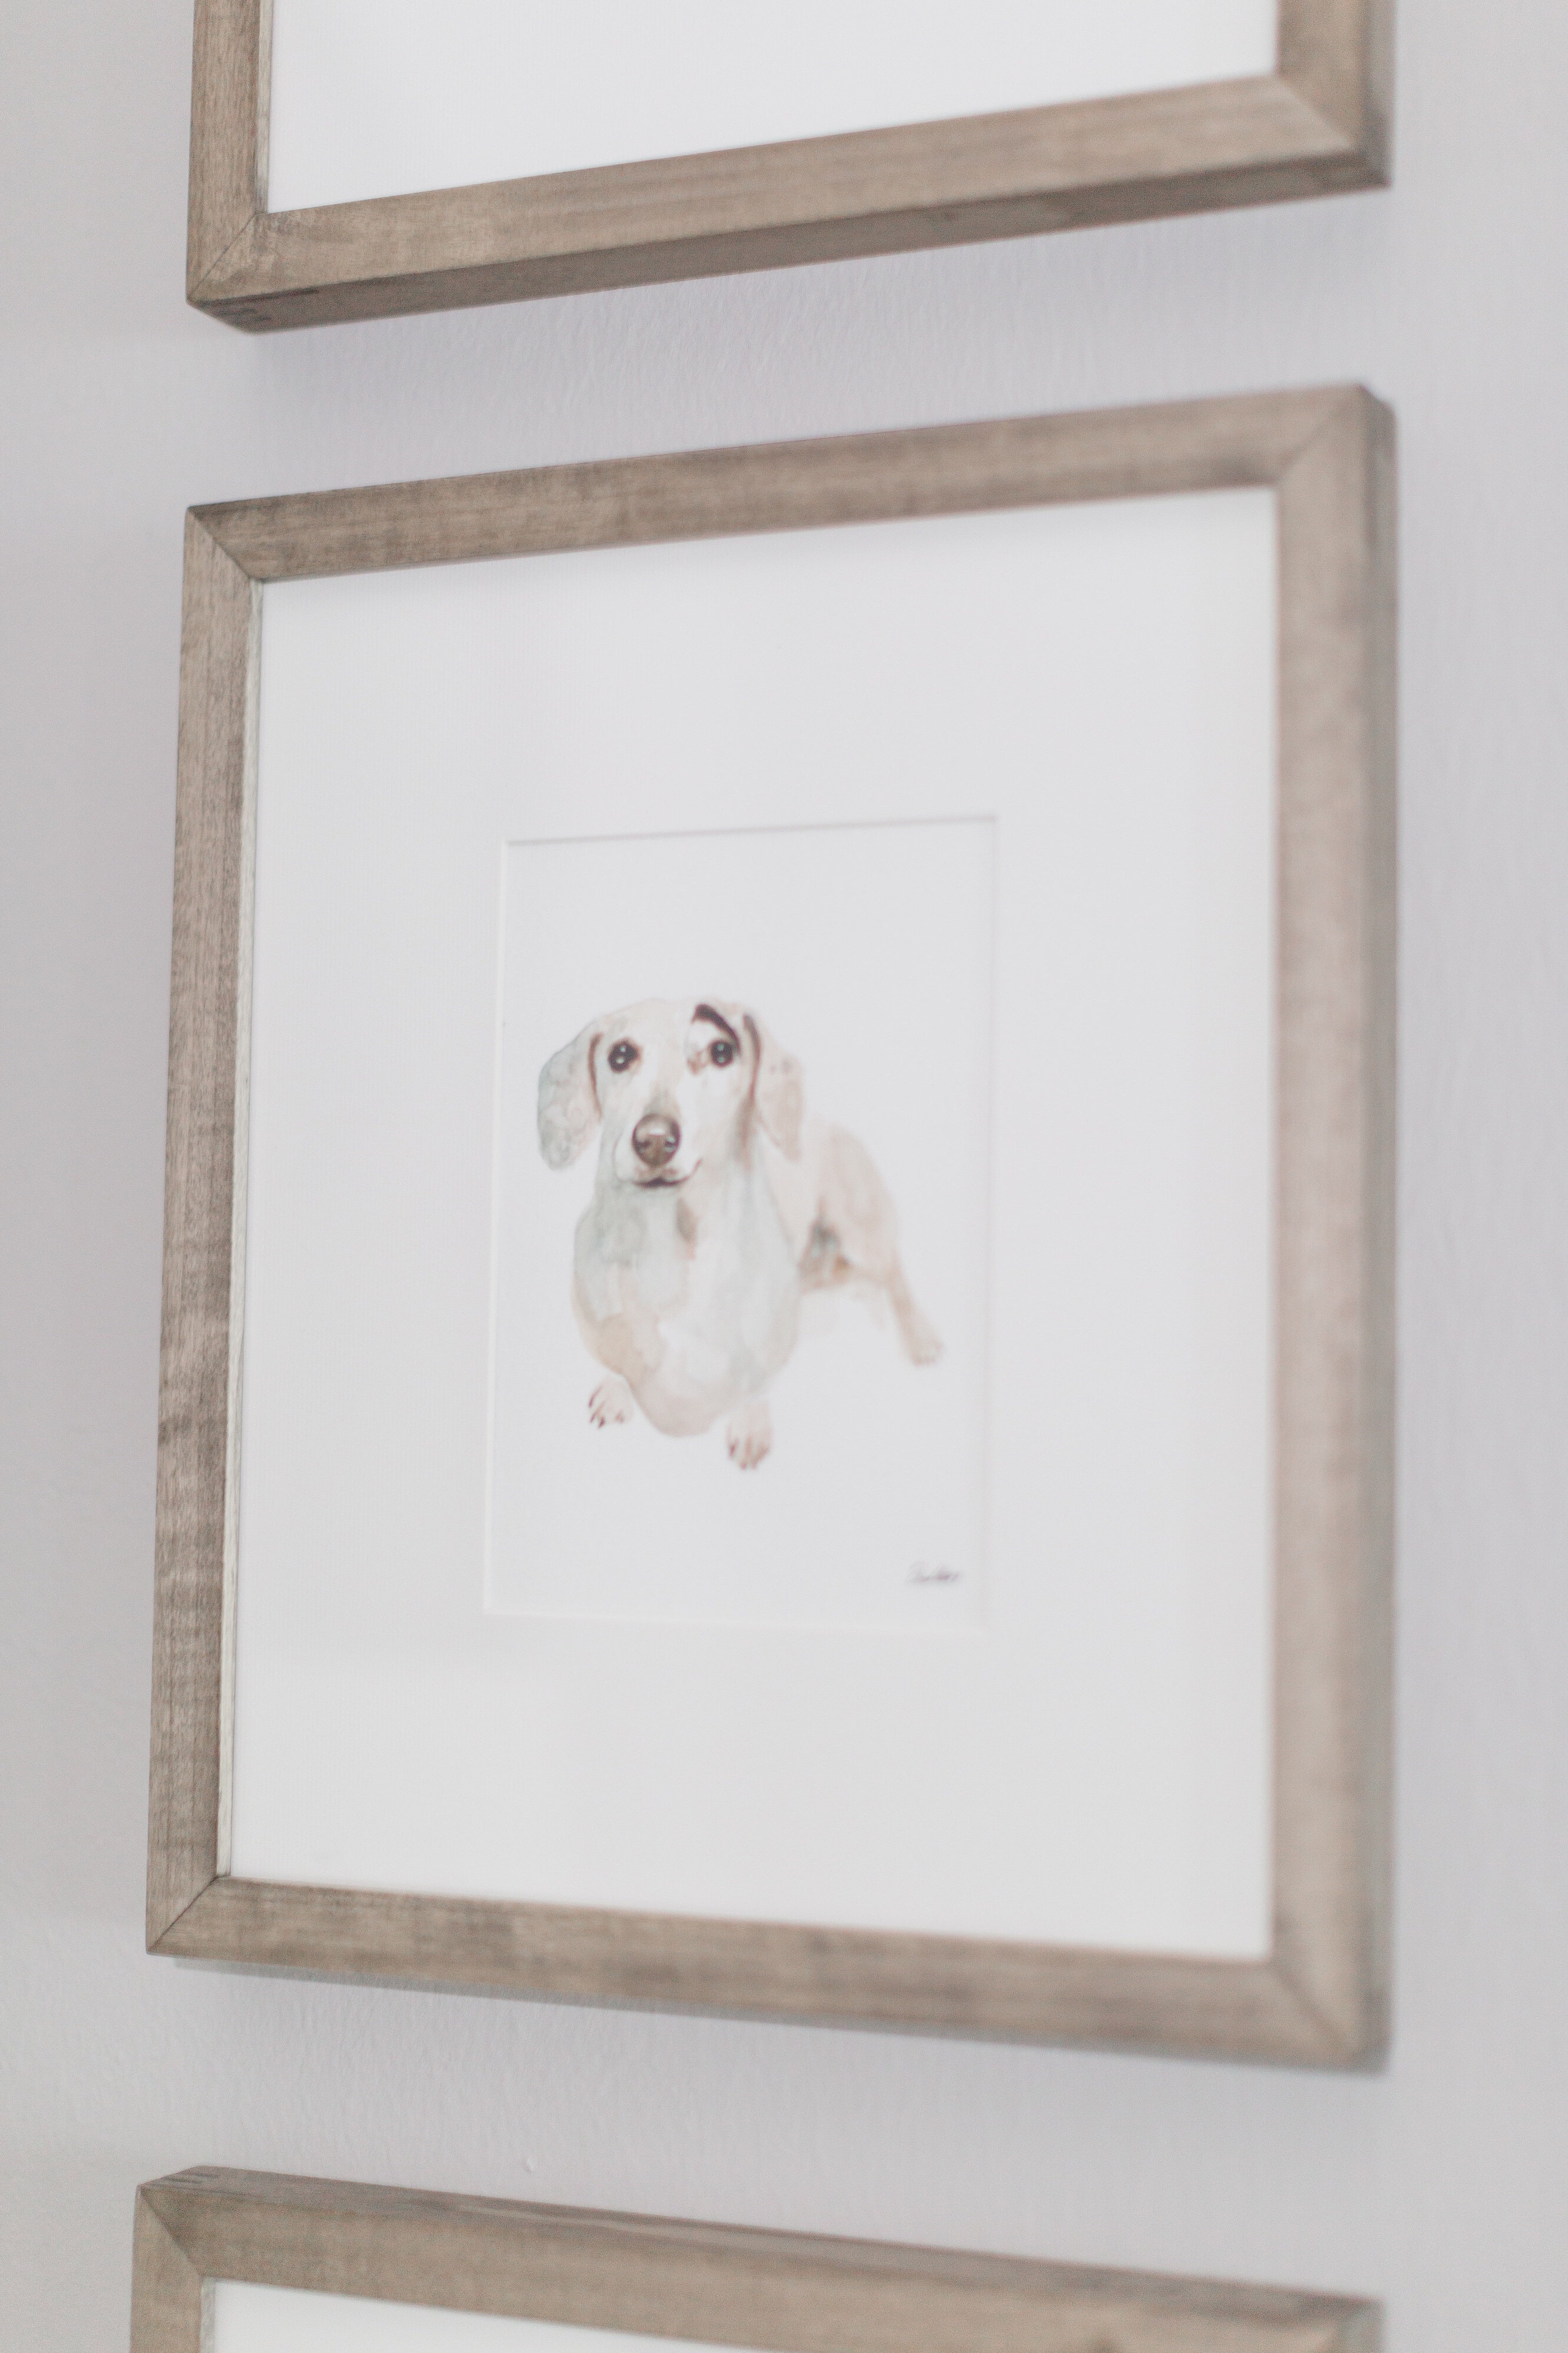
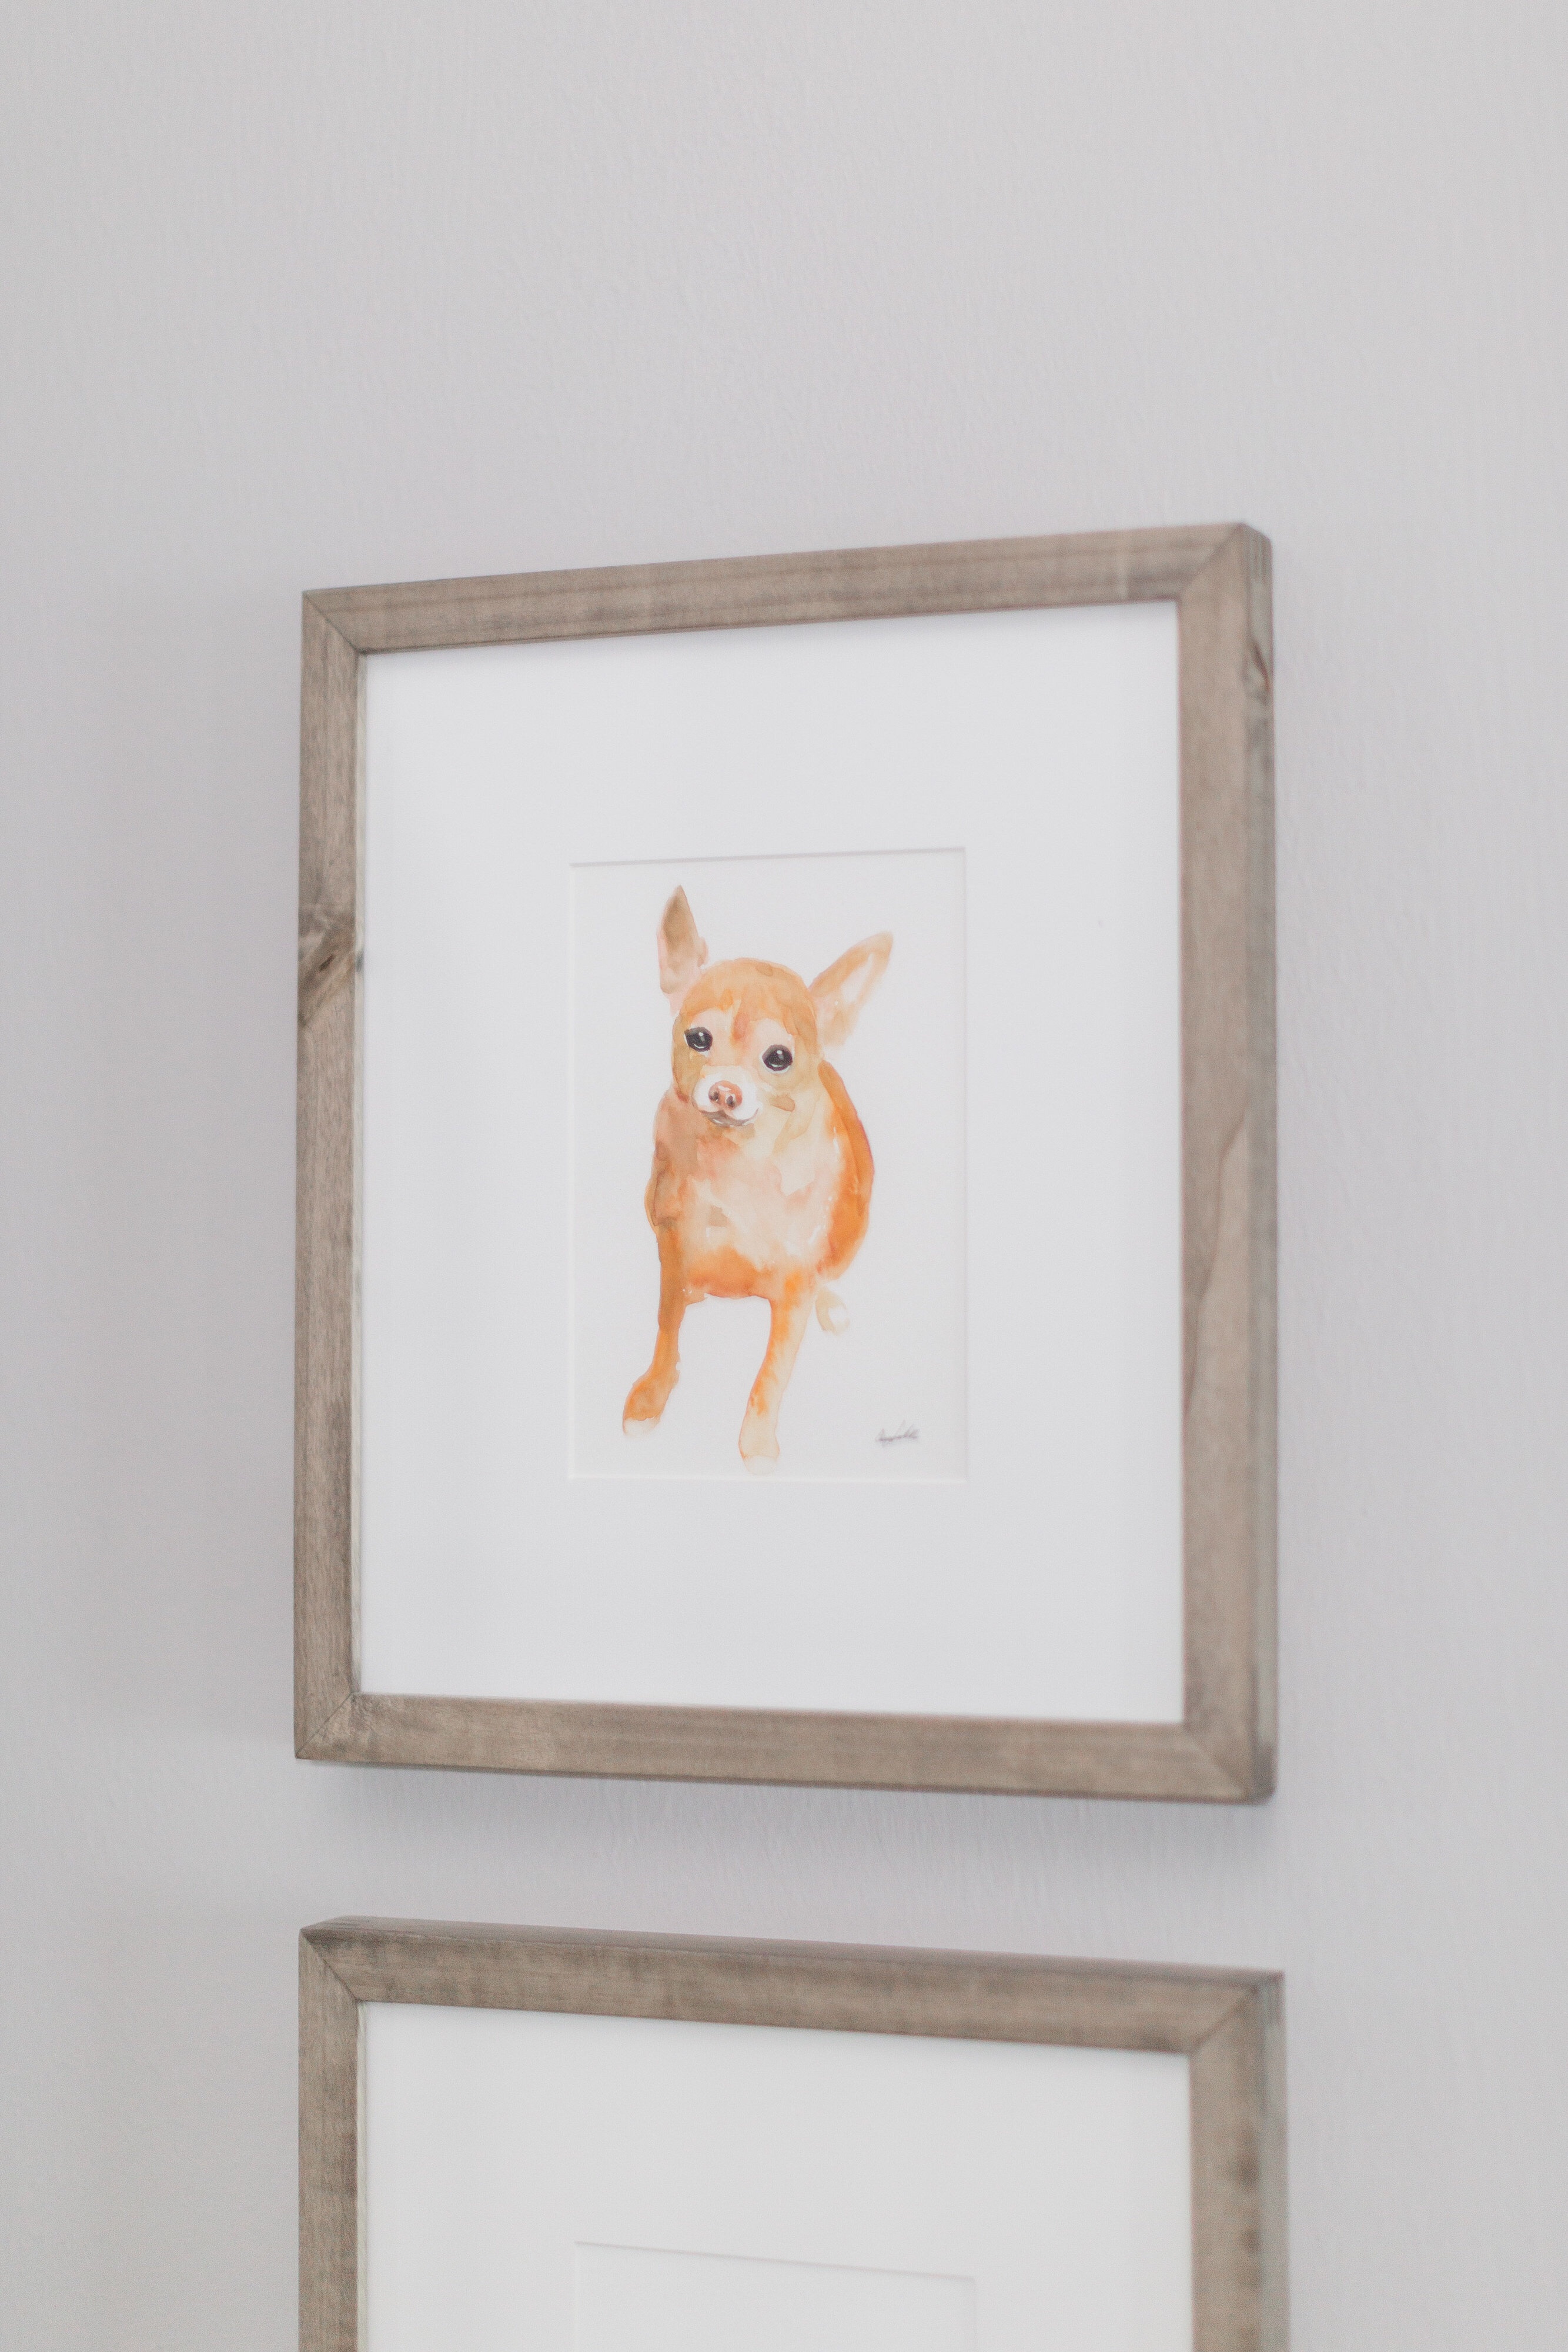
How ADORABLE are these paintings y’all?! A friend of mine Amanda had one of Febe made YEARS ago and when I moved into Ryan’s I thought it would be cute to have them made for Fara & Rouxe as well! These are cute little water color paintings and the lady that does them recreates the photos SO WELL!
The price point is perfect if you ask me! They are $40 and I am linking them HERE all you need is your favorite photo of your pet on your phone! These come from Italy but the shipping is normally super quick!
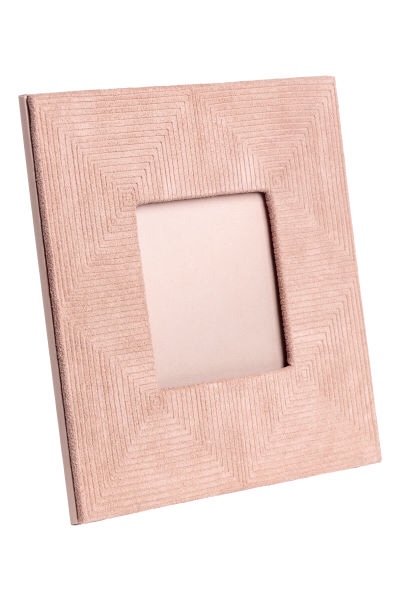
Also linking the picture frames HERE they have a more cool wood tone, more ashy! These are also 8 x 10 size!
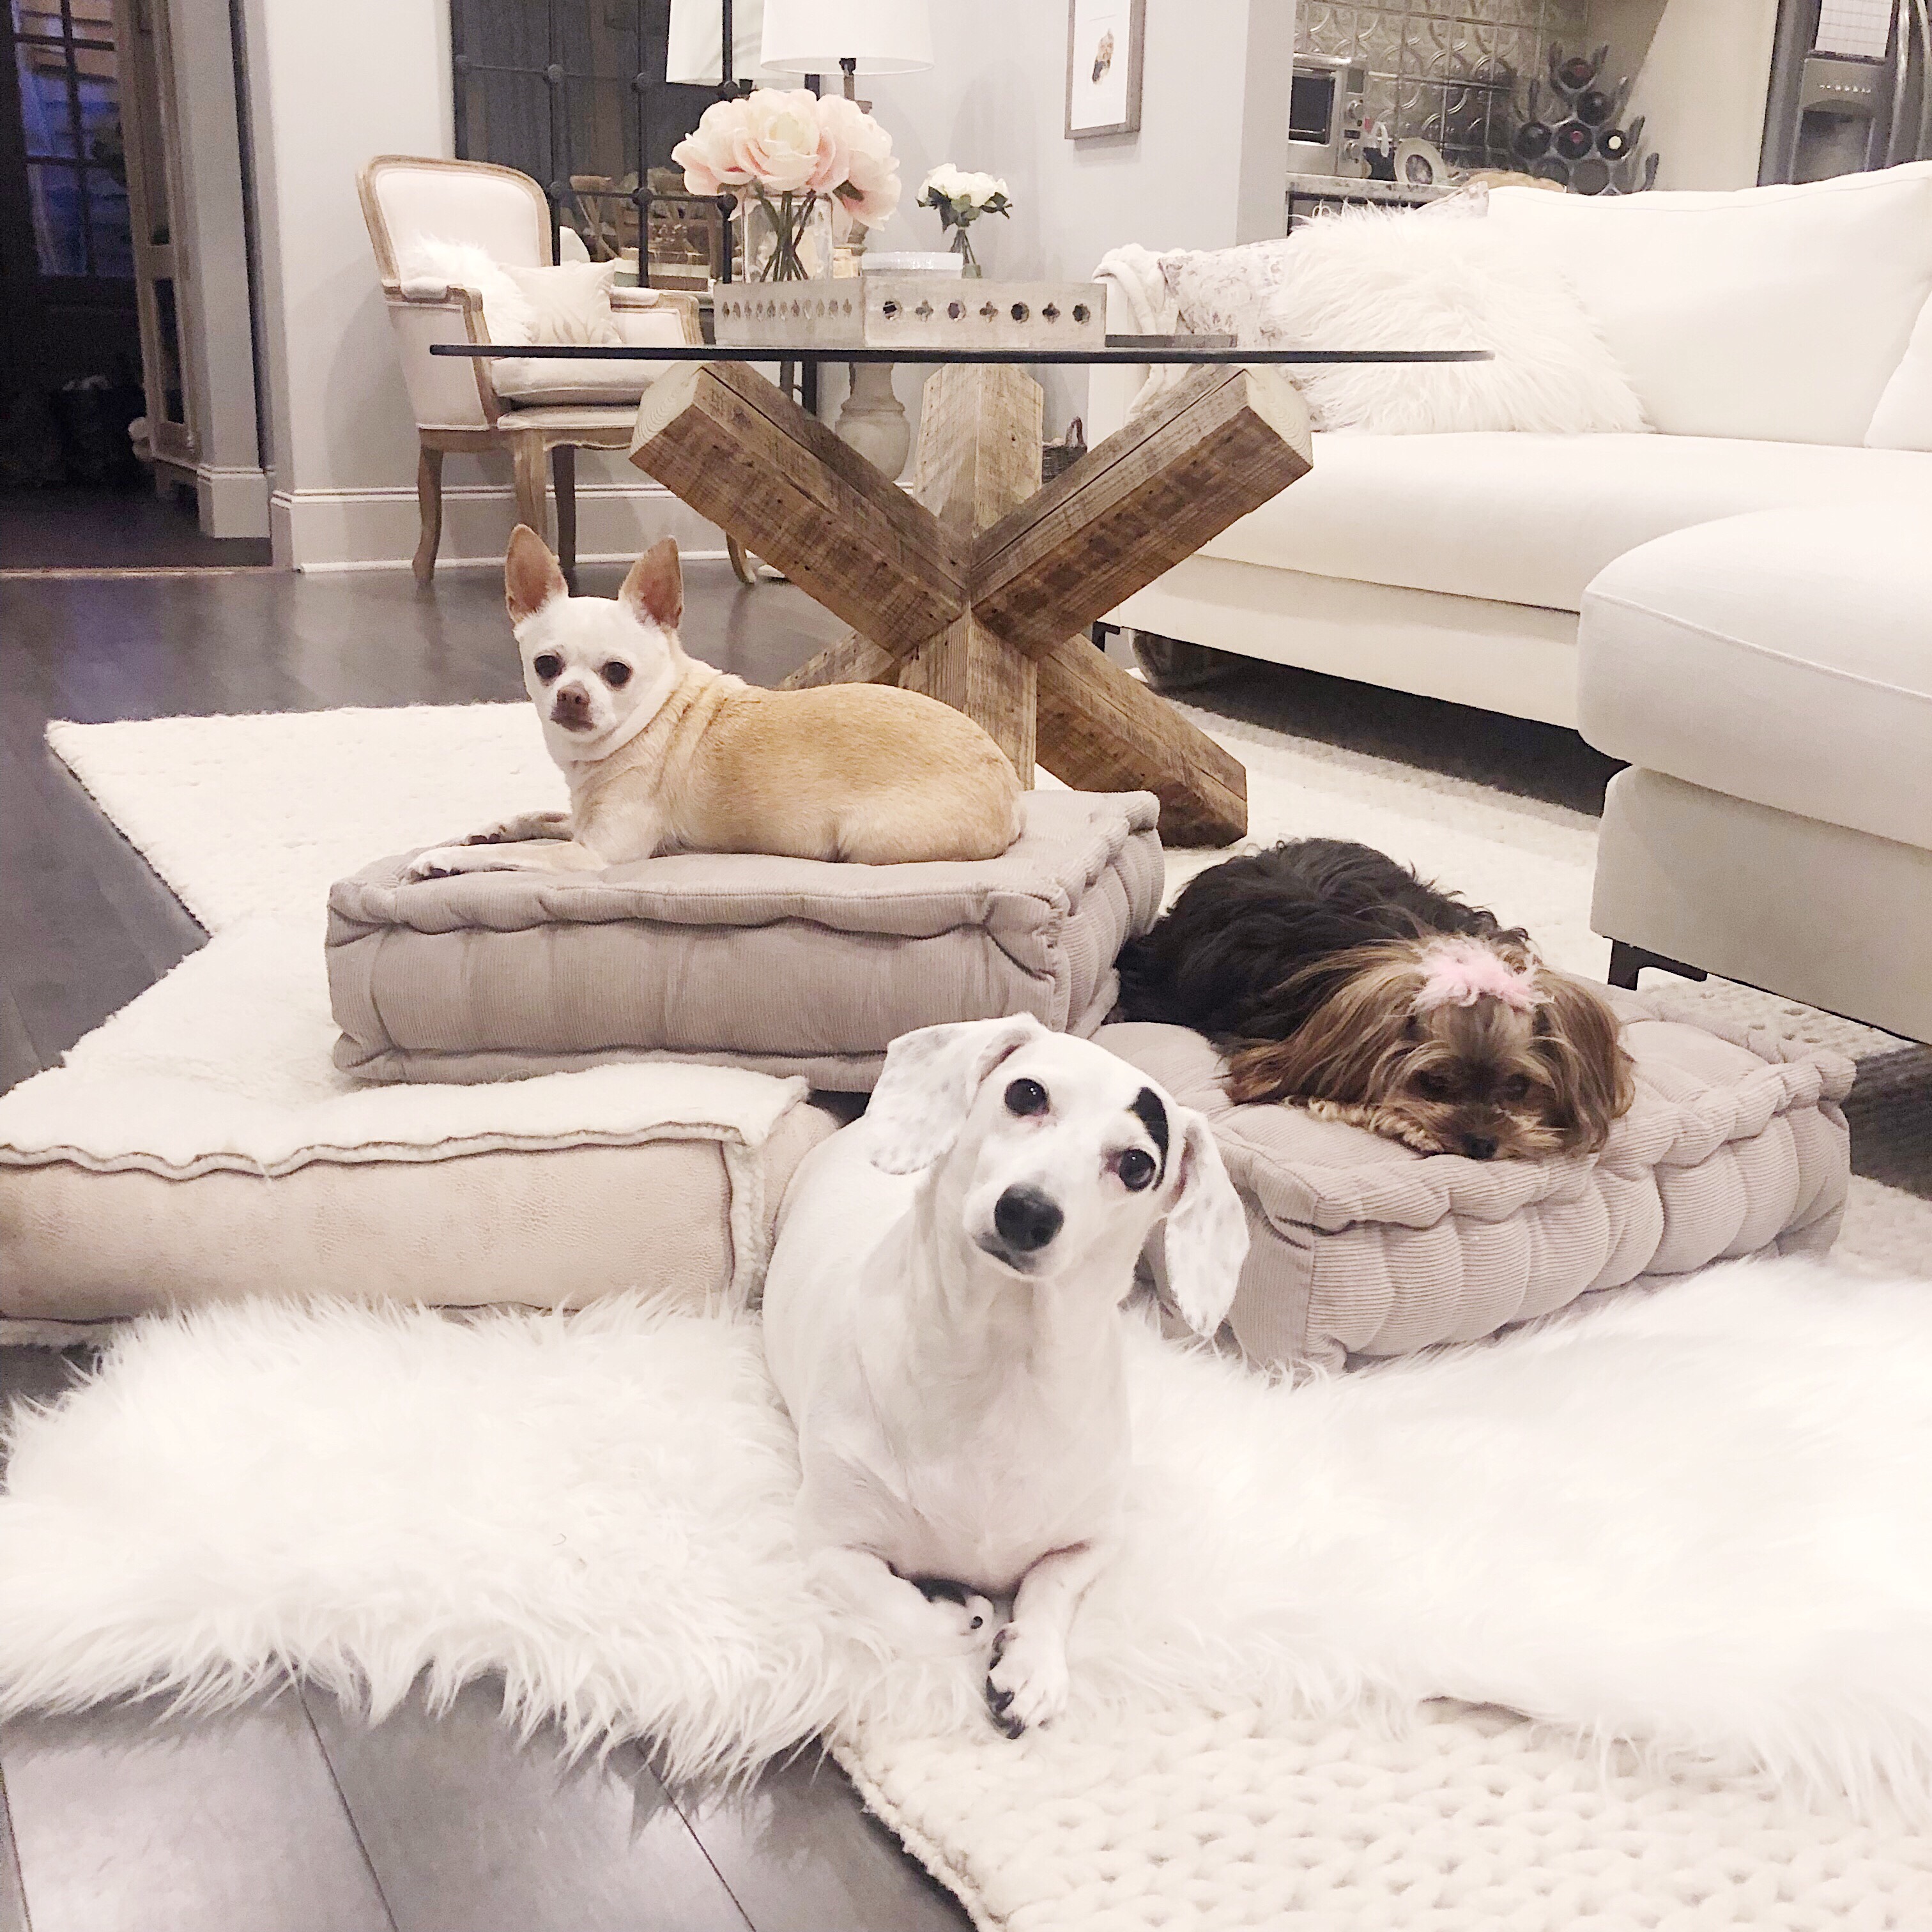
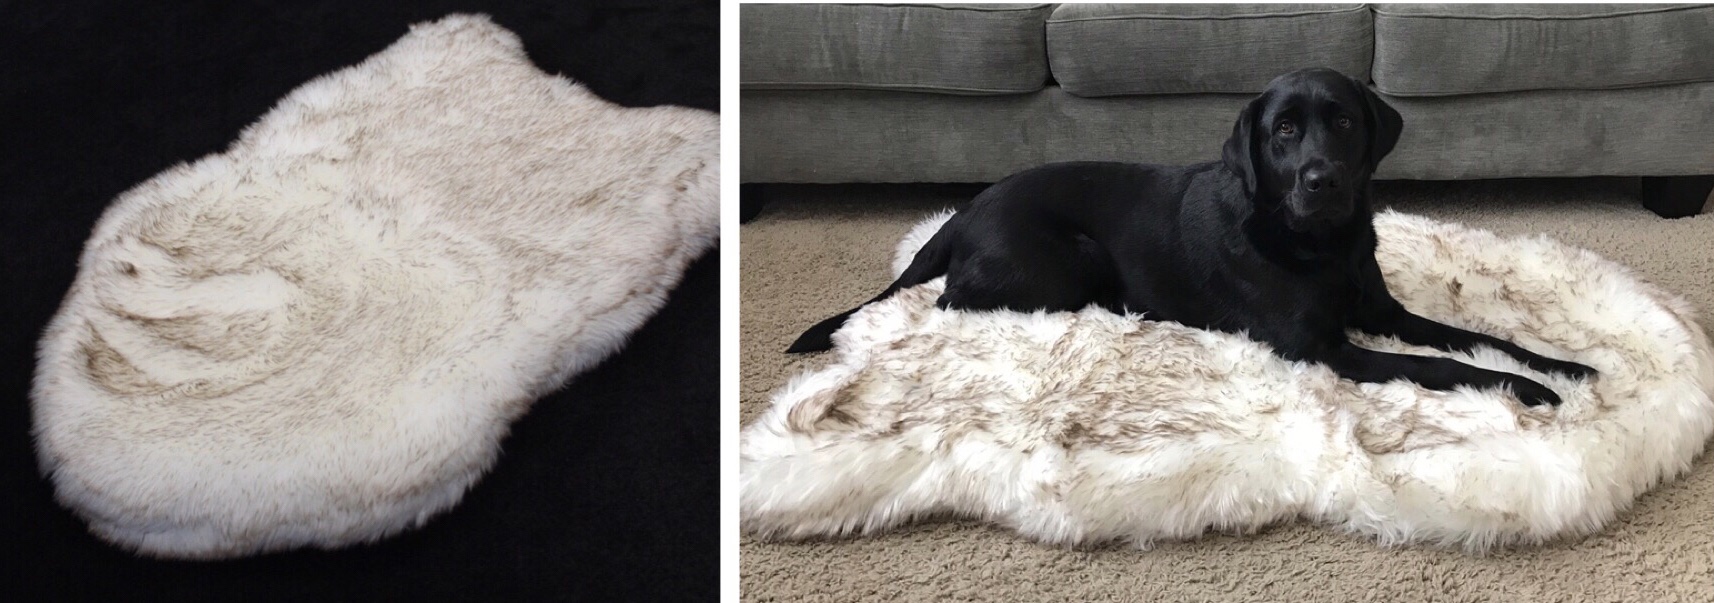
Hey y’all! Happy Thursday! Sharing the CUTEST Dog beds with y’all today! .. okay so some aren’t technically dog beds but my dogs love them! And let’s be real, how many of us actually ever find cute dog beds?!
I discovered these one day online (they are technically just floor pillows) and though okay, those would be WAY cuter on the floor in the den over some dumb dog bed from pet co! Don’t get me wrong, I’ve found a cute one here or there before but that takes some searching!
If your like me and you want the dogs to be able to relax in the den with you and not always be on the sofa then you want something that matches the flow of the room & doesn’t scream DOG BED.
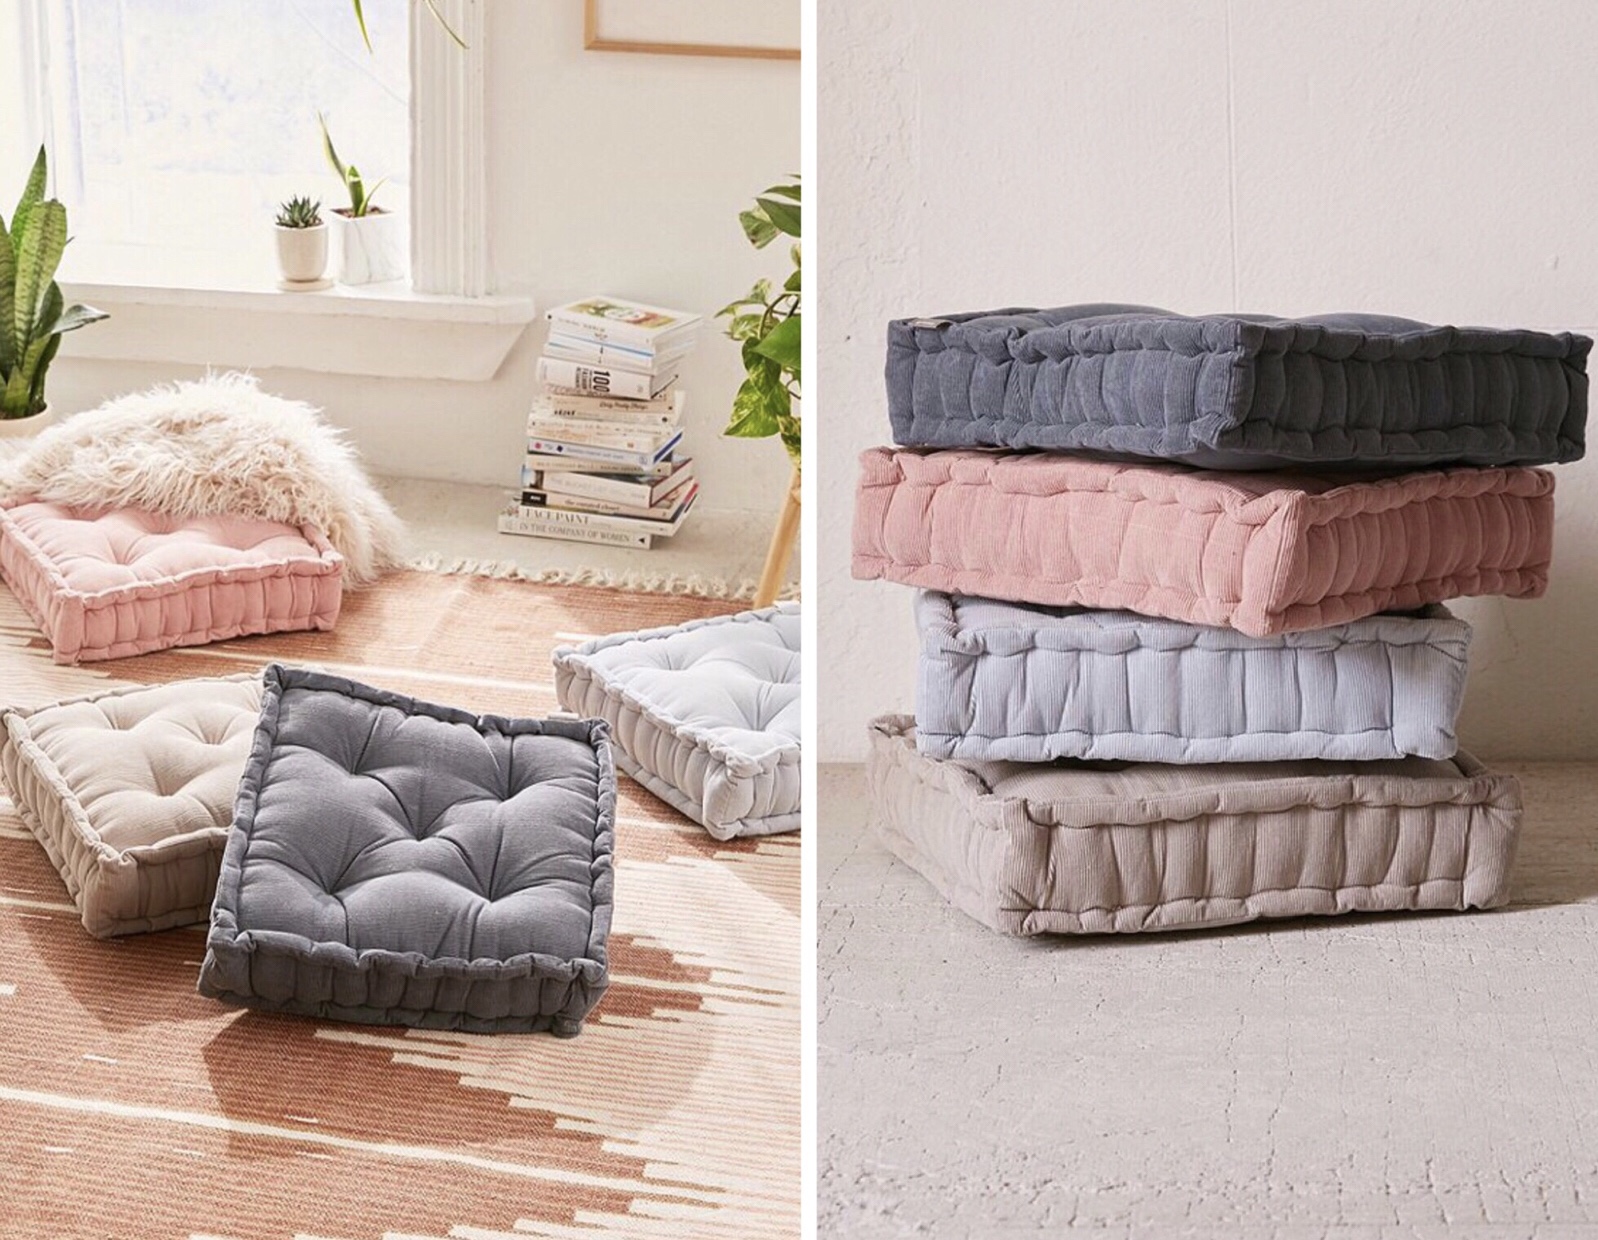
So, here are some of my picks I’m excited to share with y’all! The first set is my exact beds that are pictured!
The color pictured in our home is the “light gray” it actually looks a little khaki to me. The dogs absolutely LOVE them for some reason lol! The fact that they are floor pillows is nice because I feel like it gives them a lot of comfy cushion!
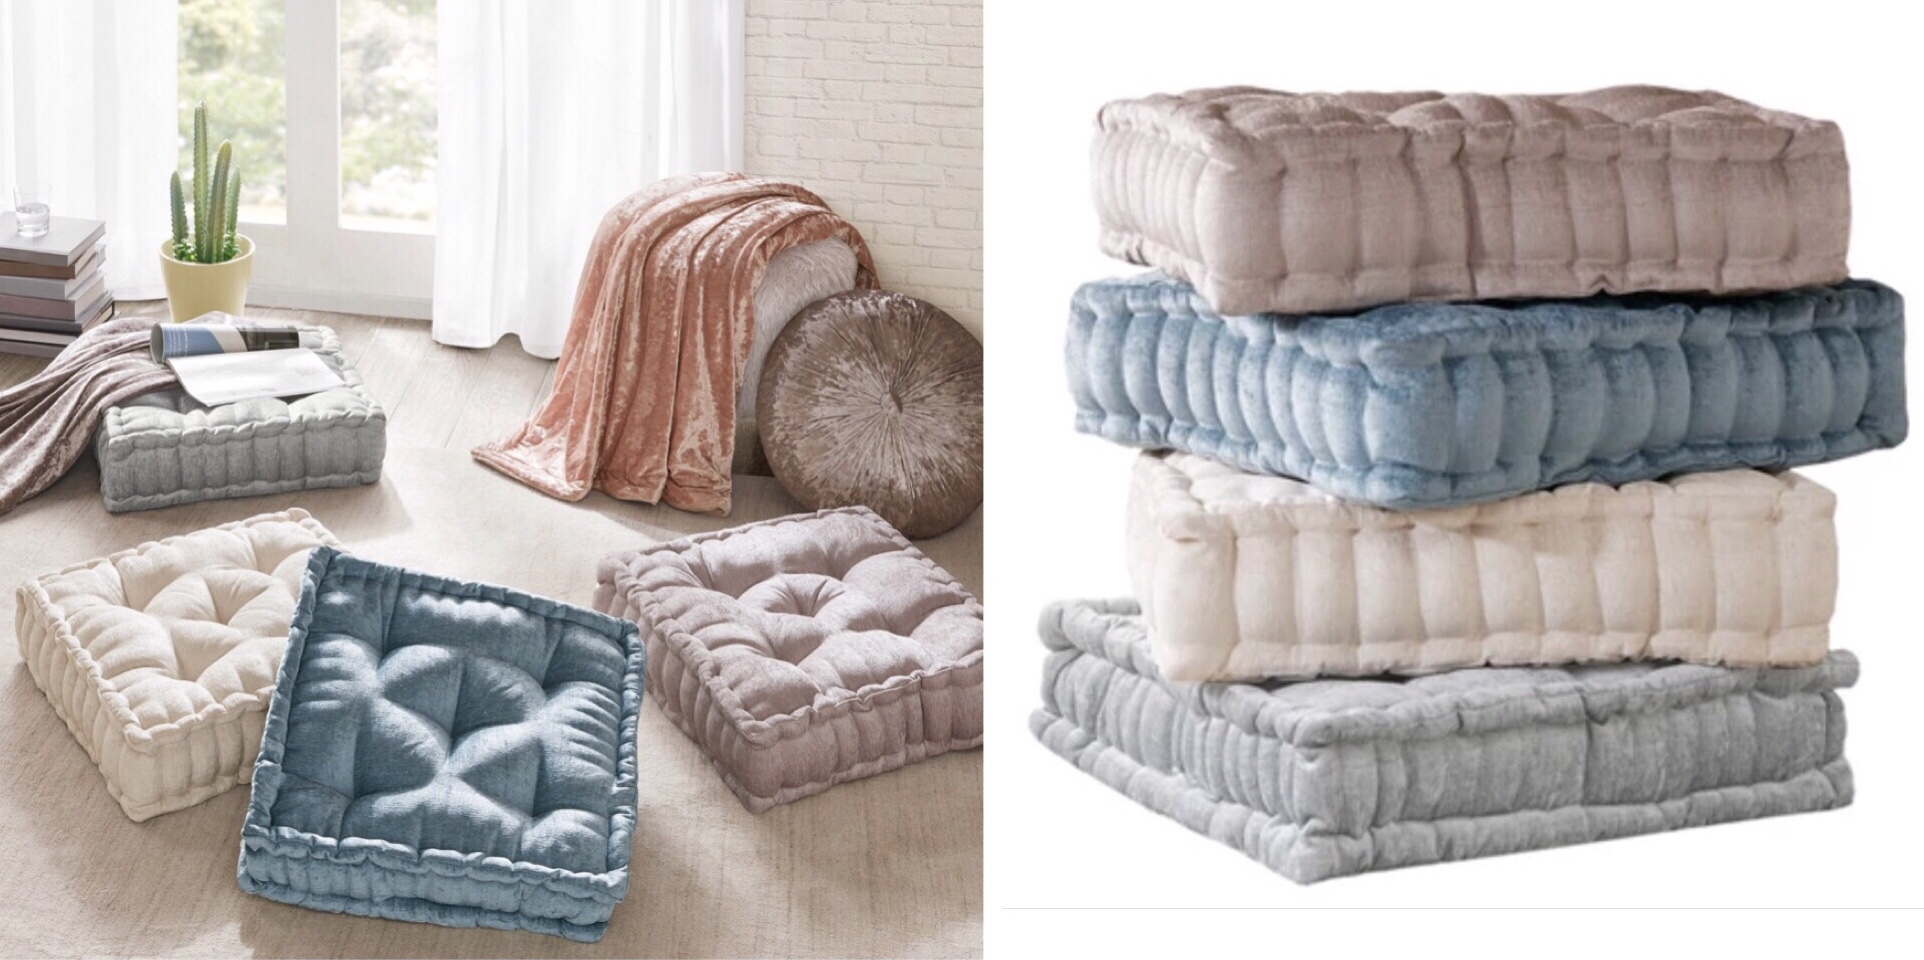
Ranging in price for different sizes! Also comes in taupe! I love this because it would like nice in a room since it’s shag as opposed to being a print or a solid color. It’s a dressed up dog bed!
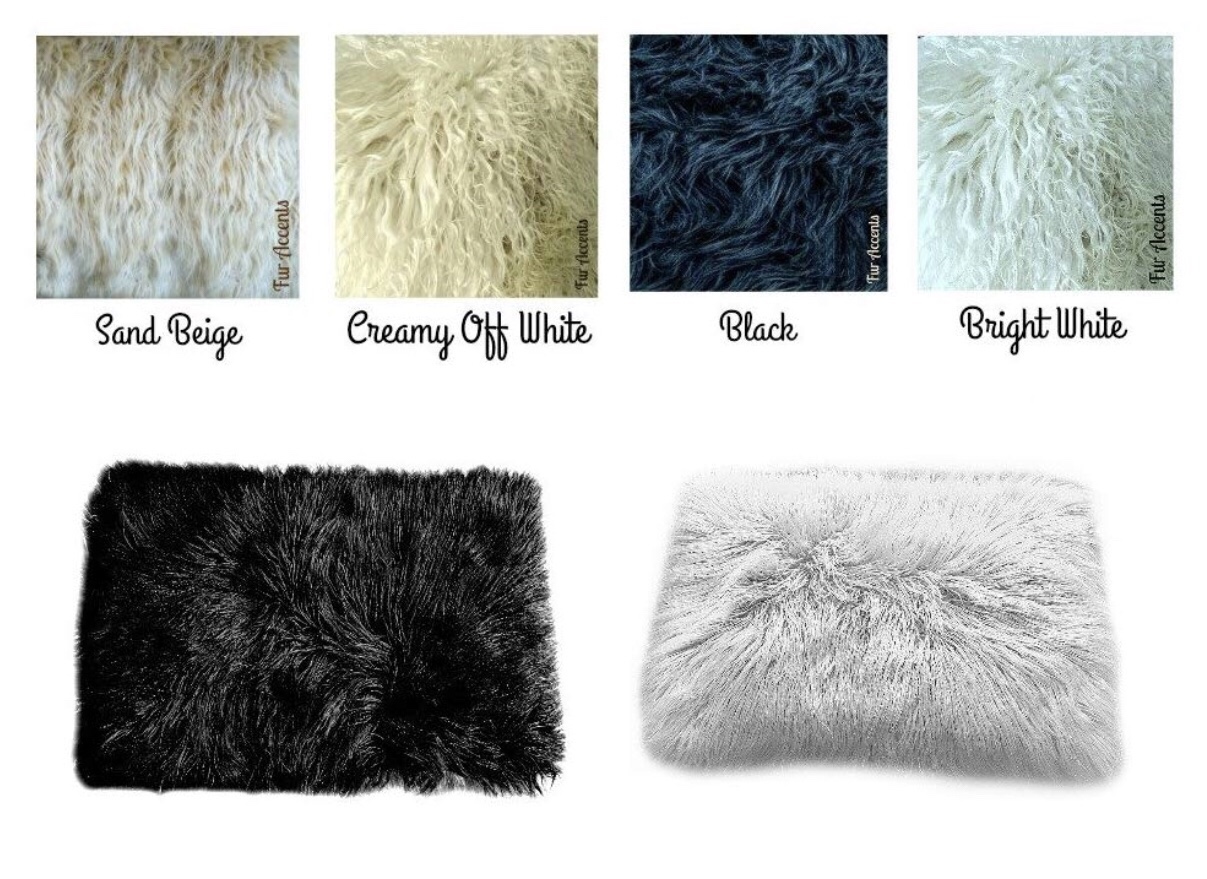
Same sizing & type as the one I have but velvet. Color pictured is silver and I think that’s the most neutral color that would match any room but it also comes in other colors!
Yalllllllll, I am OBSESSED with this bed. I am getting it when I have the opportunity lol! We have no where to put it in the house right now but maybe for the camp?! I absolutely love this because it doesn’t look like a dog bed AT ALL and these type of rugs are so in right now! There are tons of pictures from other people if you click the link to compare what colors or shape you like!
Ranging in price for different sizes as well! I love this bed because of its fur look, again not looking like your everyday pet bed! It comes in tons of colors and the link will show you more pictures from other people as well!
Some of these might seem more pricey then your norm but I think ya worth it for a nice look! Remember, happy pups, happy life 😜
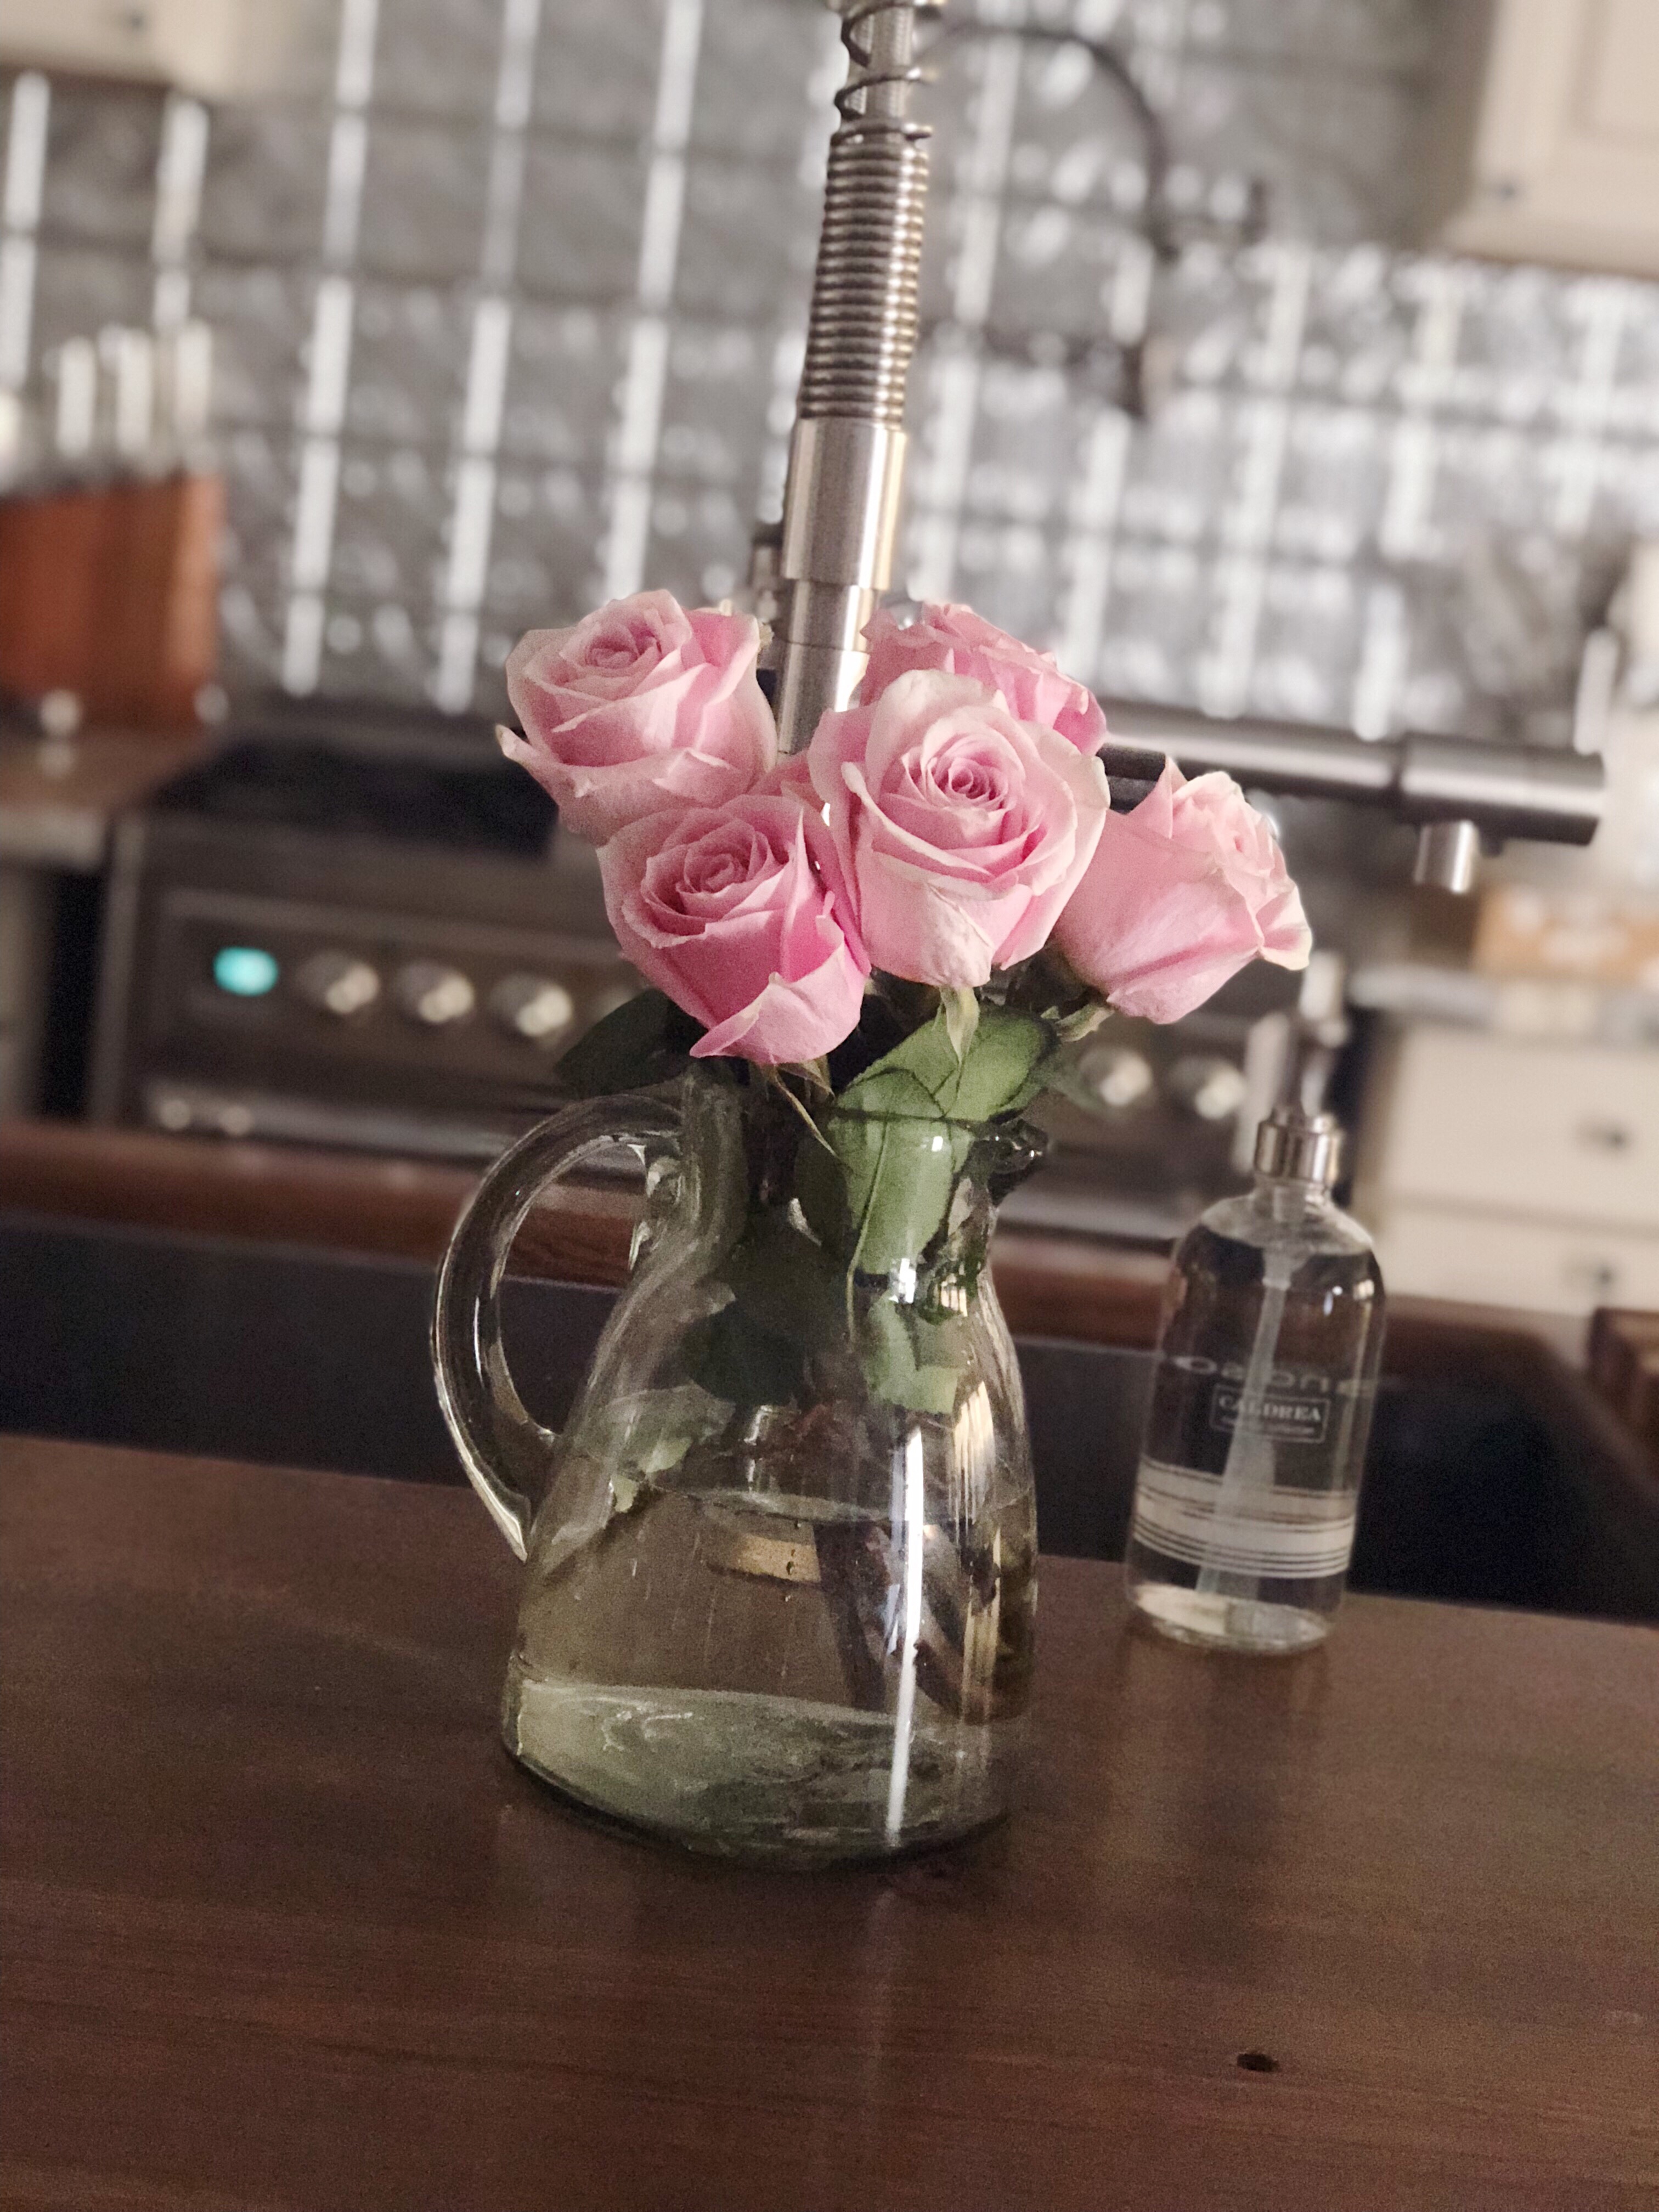
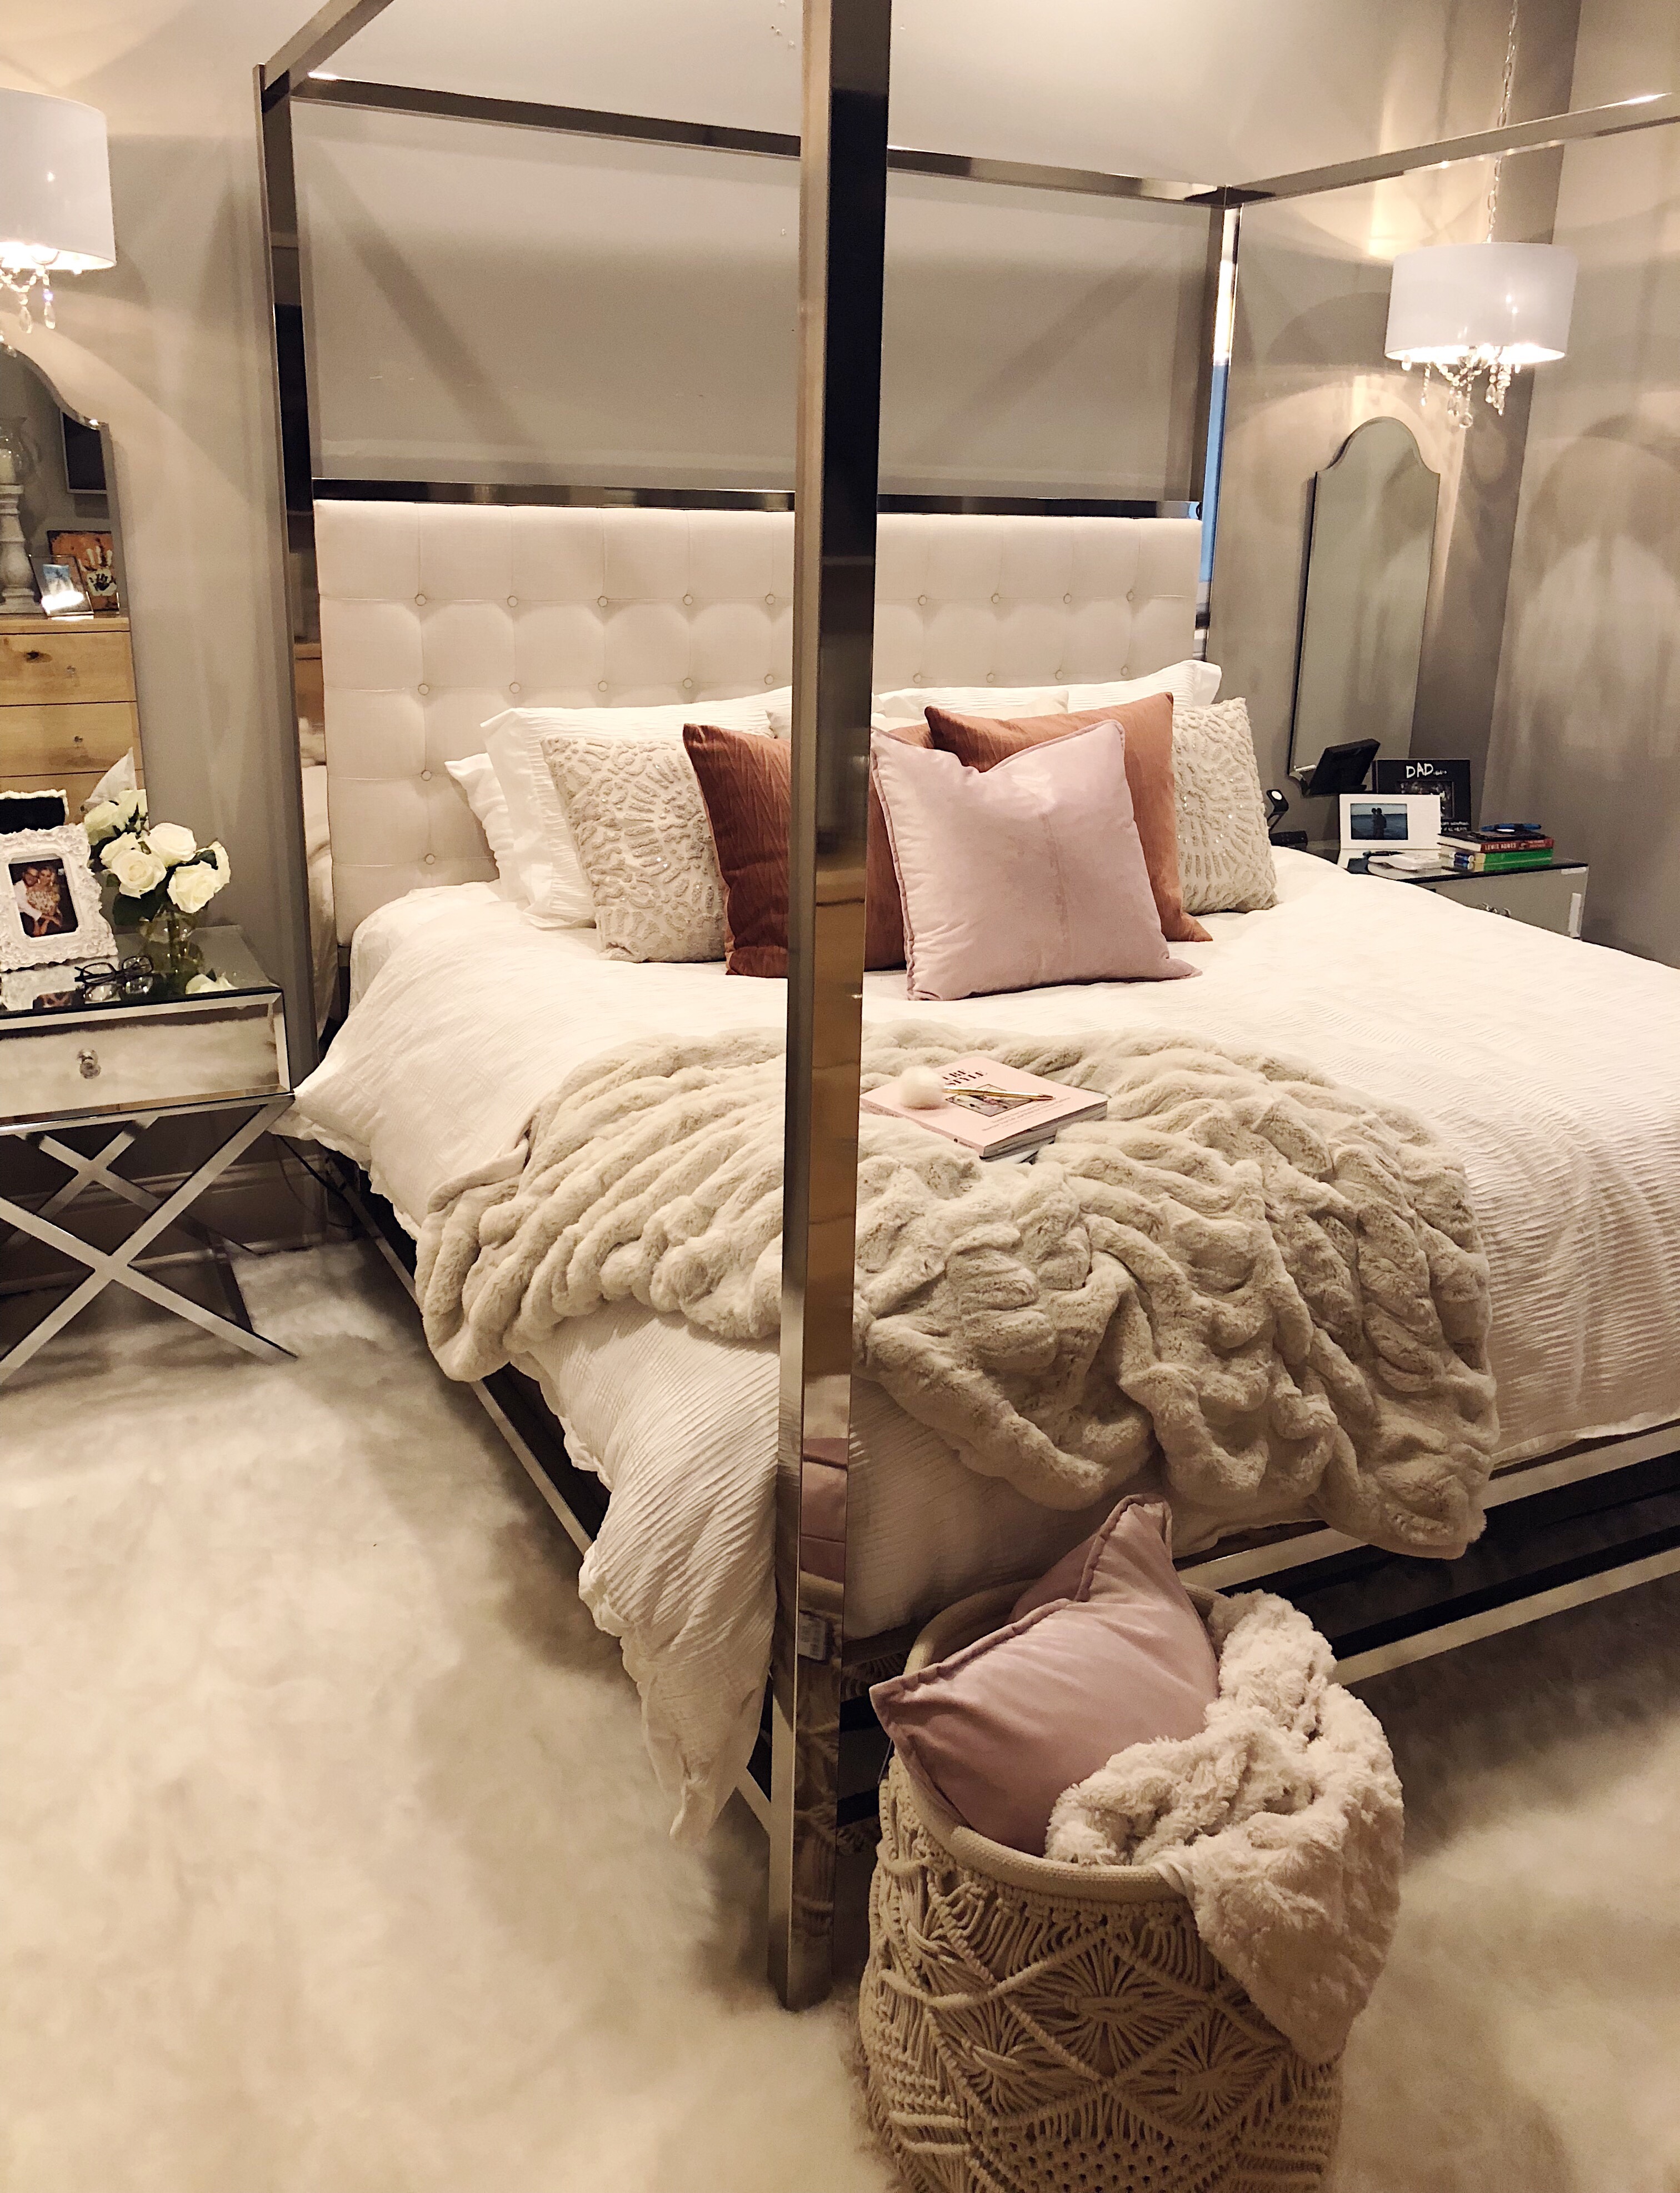
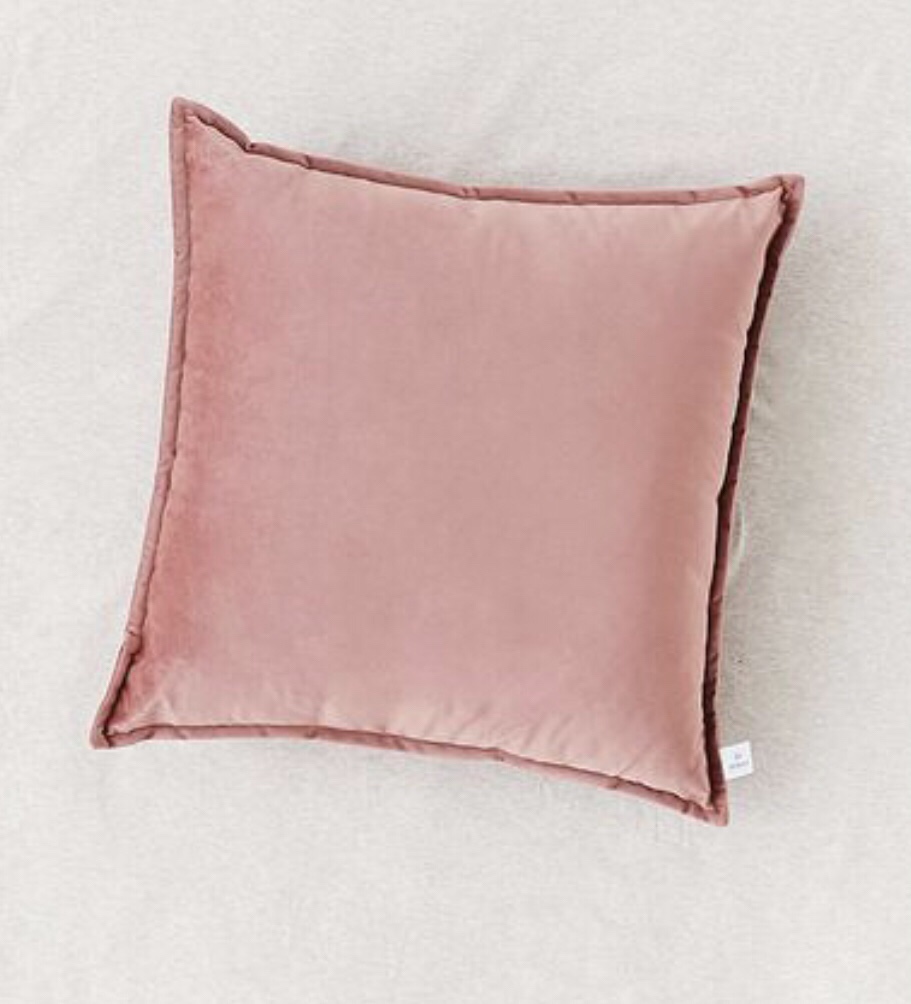
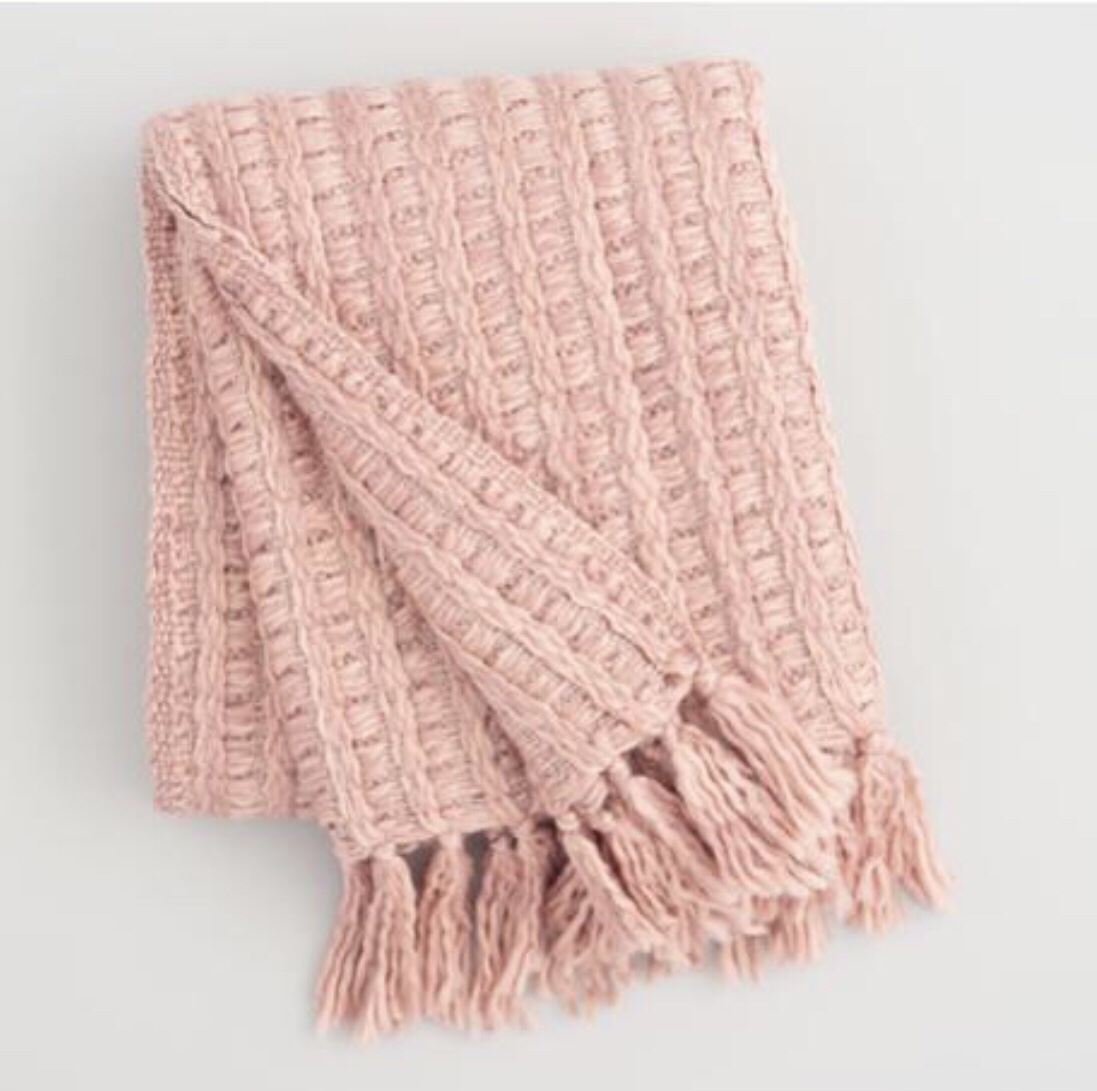
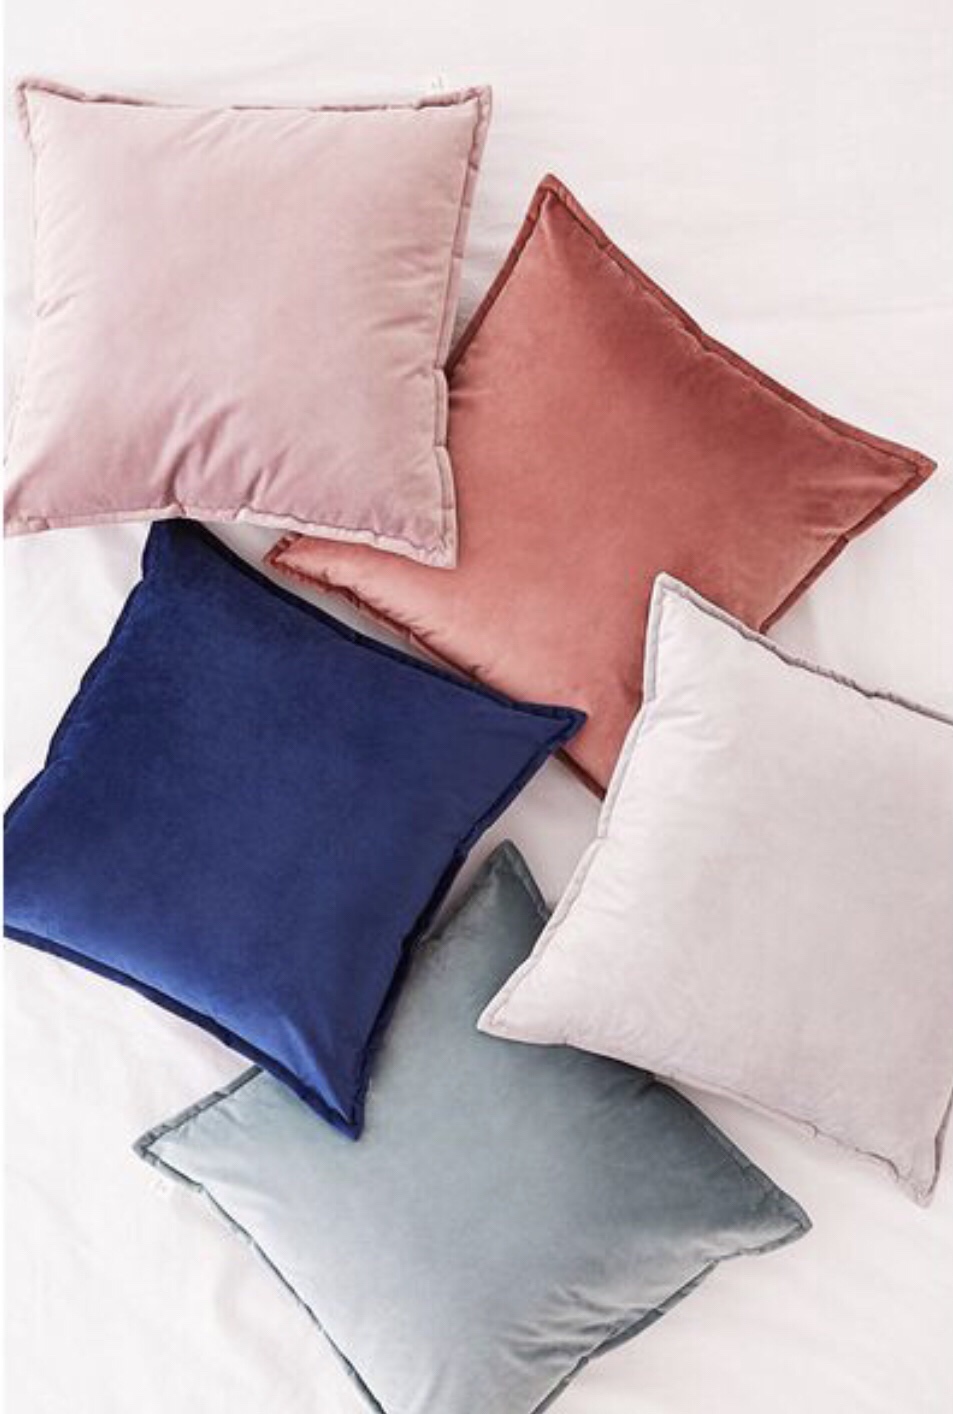
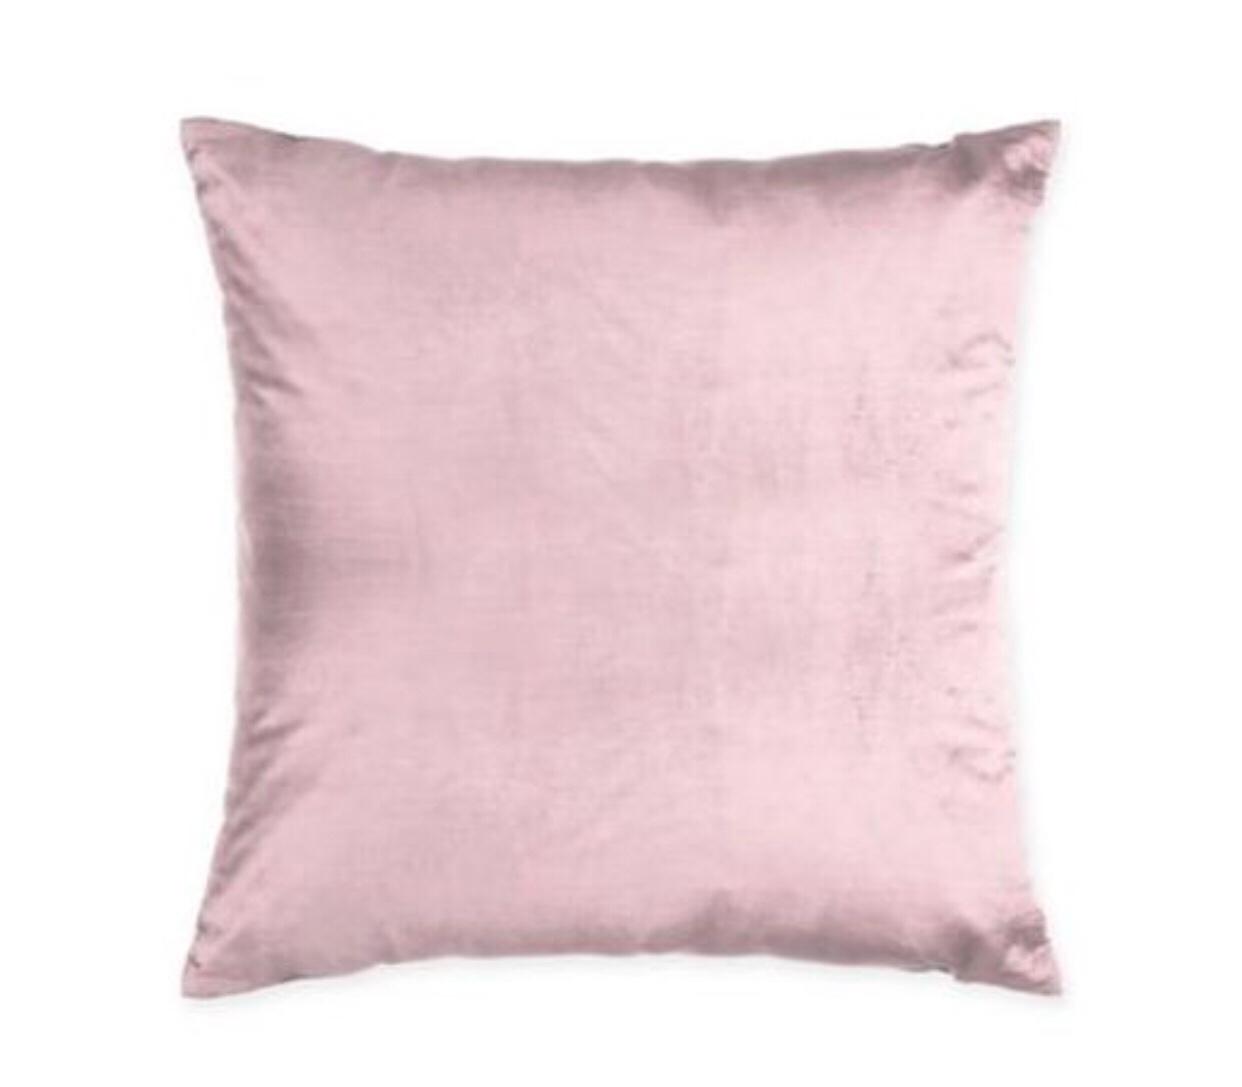
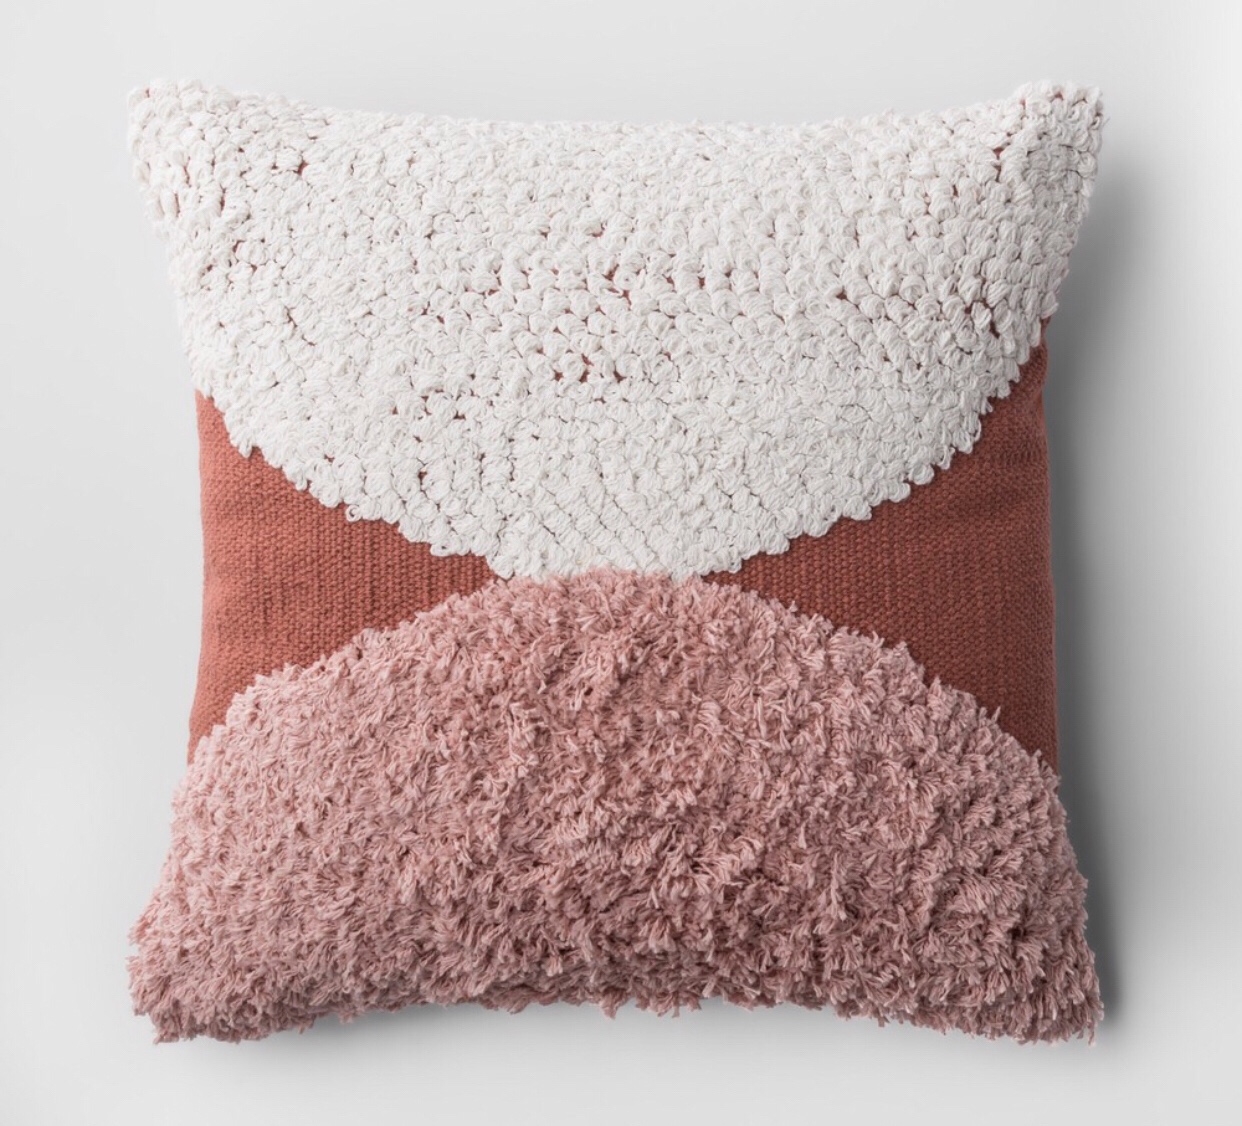
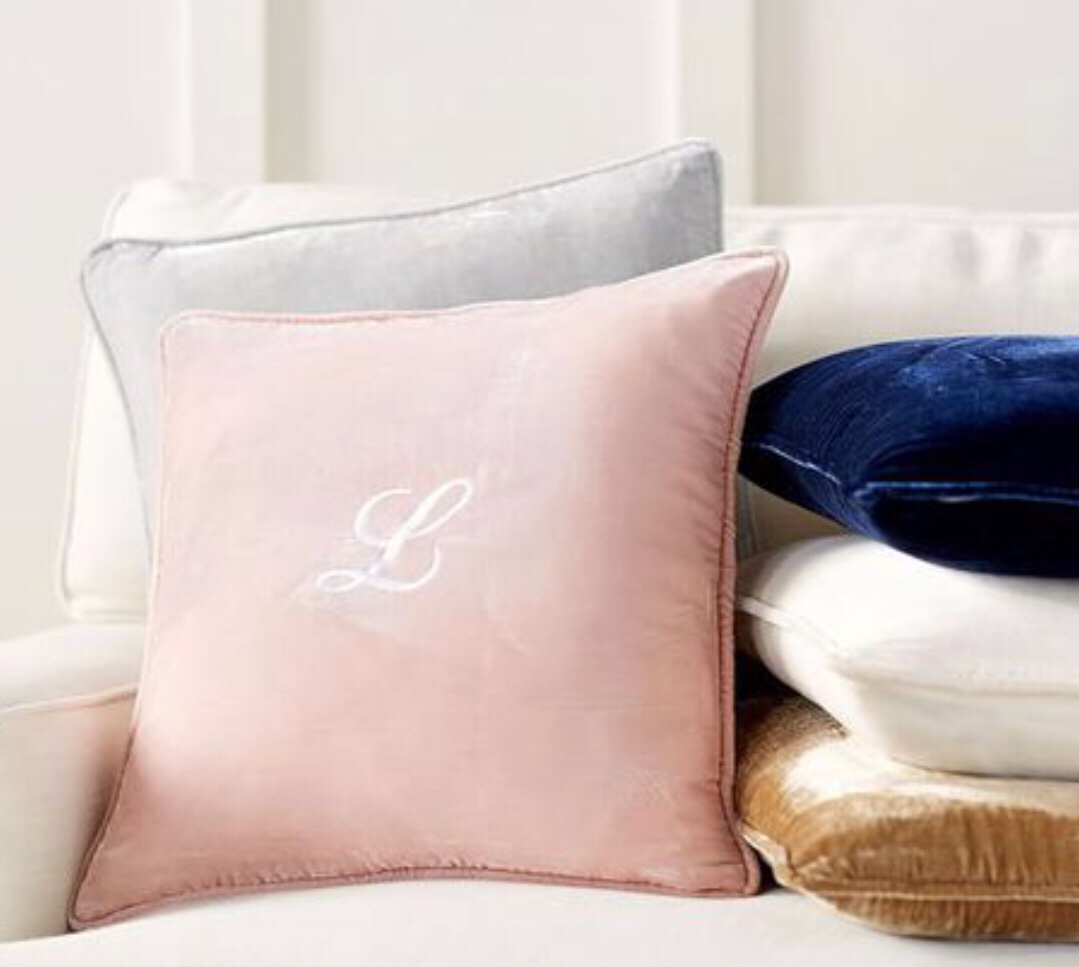
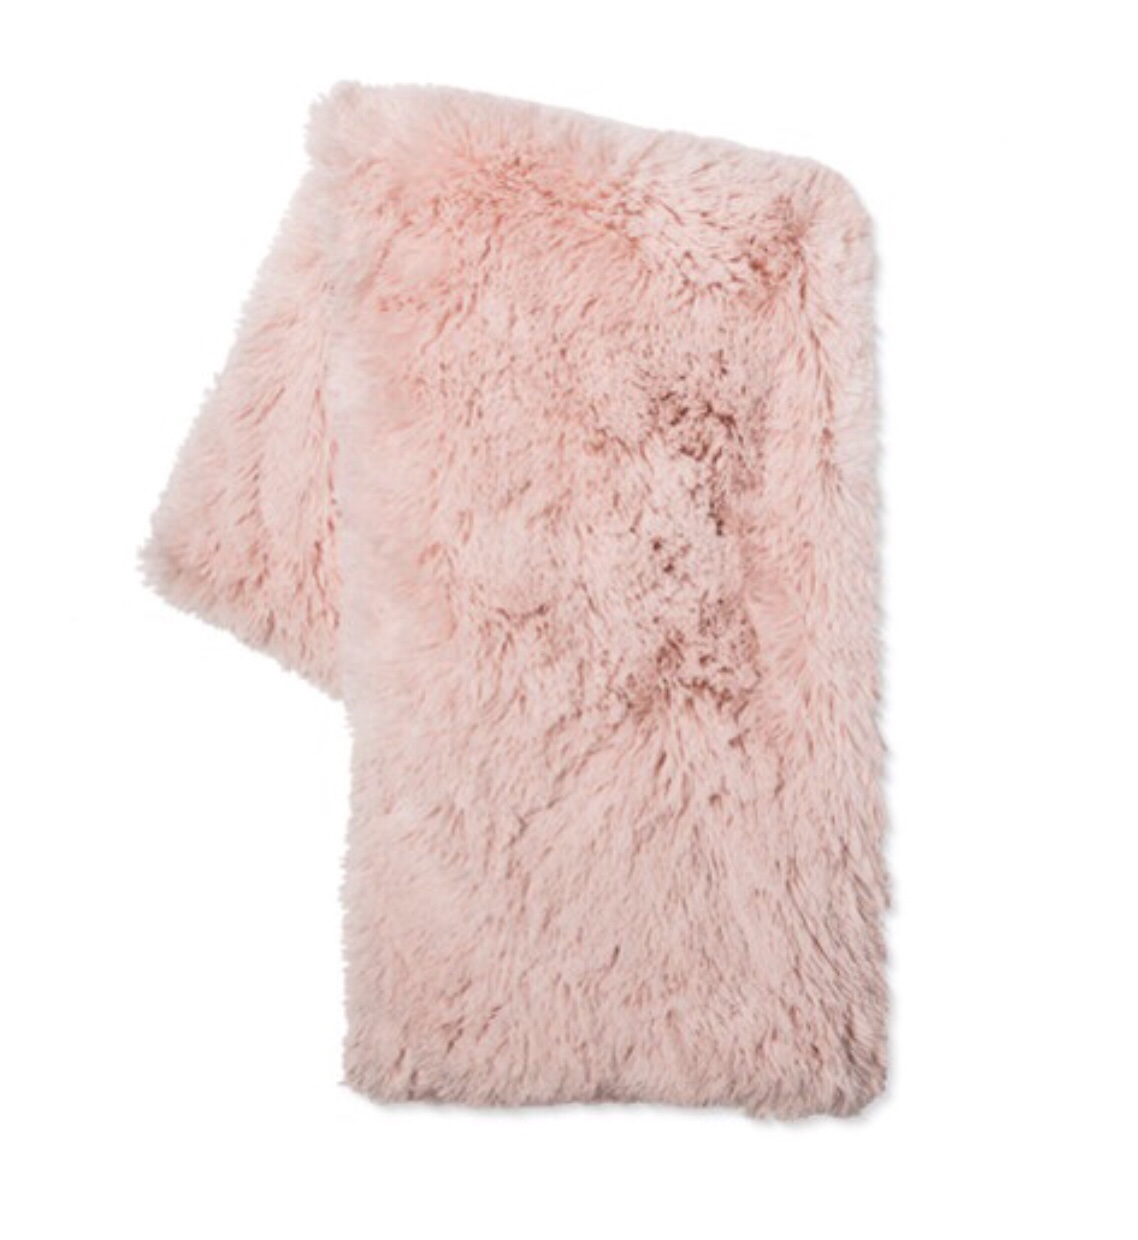
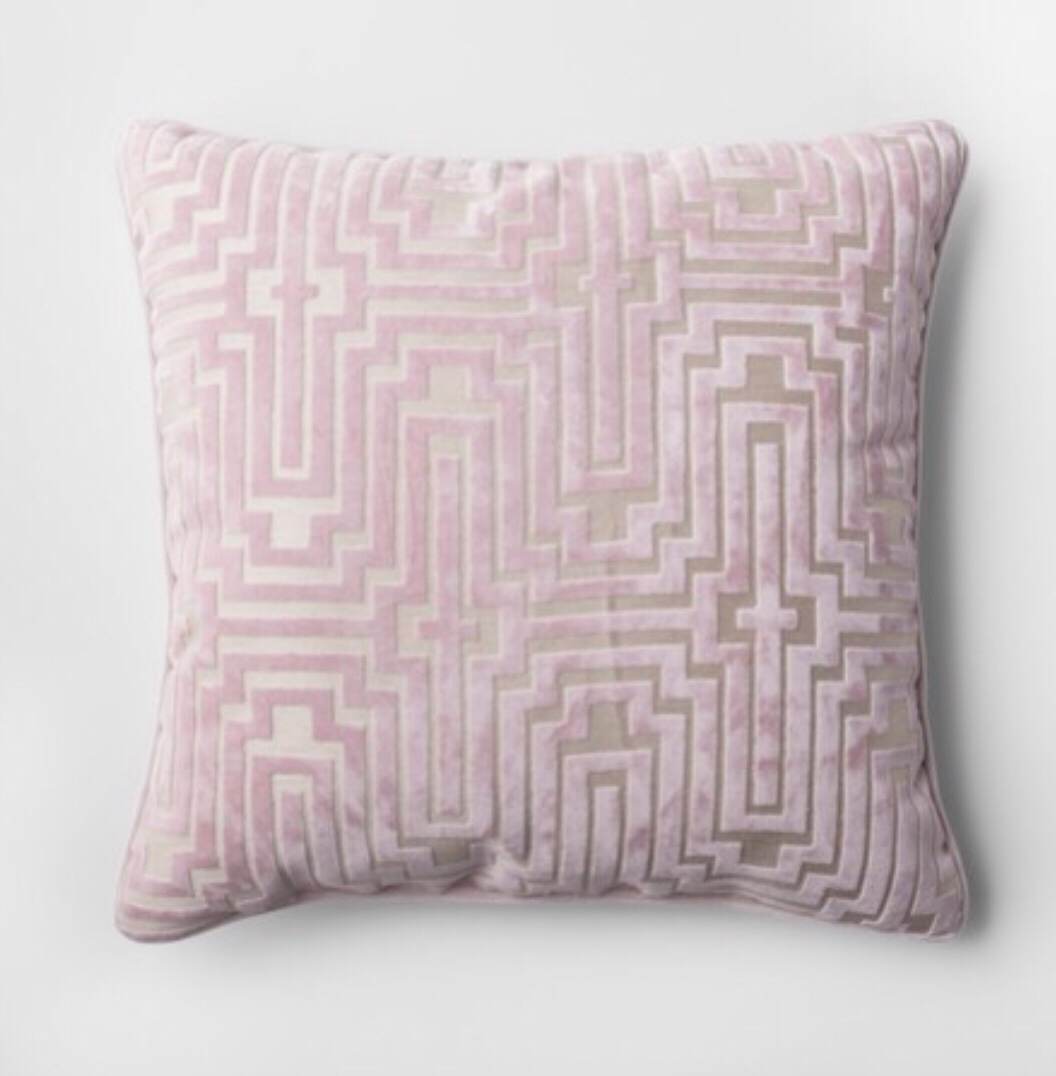
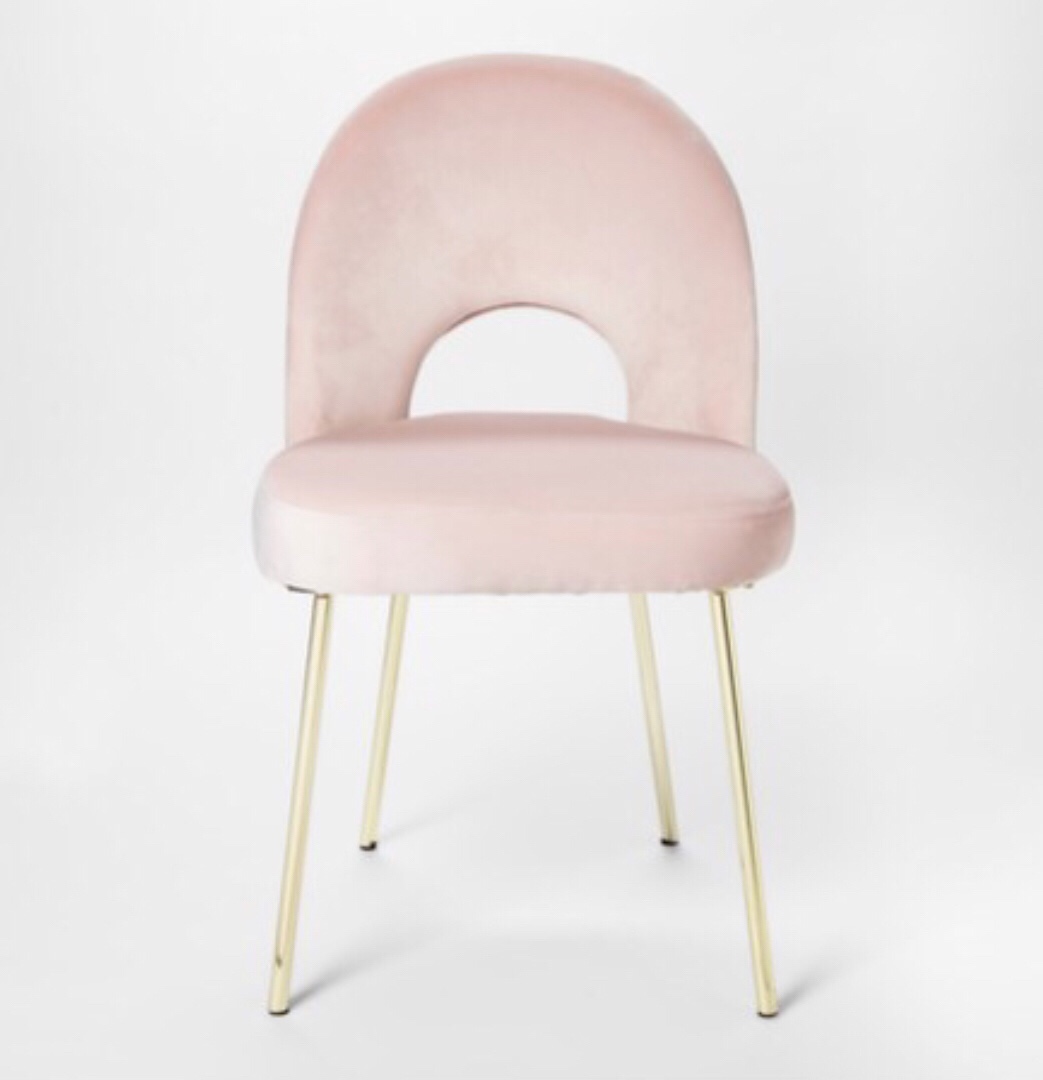
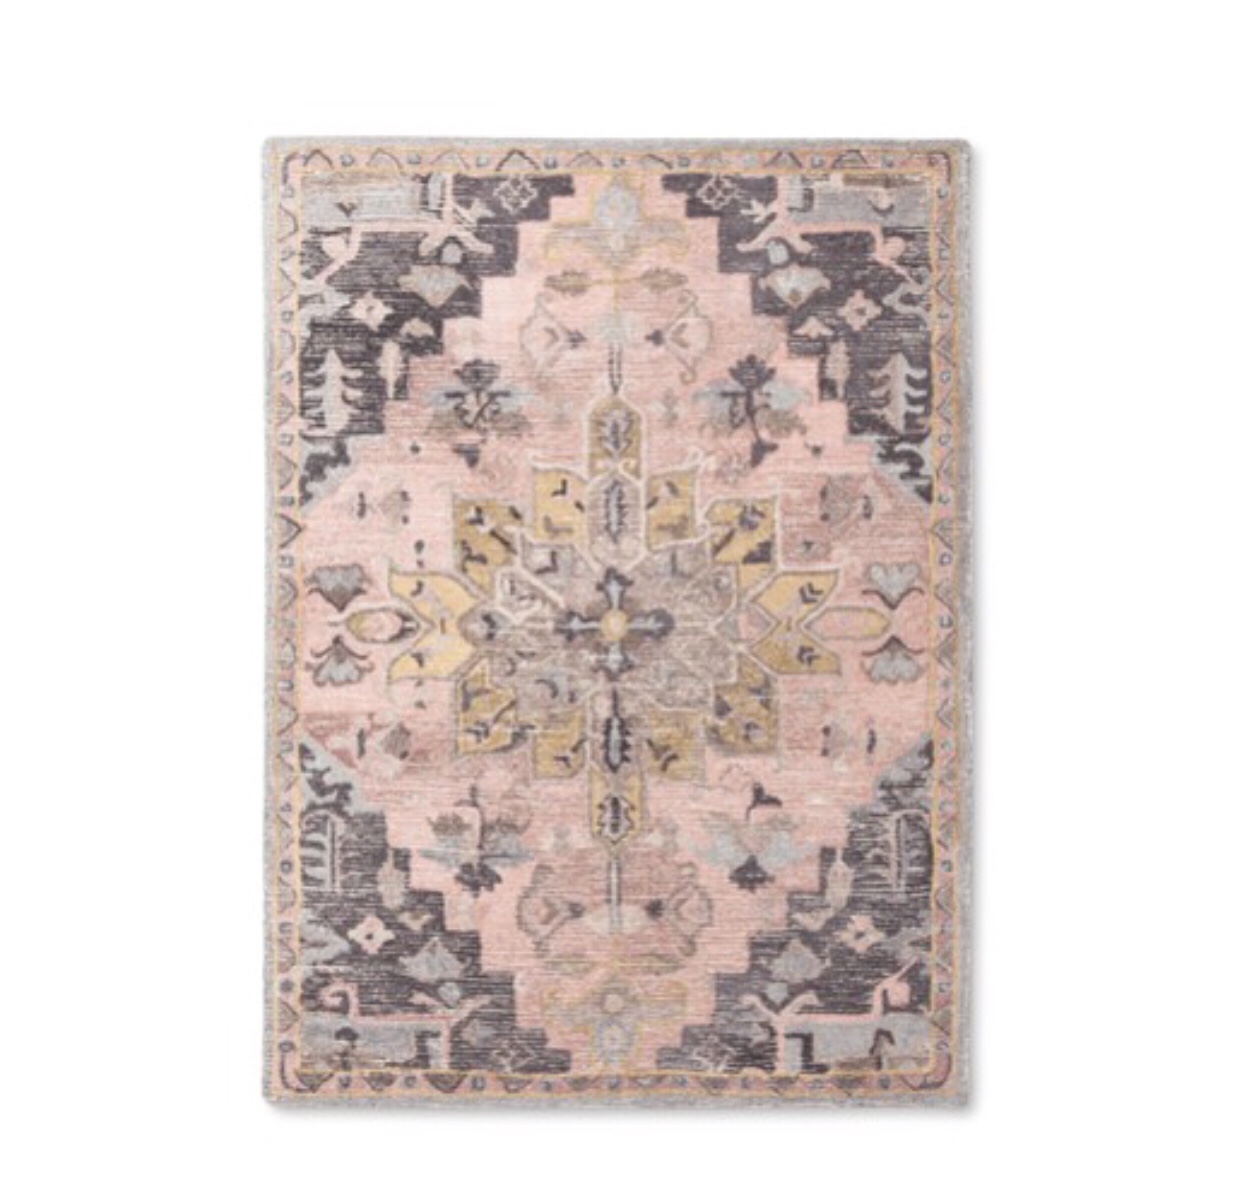
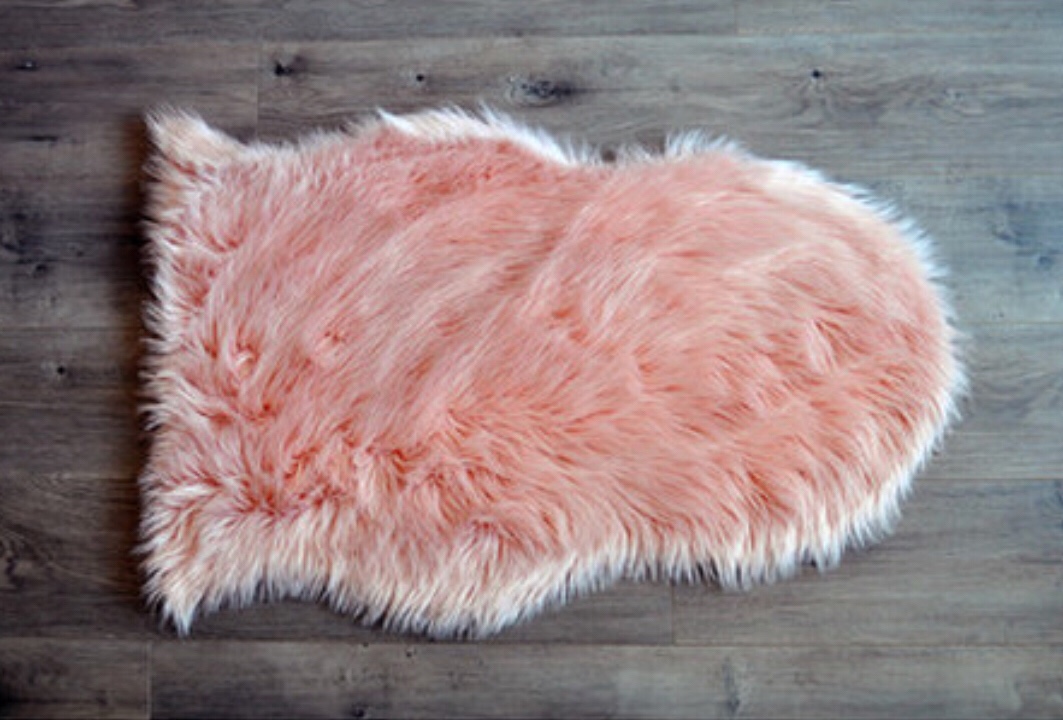
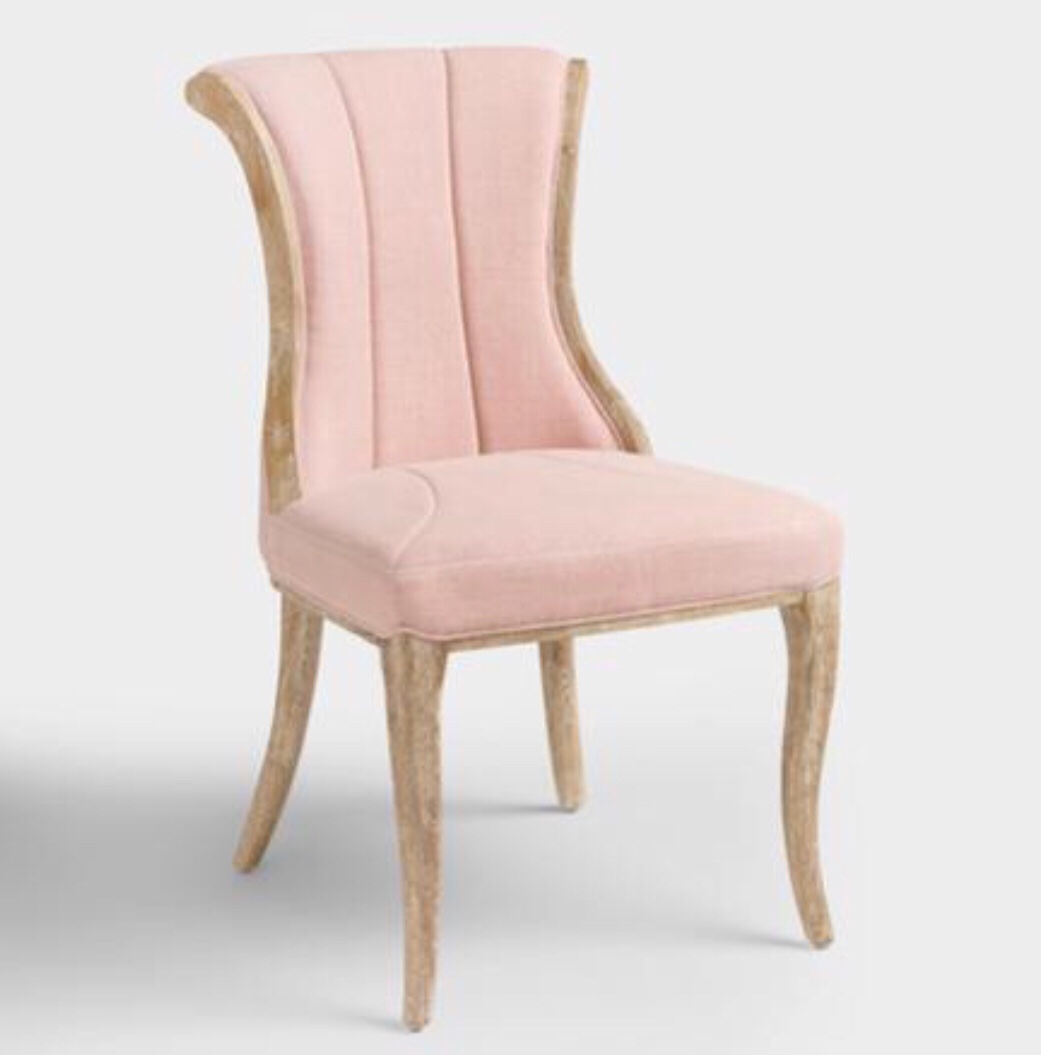
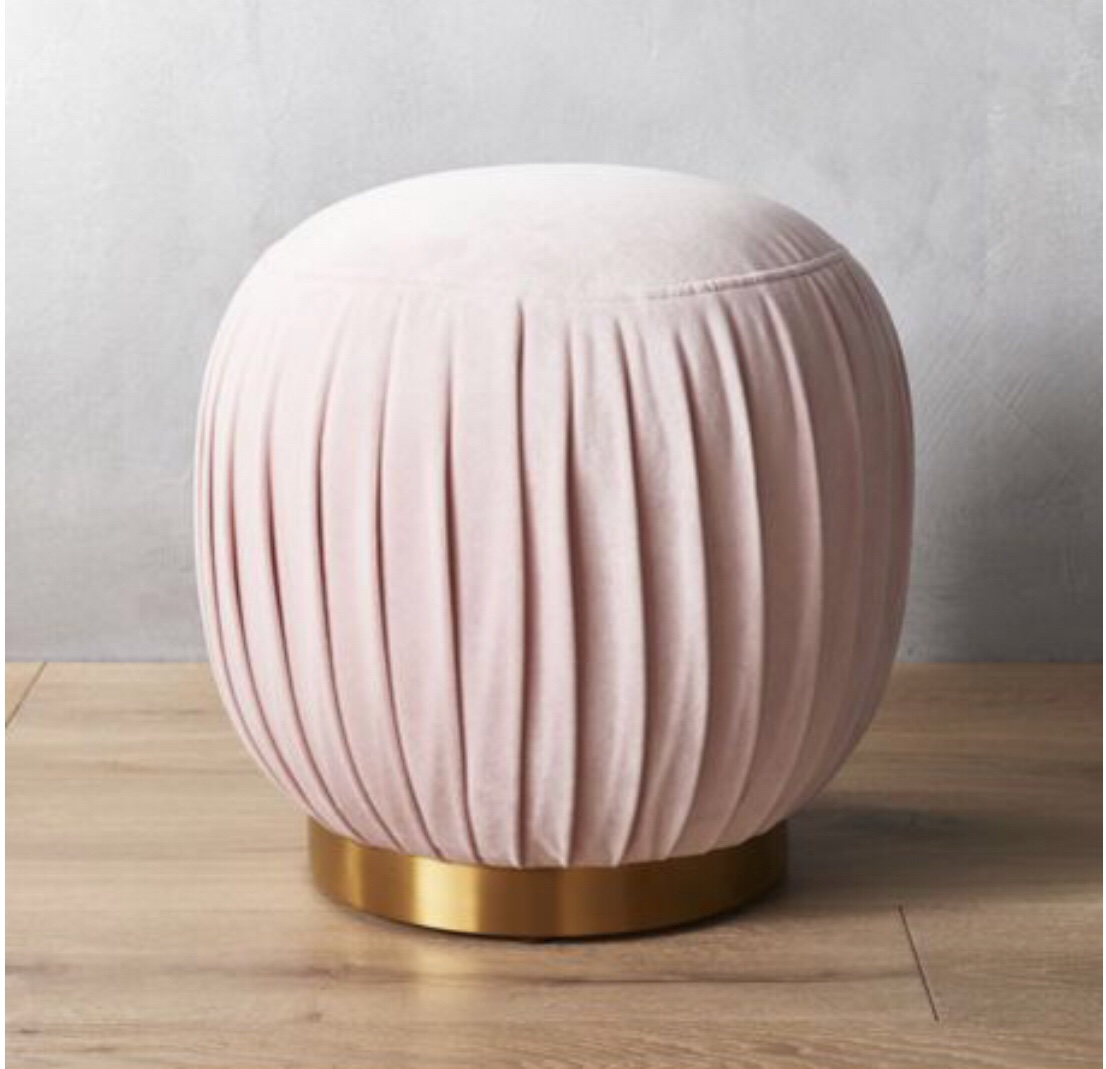
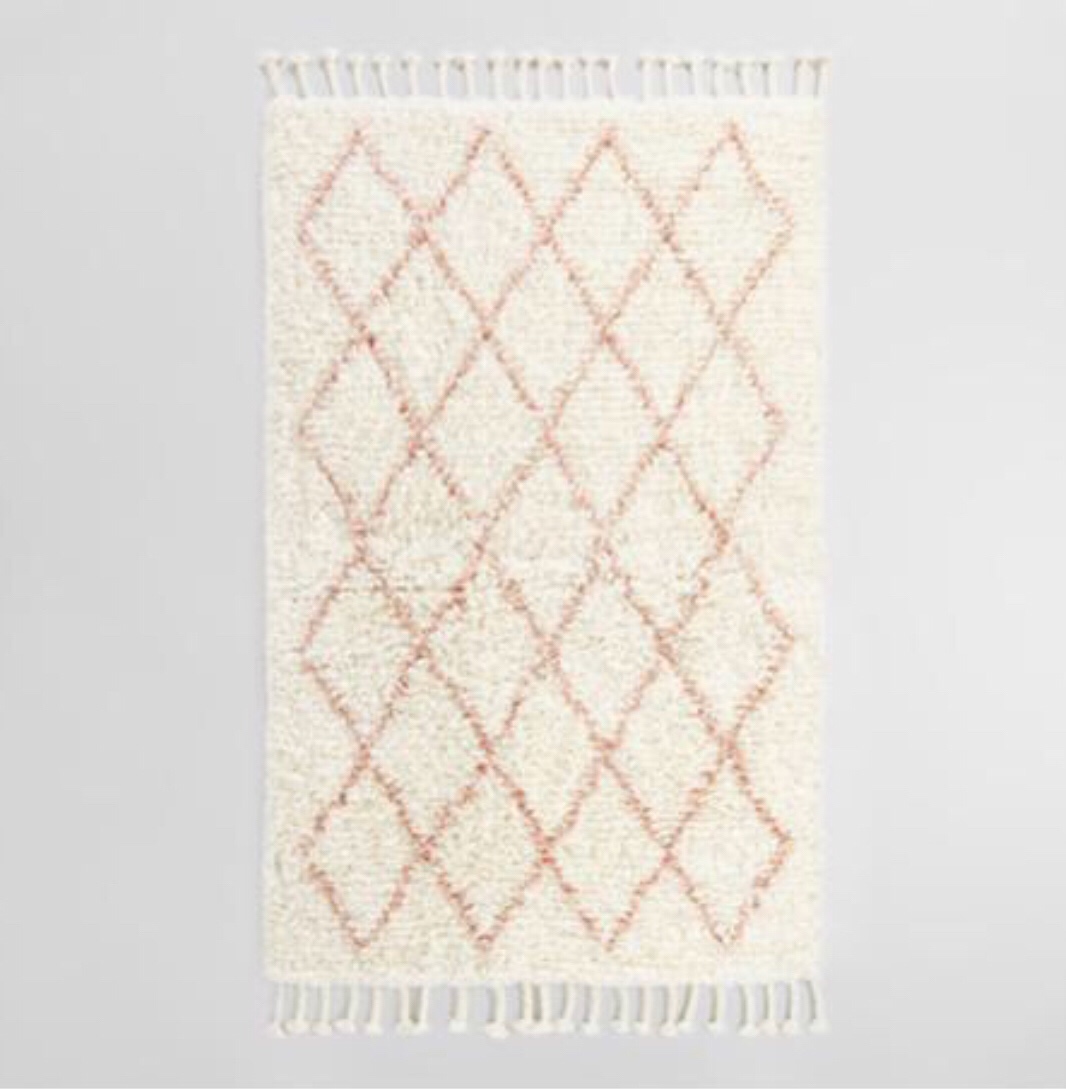
Happy Sunday y’all!! I don’t know about everyone else, but the weather in Louisiana is made for a LAZY Sunday! I’m really excited about today’s post because it’s all about the BLUSH and anyone whose been following knows that’s my favorite at the moment!!
If you’ve read along you’ve known my opinion about the blush trend. I LOVE IT. However, I know it’s going to be short lived. With that being said there are ways I like to incorporate this into my decor without getting crazy i.e. making crazy priced purchases or purchases/changes that would be more permanent. Also, I can’t go crazy because Ryan & Hayden probably cringe at the sound of sight of the word blush at this time and Ryan has said numerous times that blush is not allowed in the house. But even my fool proof tricks for keeping it subtle yet TOTALLY present have still fooled him (okay, he definitely notices I’m pretty sure but he lets them stay there & that’s what matters!)
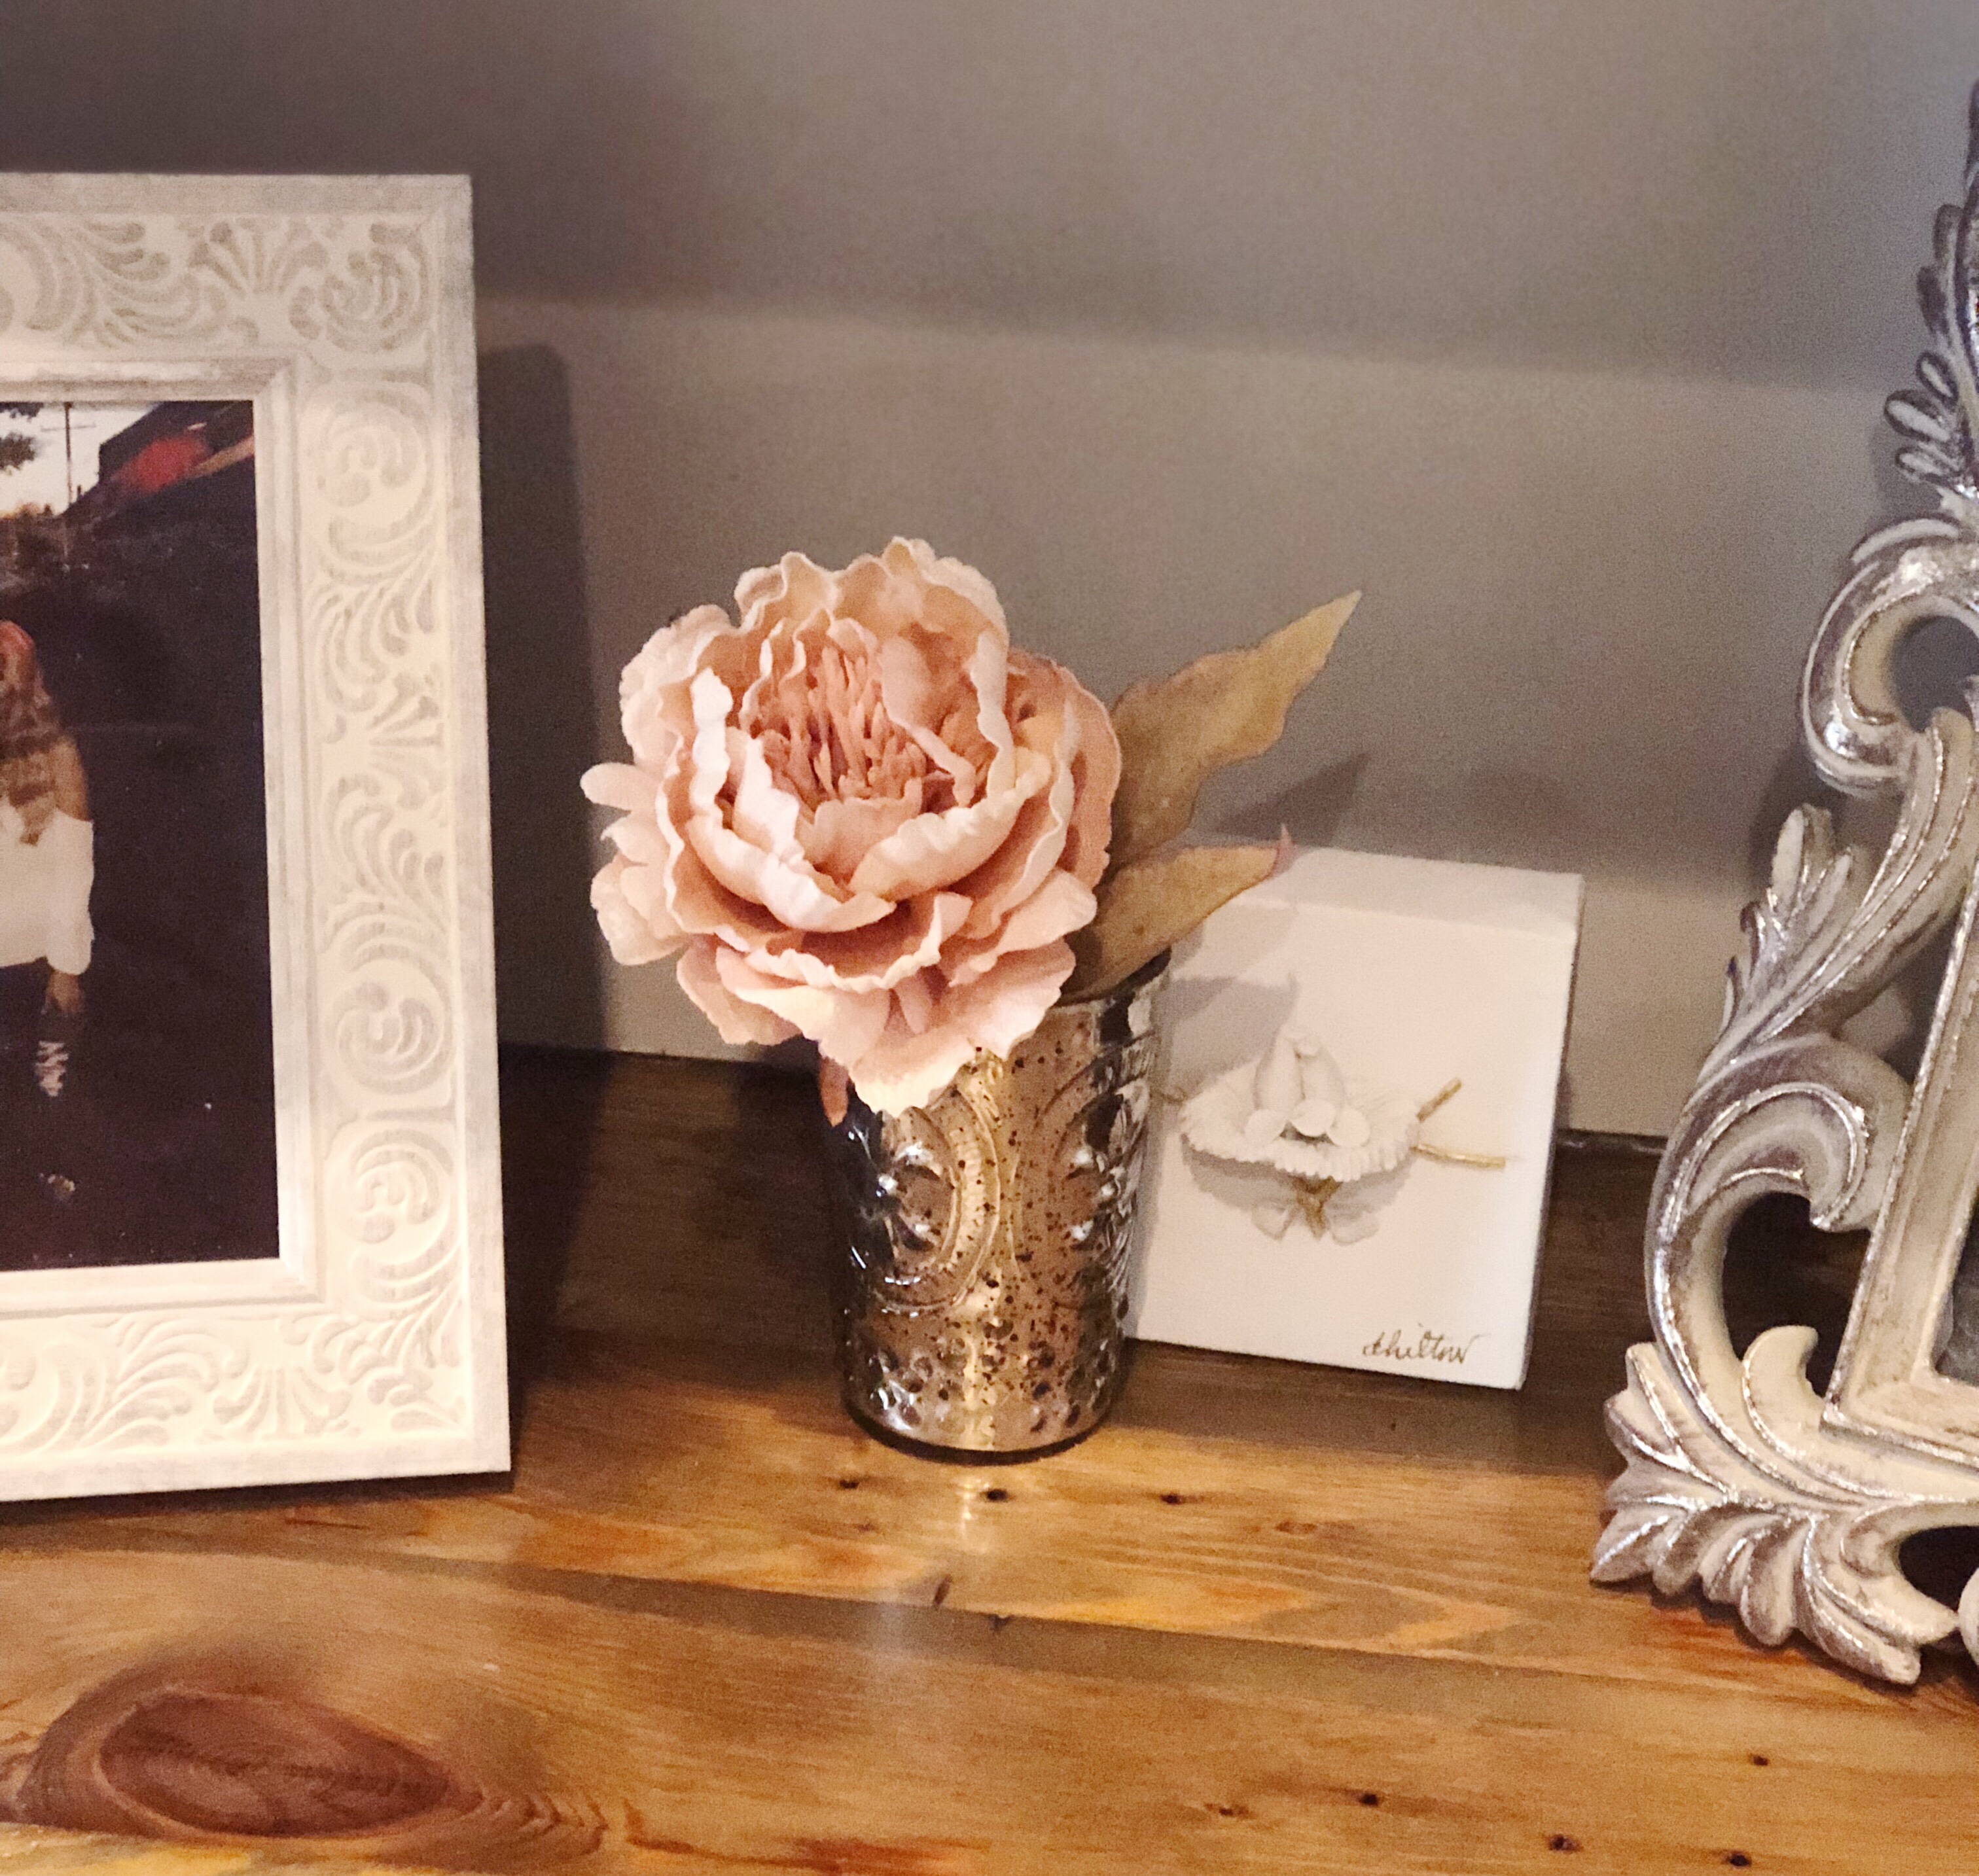
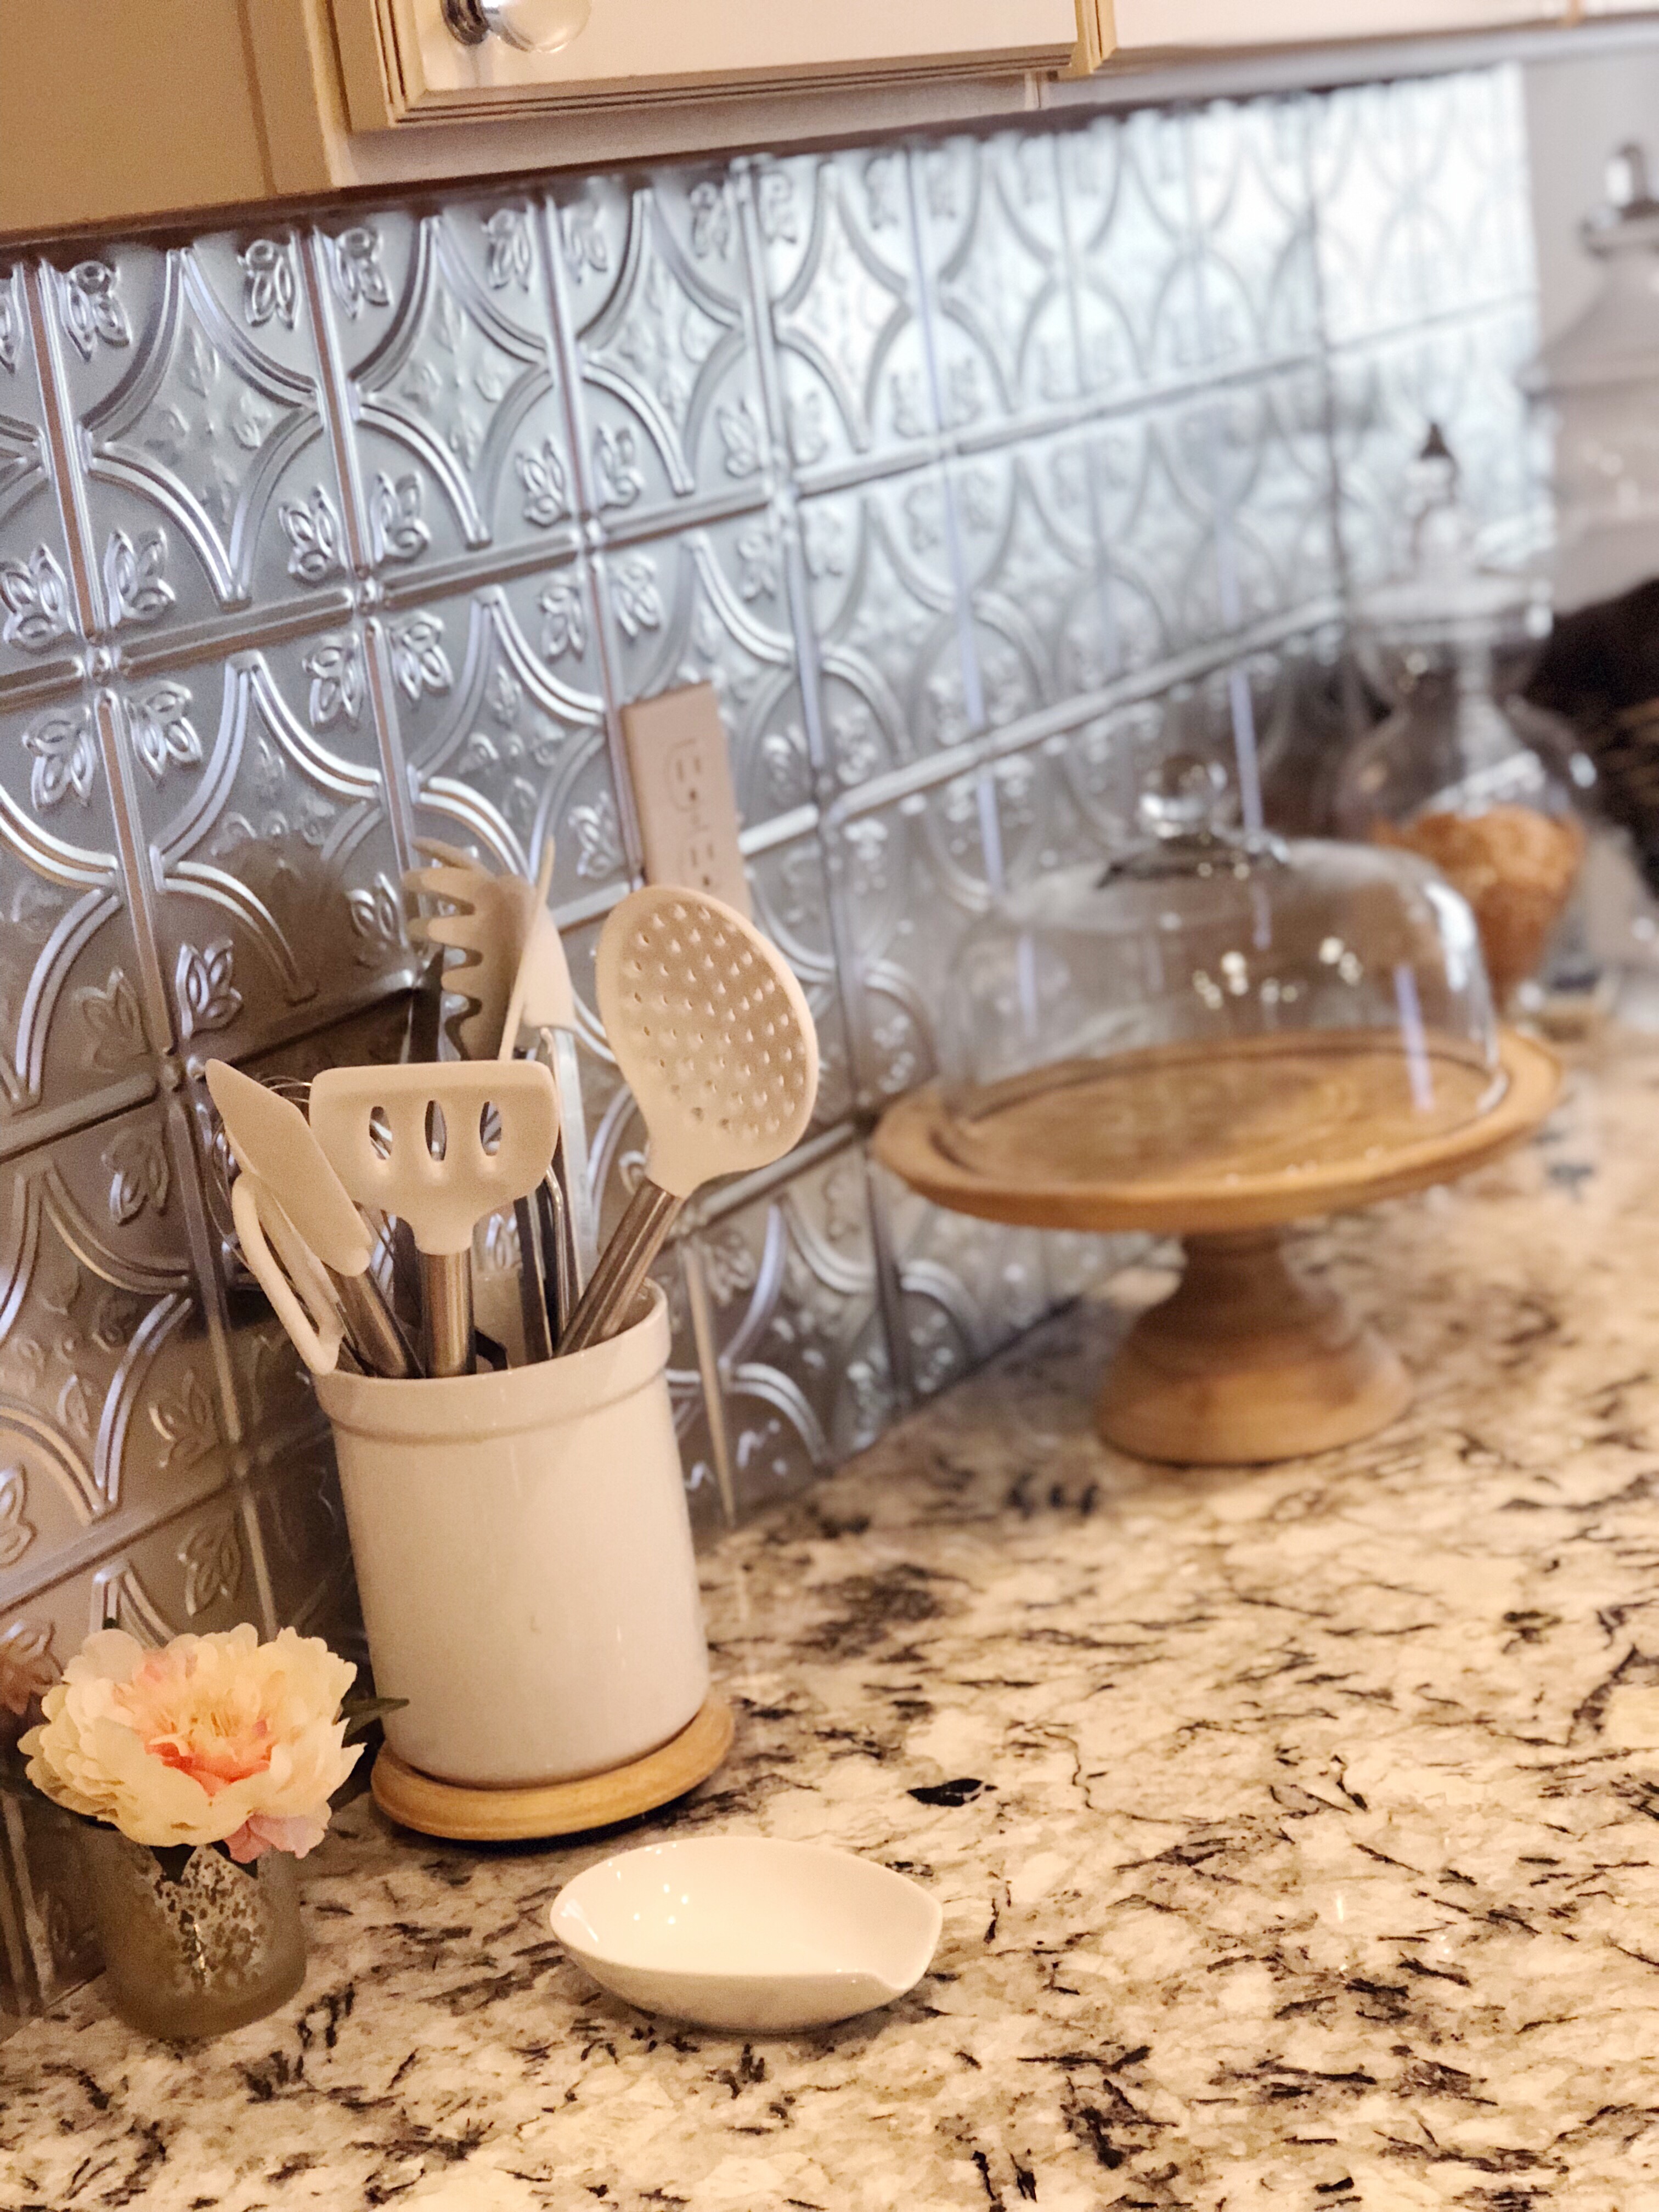
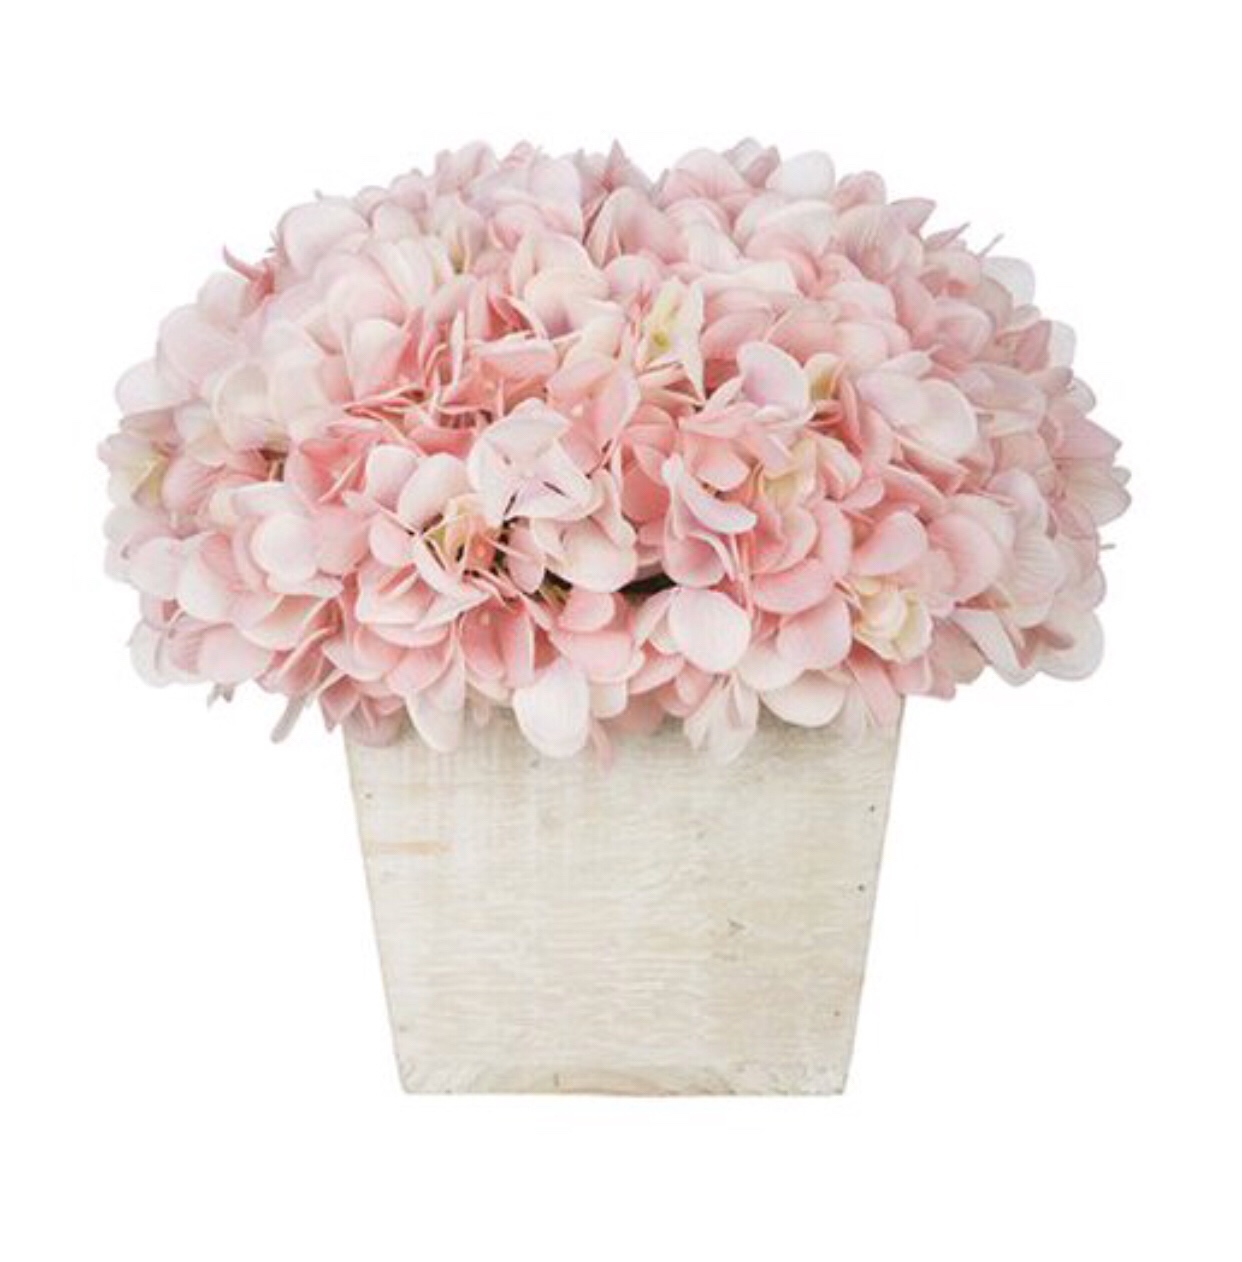
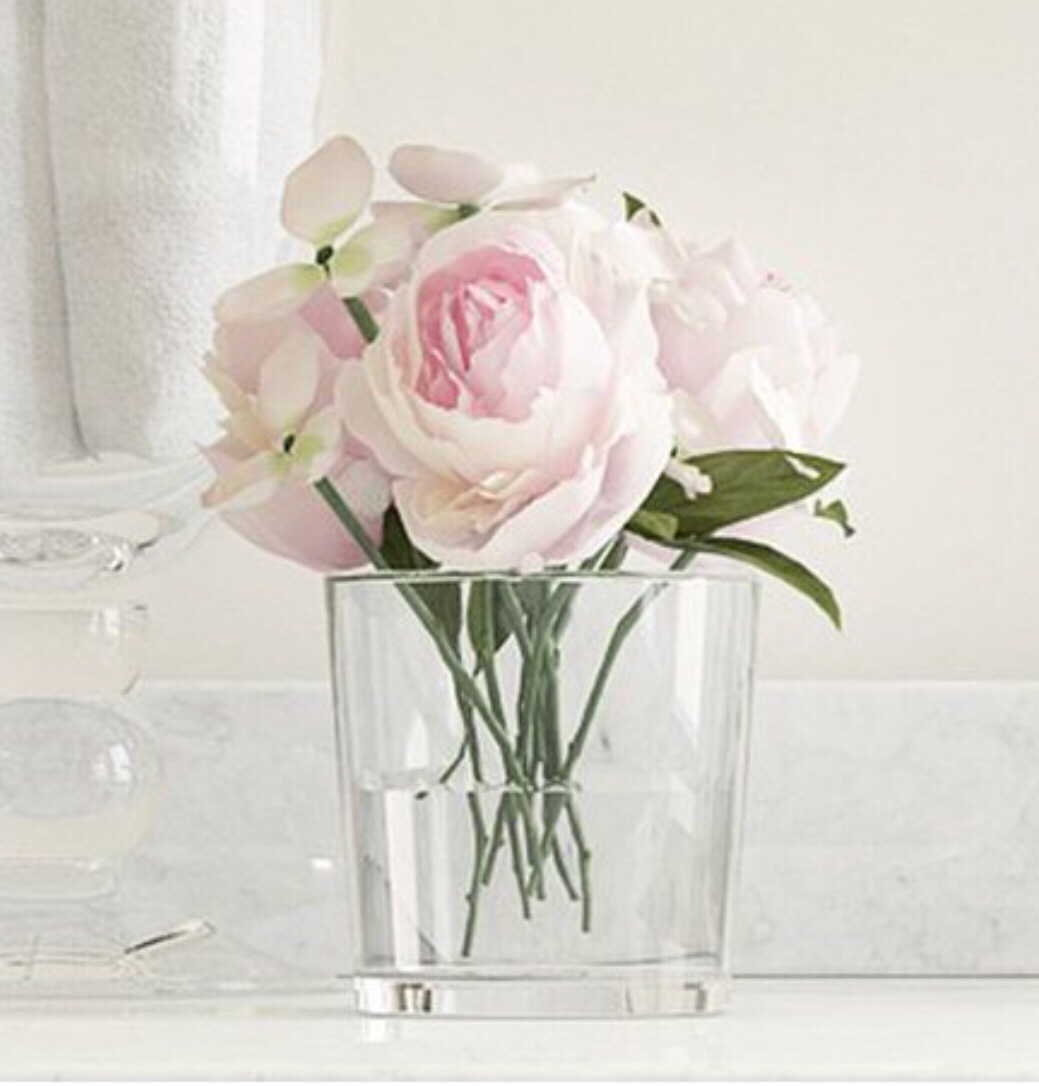
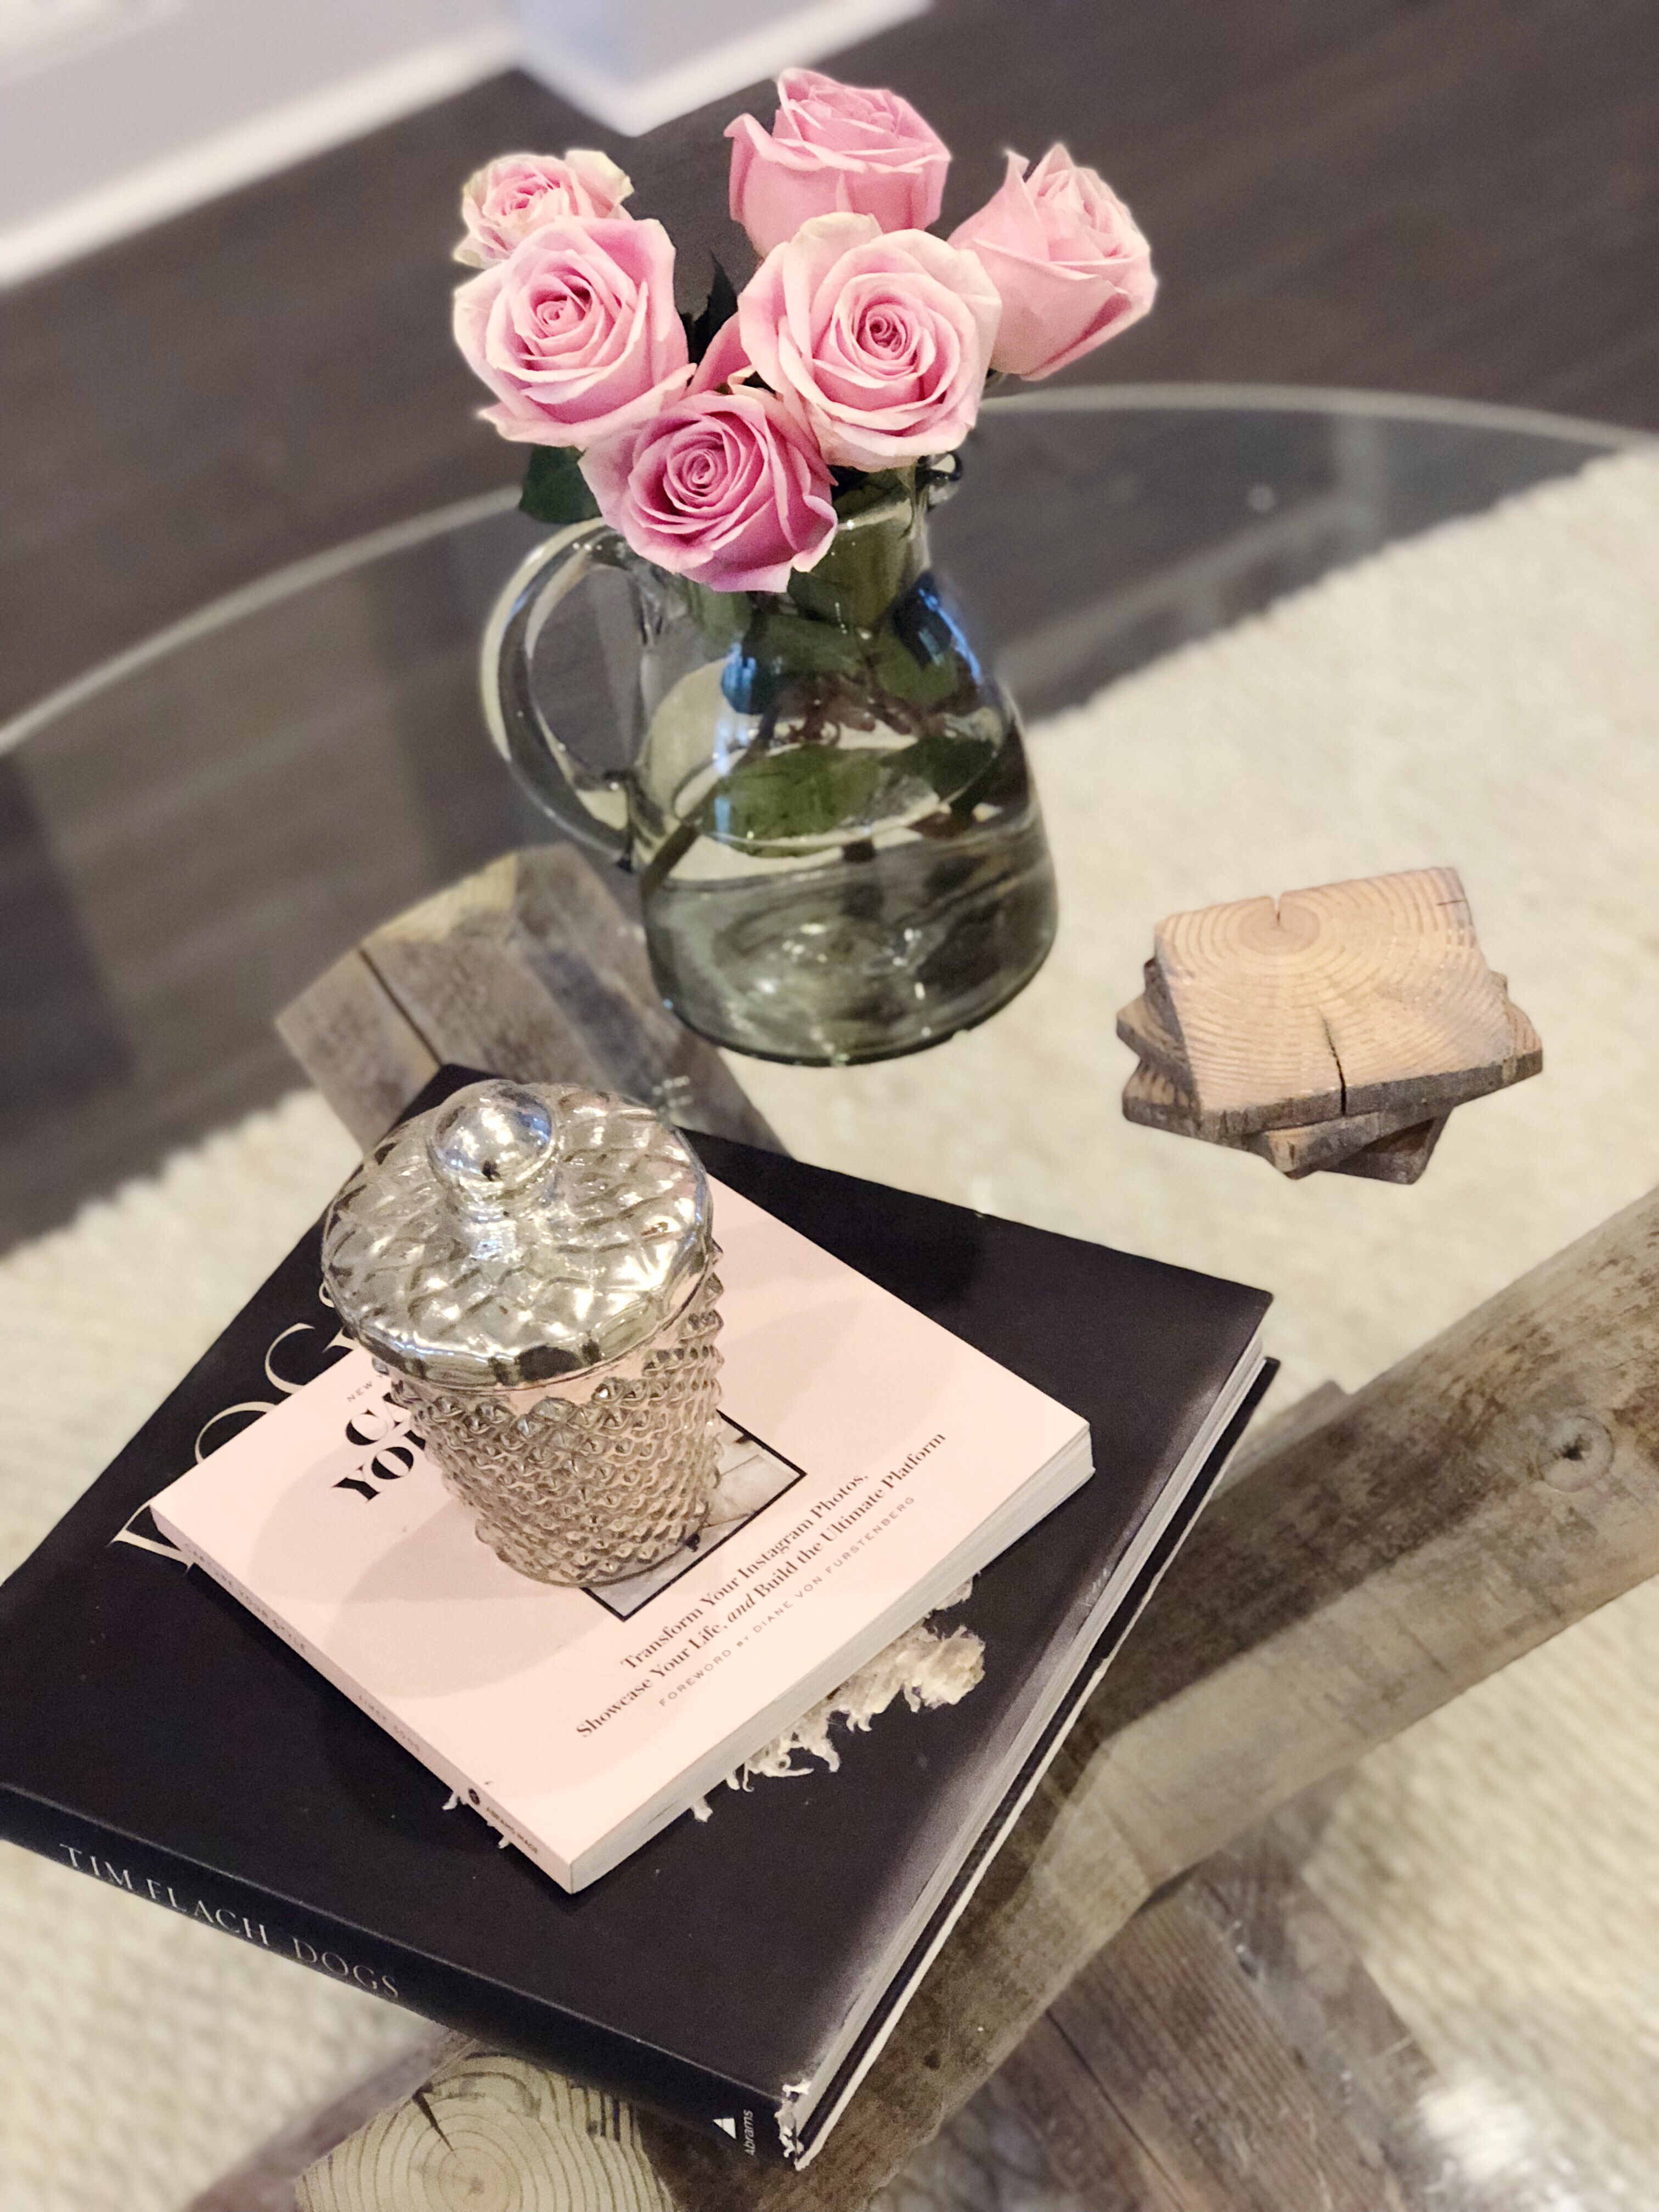
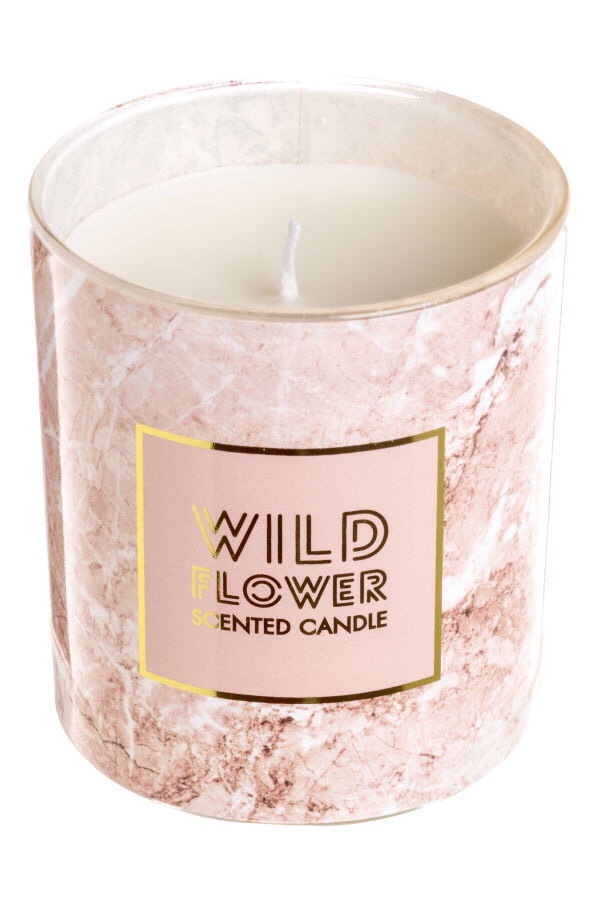
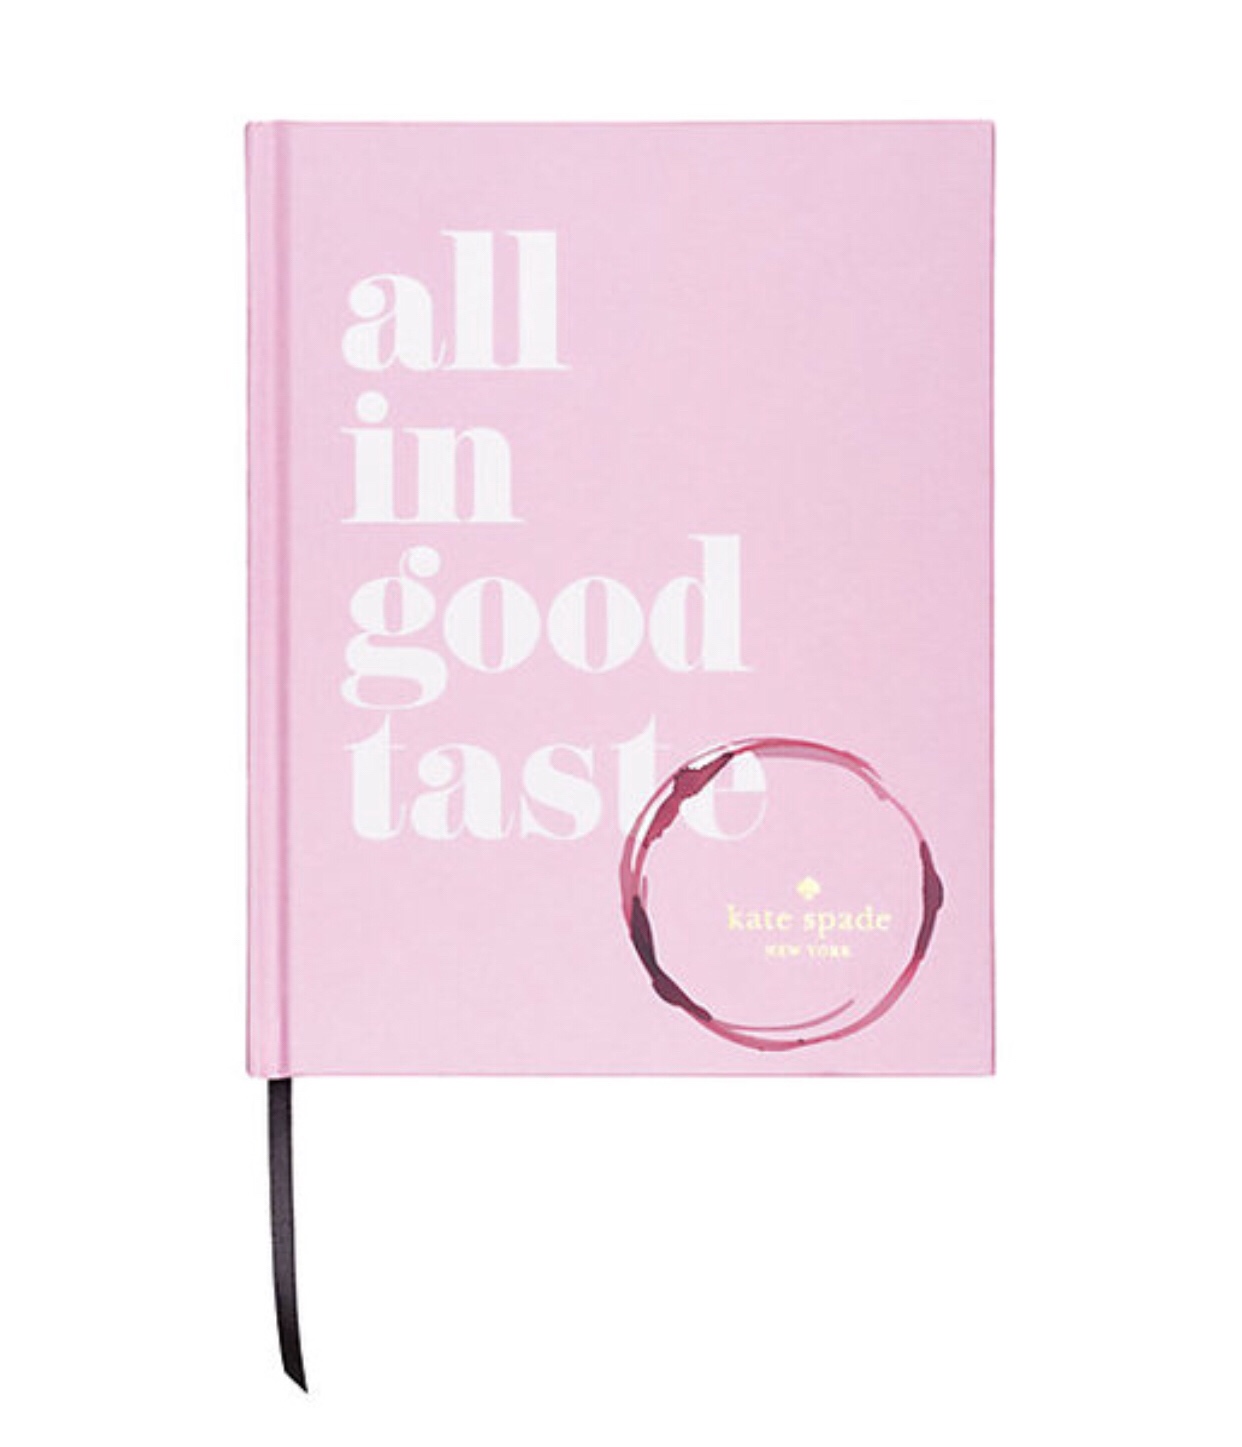
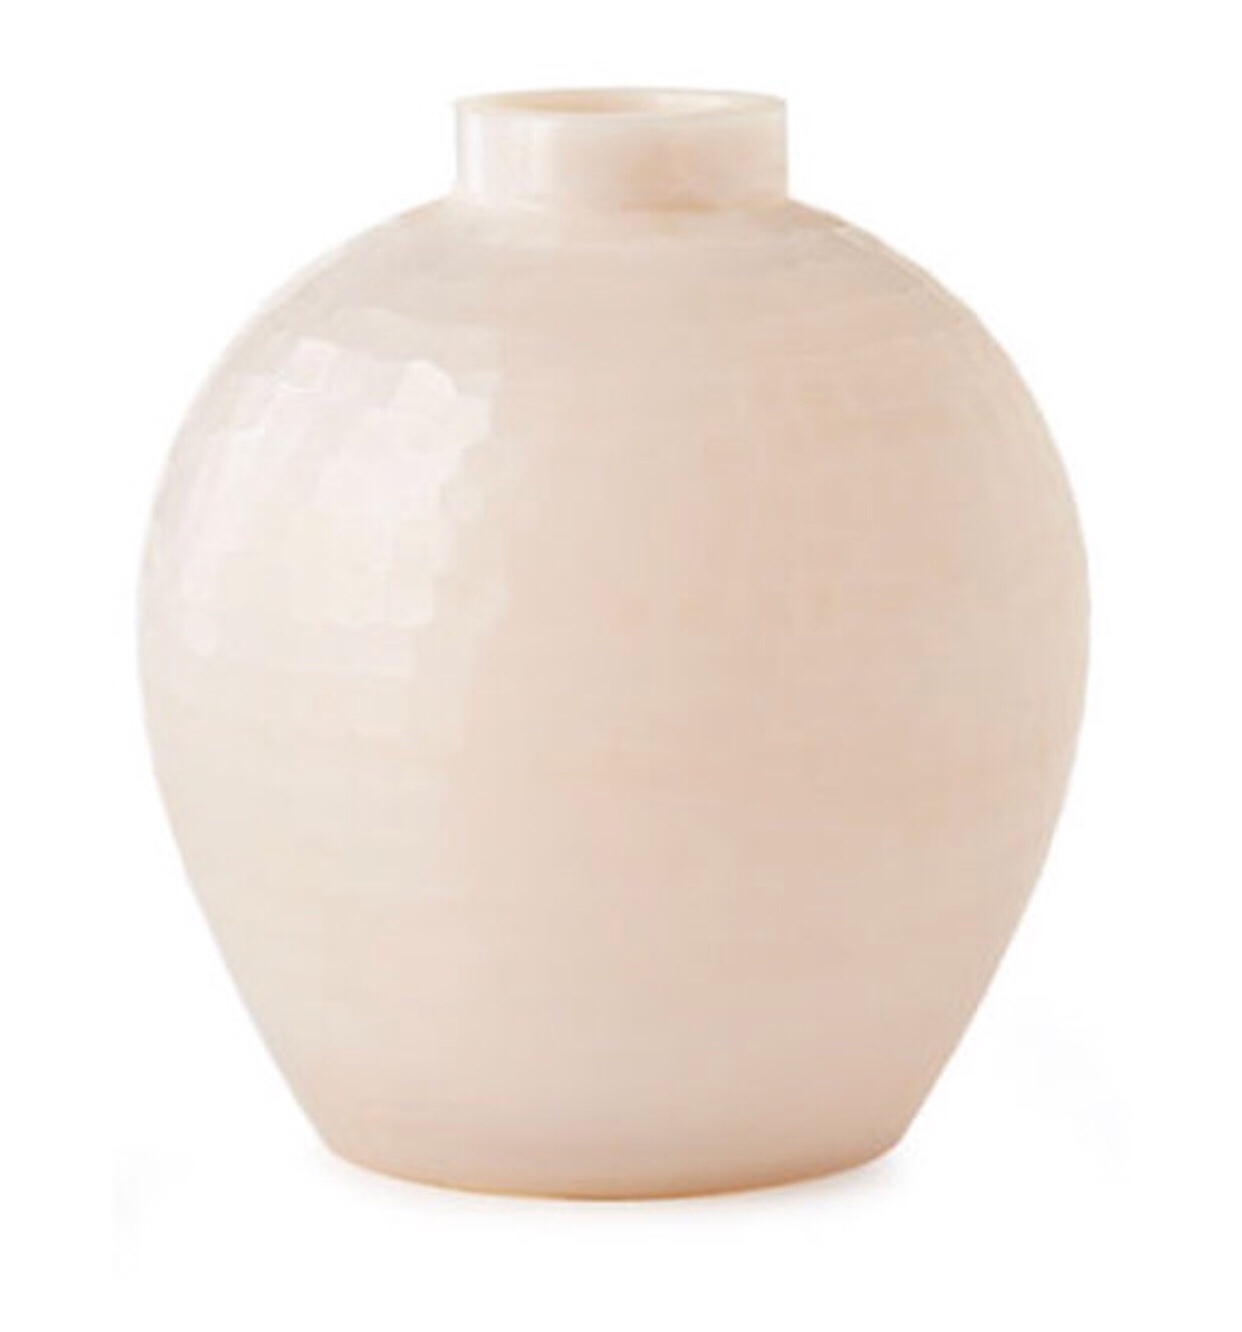
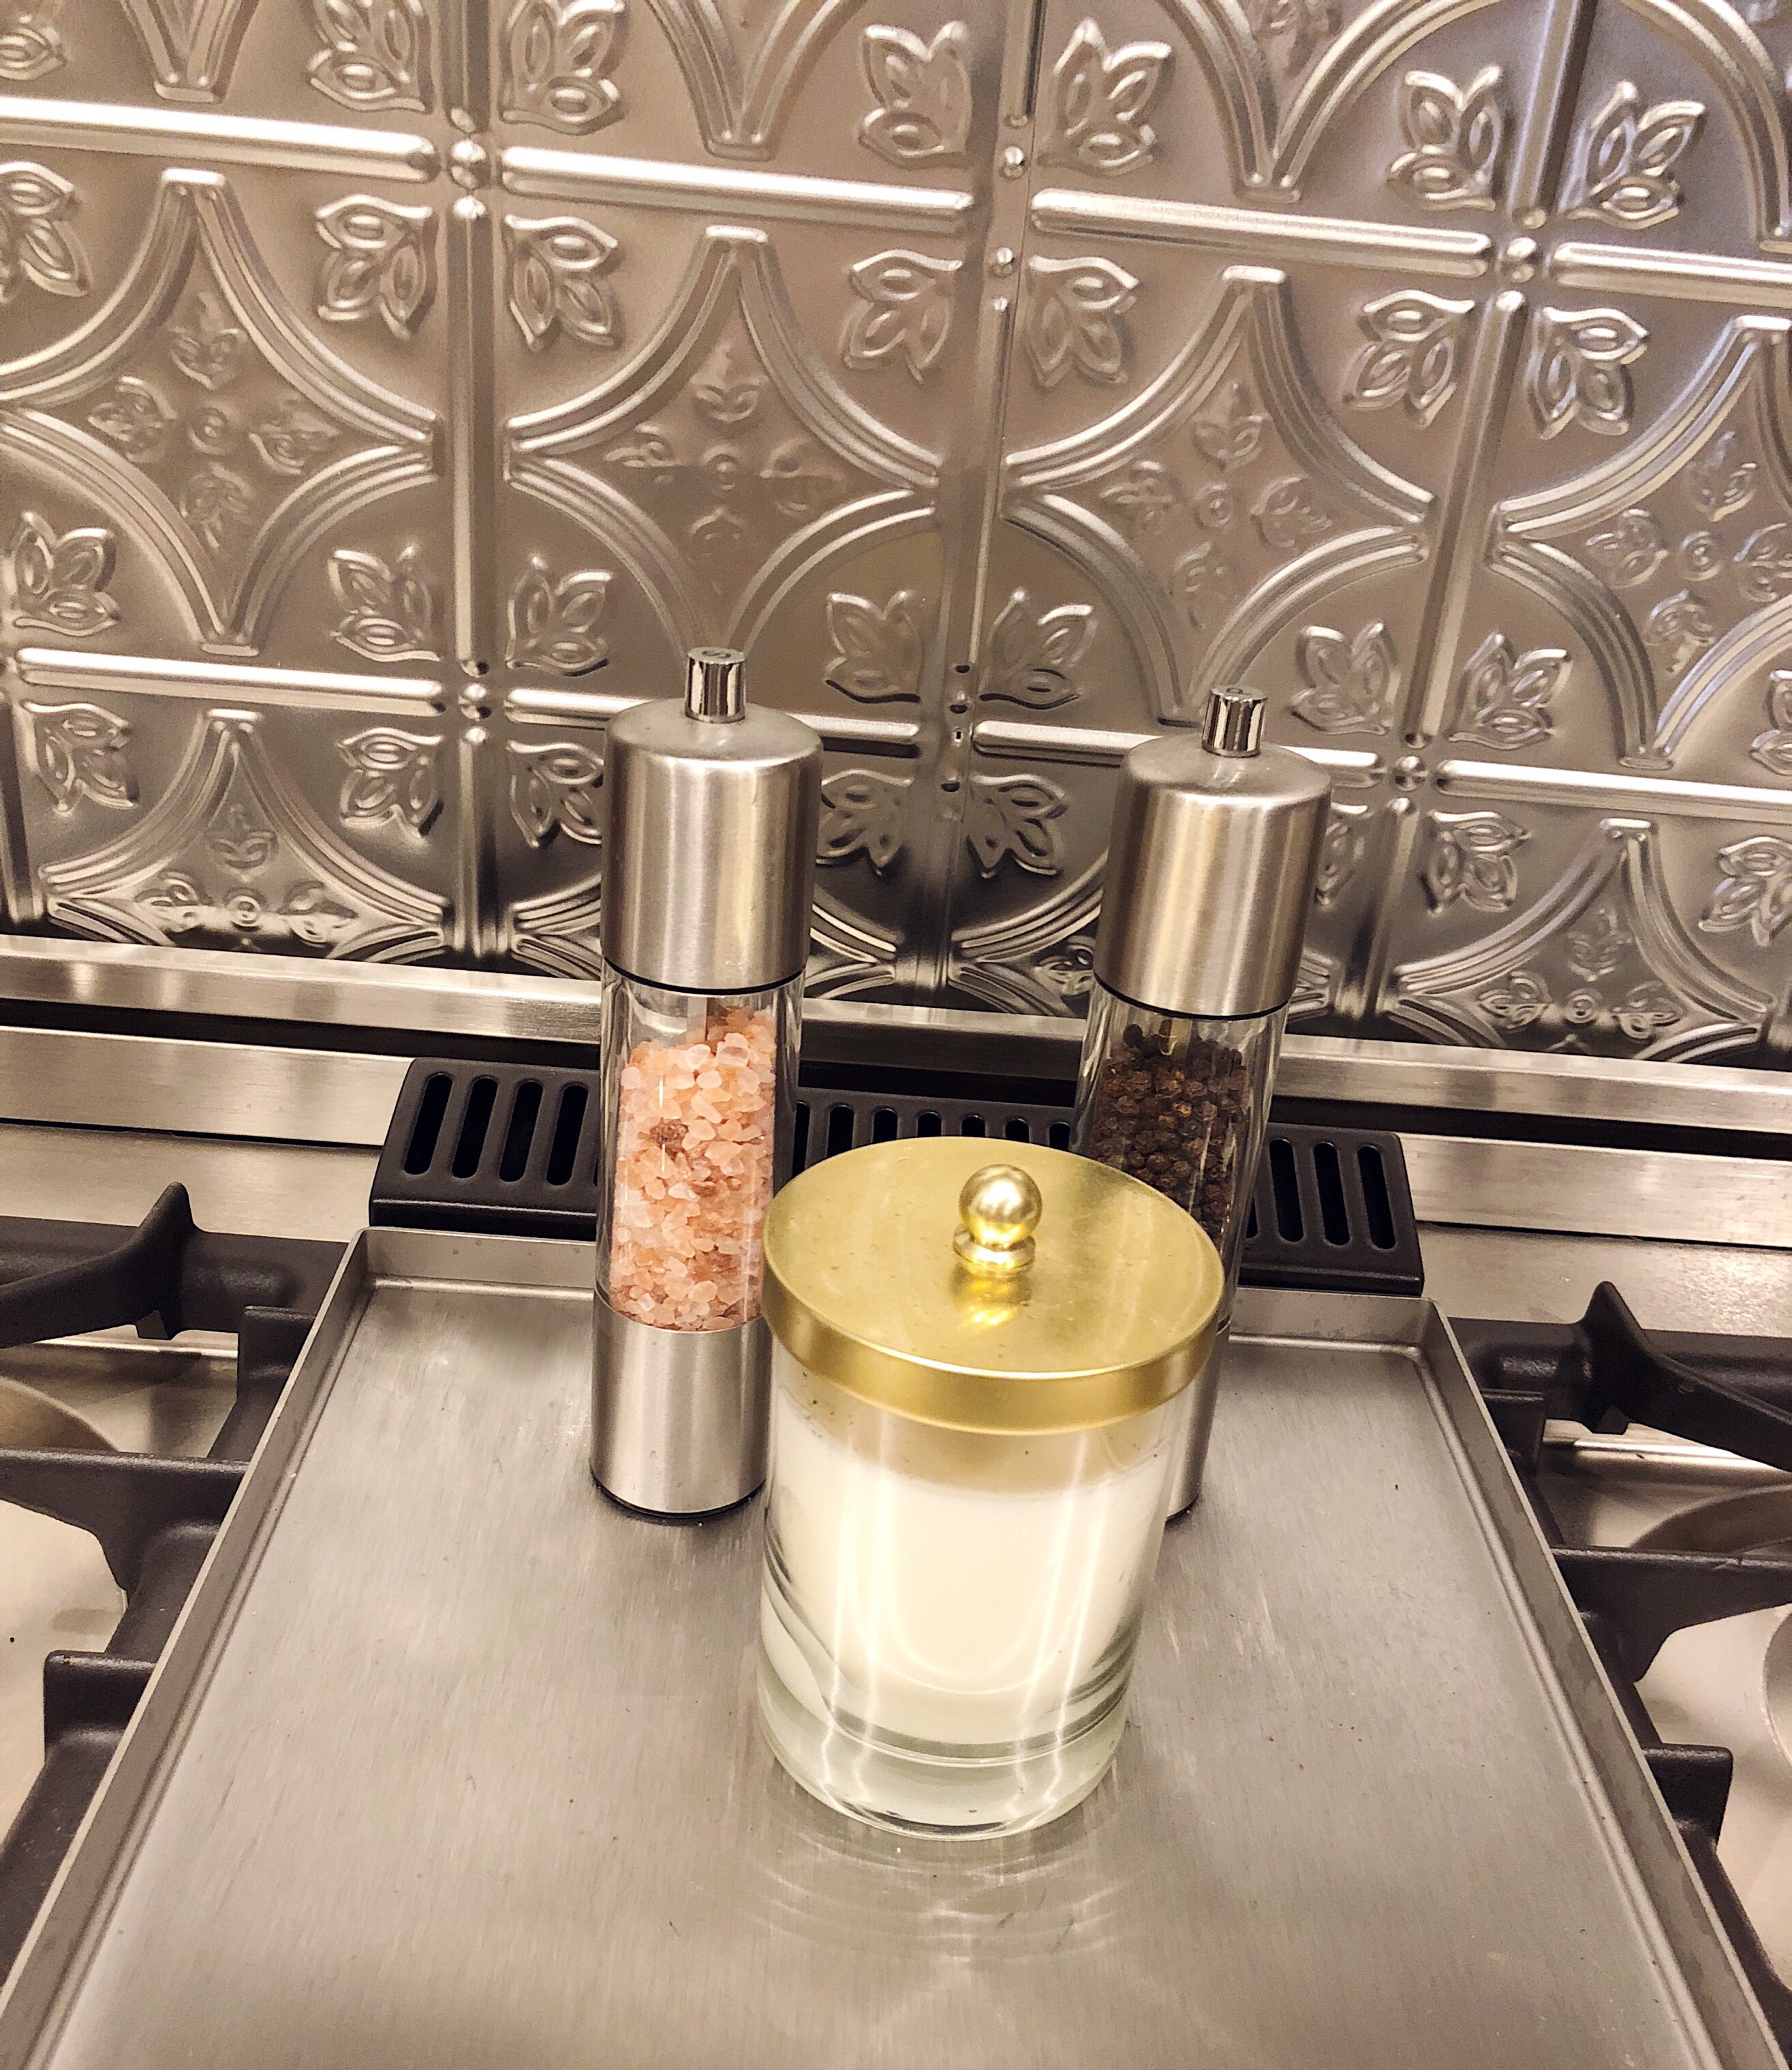
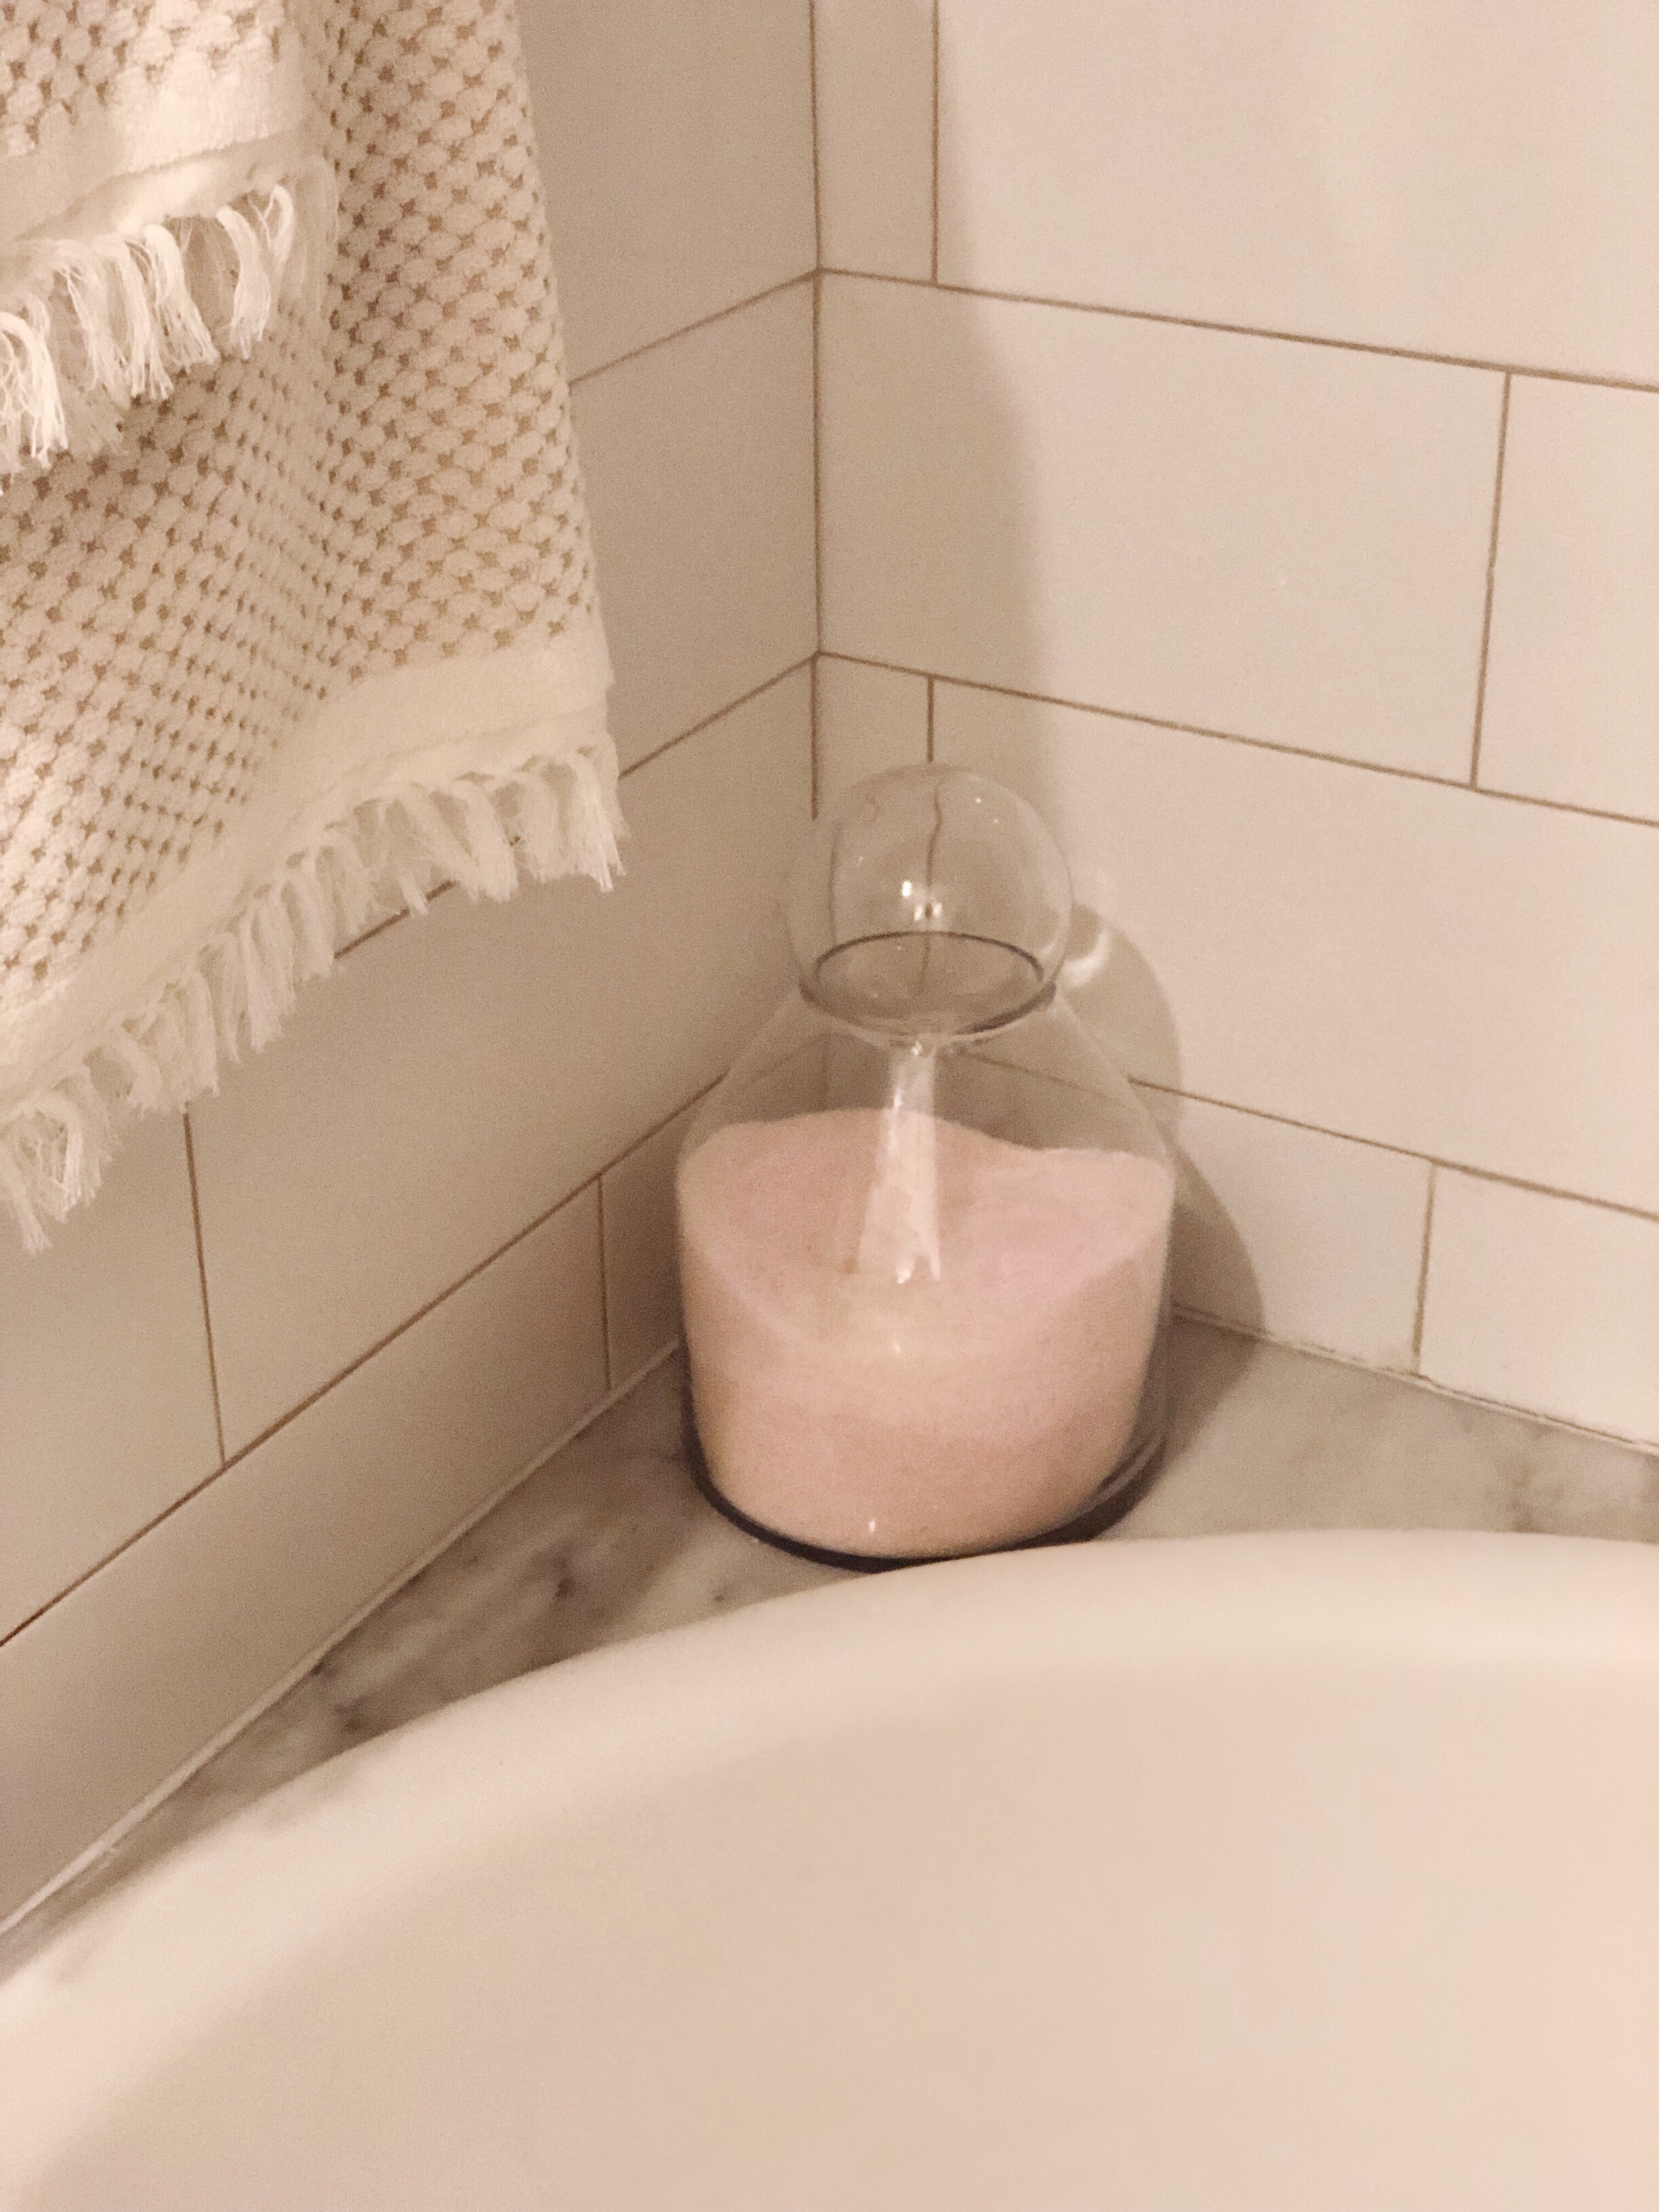
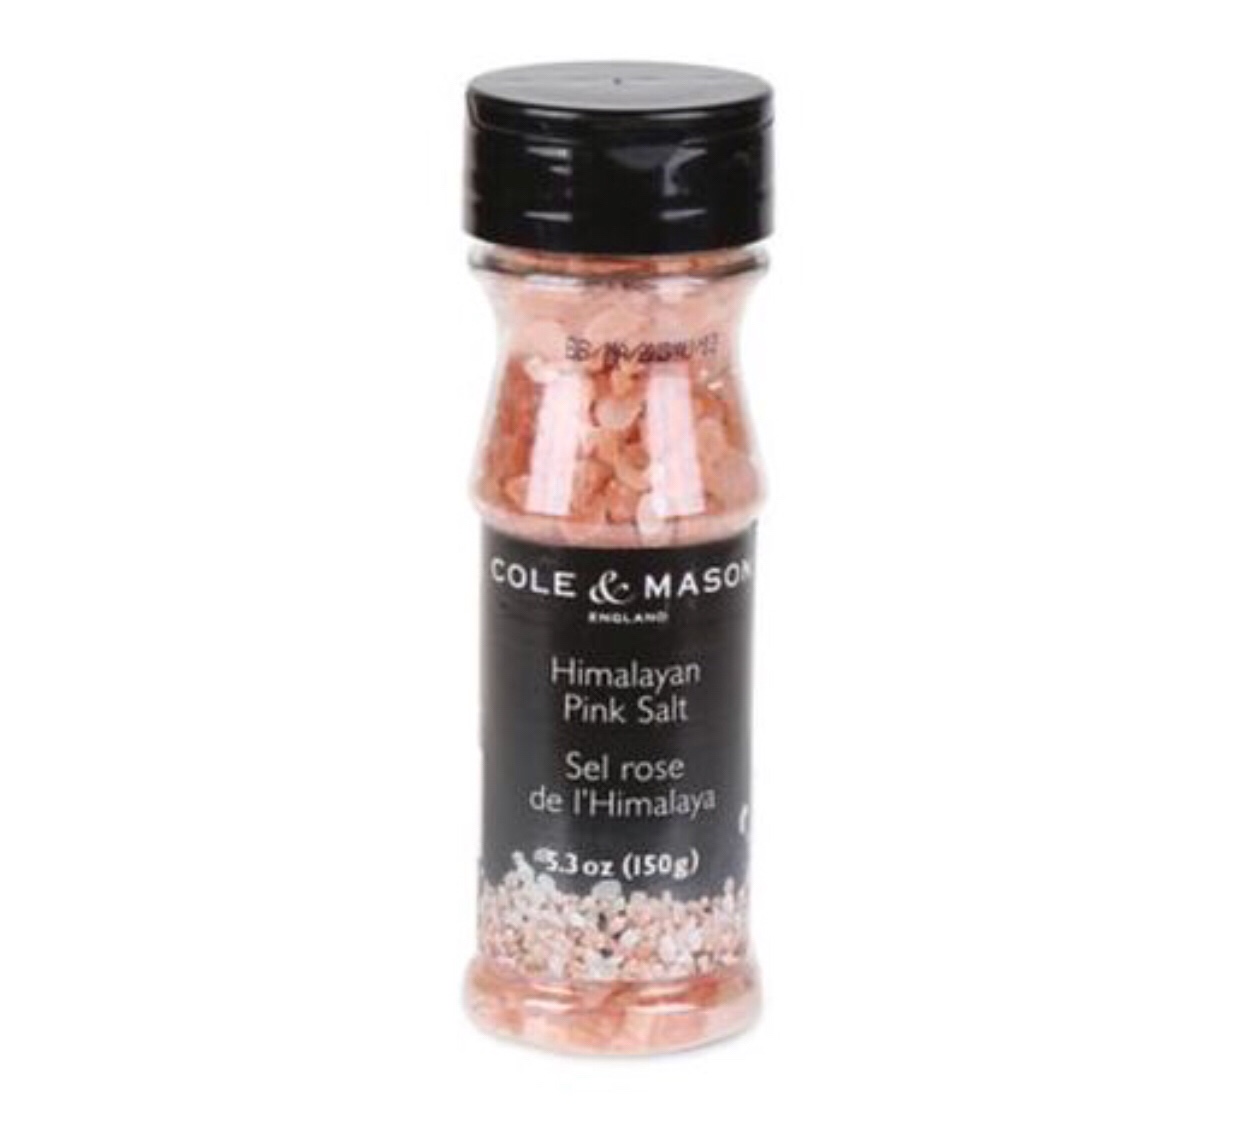
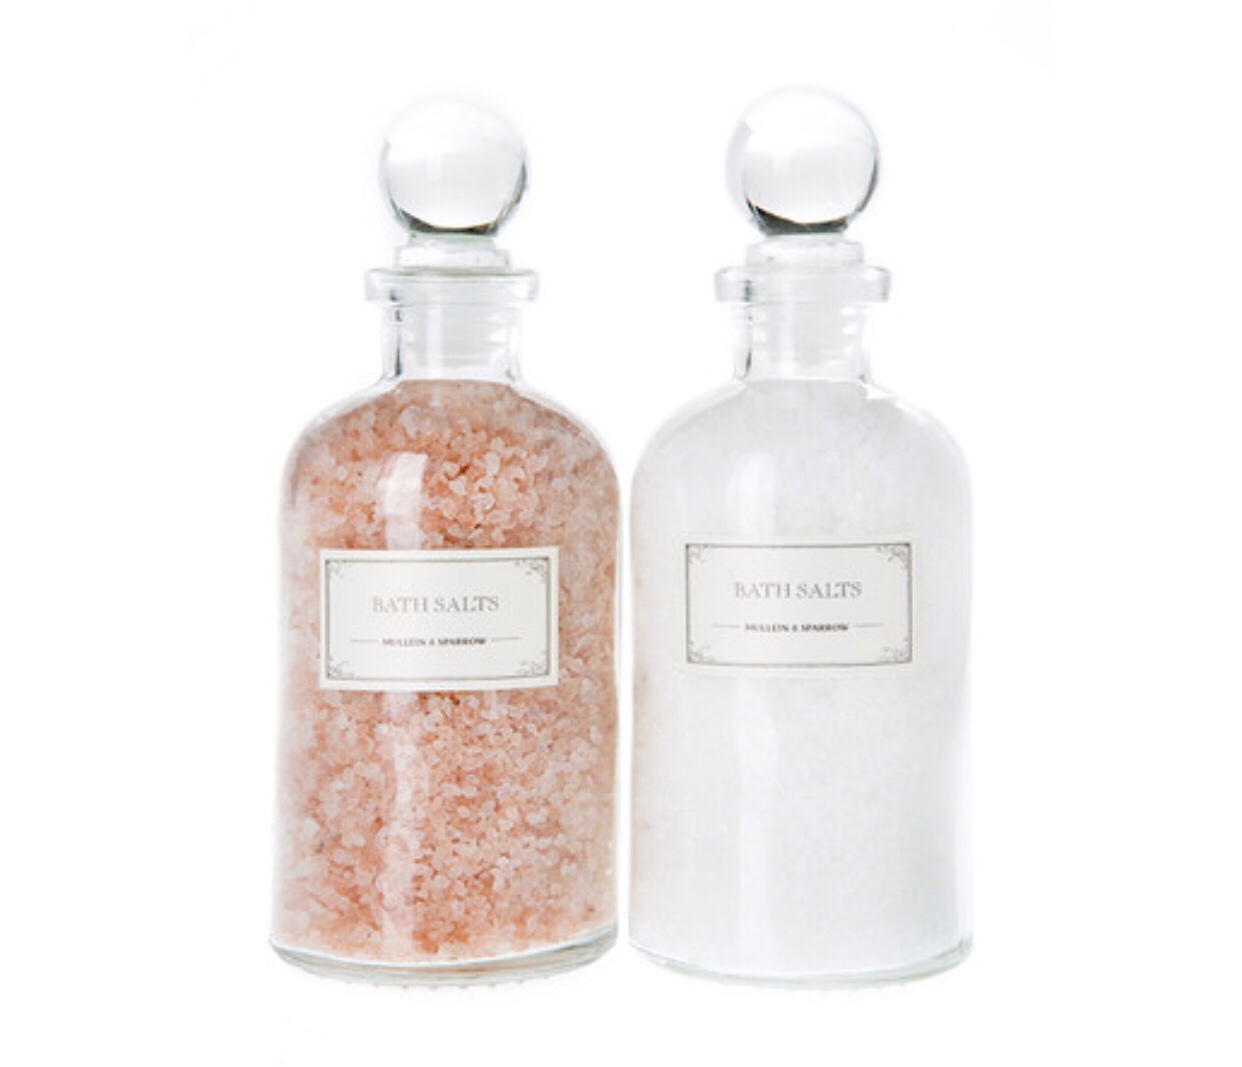
Subtle things like throw pillows, touches of pink flowers in numerous spots, a throw blanket, a blush vase or even a cute pink book thrown on the coffee table can bring it out in a room! I even have pink salt on display in the kitchen pahaha!
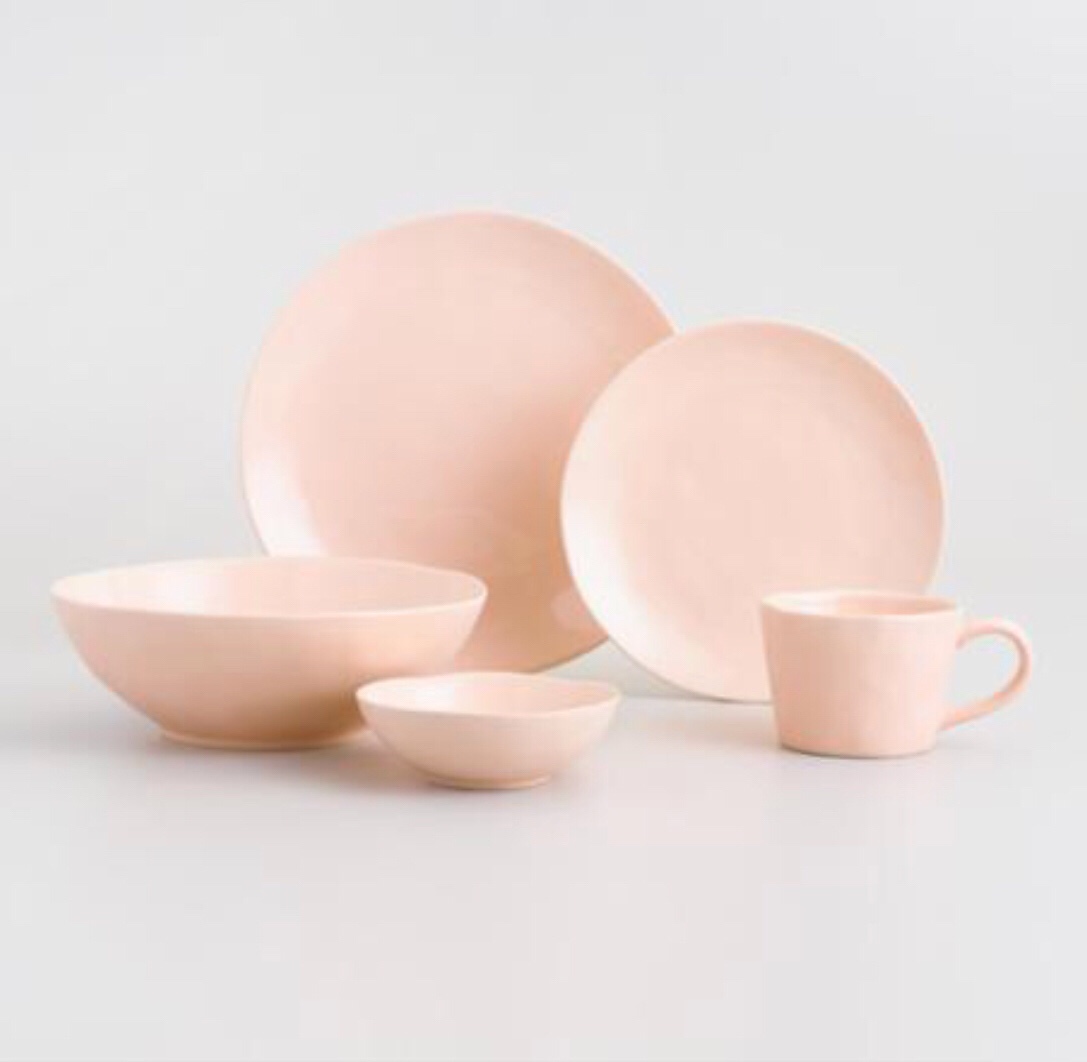
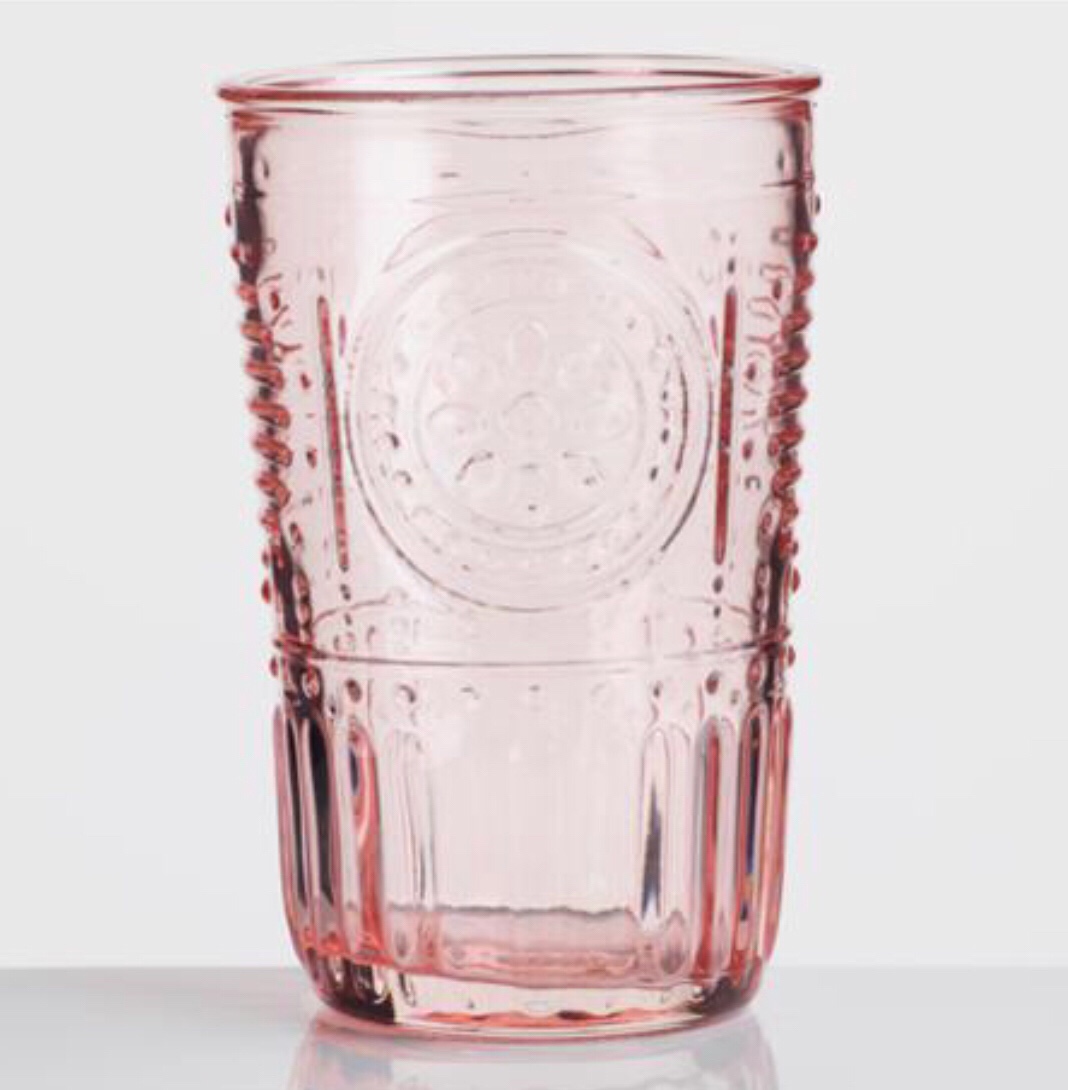
I know a lot of others have been wanting to incorporate this into their decor so I wanted to share some ideas with you guys that you can do and I’ve been doing around my own home!
I would absolutely LOVE to be able to incorporate a rug with some pink tones in the house, I absolutely know this is not happening however – a girl can dream right?! These pieces would make a BIG statement in a room for a reasonable price. These are things you won’t be sad you spent $200 on 2 years down the road if it goes out! An inexpensive rug or curtains can be easily replaced!
There ya have it! Great options to adding a little blush to ya life! Almost everything here is pretty inexpensive & will look great in any room! Need any blush decorating ideas? Shoot me a comment or email because I’d LOVE to help! This post was fun for me because I got to shop without really spending money 😜
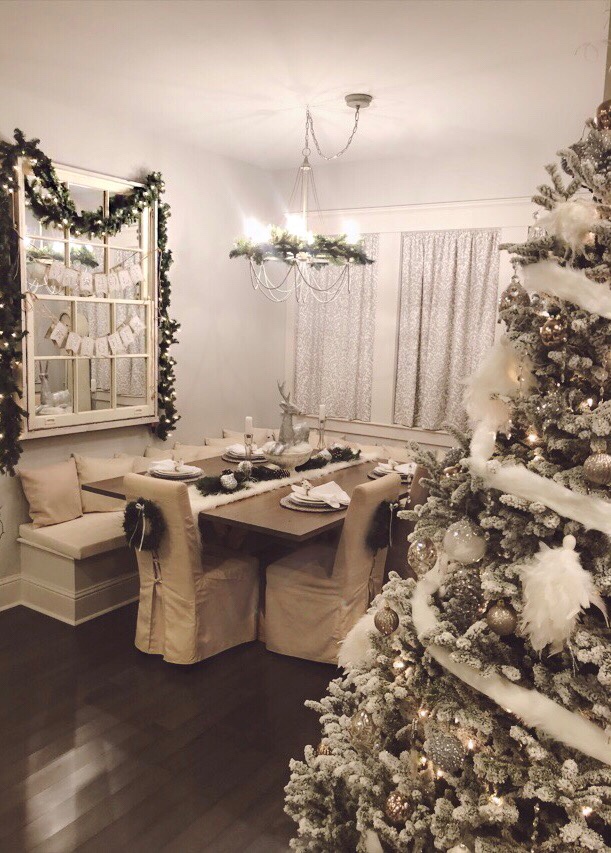
I love decorating for Christmas! I don’t know if I could think of anyone who would say different! Christmas decor is hands down the best! All the lights, and sparkles! The fresh (or faux) greenery – there’s no other holiday like it!
The thing I love about decorating for Christmas is that you can throw some lights or greenery around the house and it makes such a huge difference! It doesn’t really need anything else if you don’t have anything else, land honestly, sometimes I think the simpleness of Garland and some lights is the prettiest! Anytime I decorate, I have to say I’m more into the simplicity of things rather then throwing a billion over the top things up just to have them fill up the house!
Also, with decorating for any holiday, I always try to keep in mind all of my past years themes when shopping and only really purchase things that will work with them/add to them. This helps save you money and gives you more options for years to come. I like to think of shopping for any holiday decorations as an opportunity to add things that will go with anything in my collection – not to necessarily start a new collection. For the past few Christmas I have stuck with silver, gold, white, silver & gold and all white.
Now, if I wanted to make things look different from those past years I would maybe think to add some color! If I was in my all girl house still, BLUSH would have made a major appearance (but every time I turned to look at Ryan after saying something blush was cute in a store he looked at me like I had 3 heads)! Or, if the boys would have wanted to go for a more festive theme I would have thought to throw in some red ornaments in the mix of white. Maybe have a red bow as my Christmas tree topper and add small poinsettias through the house to add touches of the red theme in different areas!
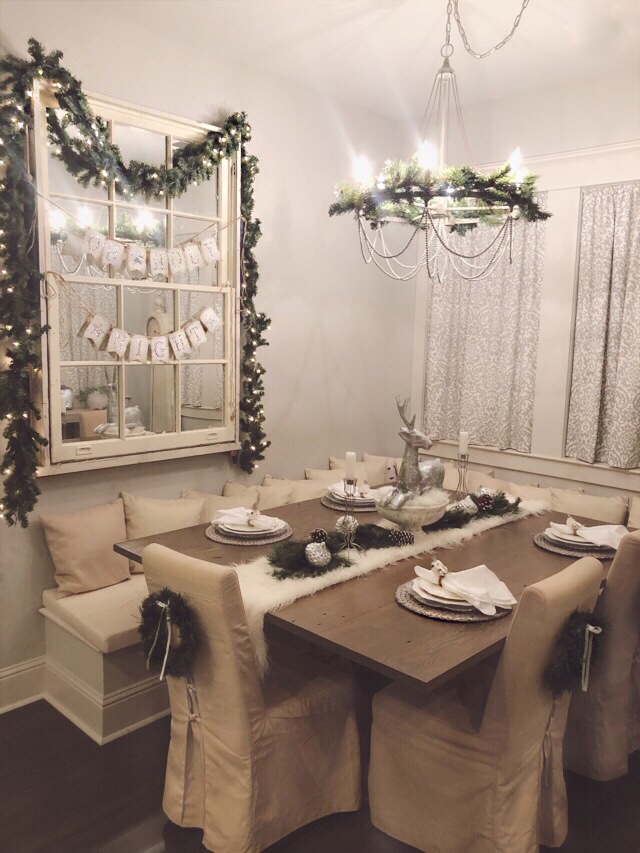
This year, Since it was my first Christmas moved into Ryan’s I tried to remain calm and told myself I wouldn’t go crazy and take over. Pahaha! Although I think Ryan’s maybe used to me taking over the decorating. And that he’s maybe okay with it! He goes along with it, so sometimes I think he doesn’t mind, either that or he gives up lol!! But anyway, I only realllllly went nutso in the dining room! So I figured I’d focus in on that for you guys in this blog post!
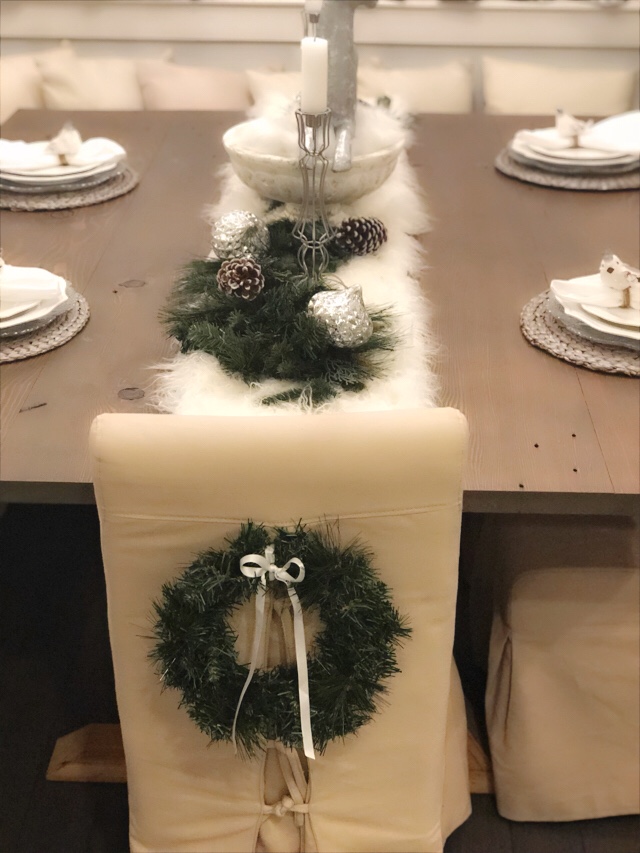
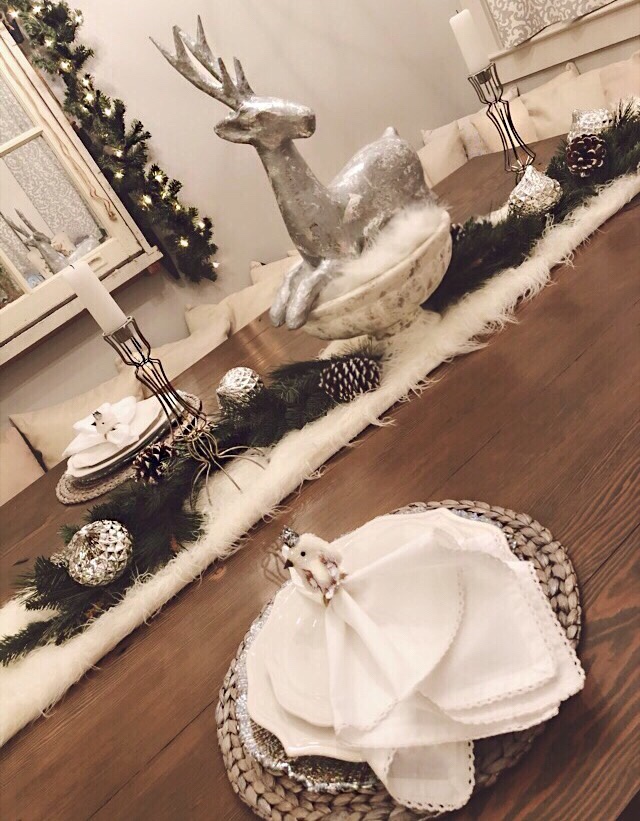
This year we went more with a silver and white theme. Keeping things clean and simple. I wanted the table to look elegant but not to done up! With the table I used the normal urn that stays there but replaced our fall pumpkins with a big silver reindeer! This little guy looks big and makes a statement but was cheaper being that he’s made of paper mache!
Once I filled underneath him with fur ornaments I found, this made for the highest point on the table. I knew from here that I would have to even the feel out with something that would bring the hight down a bit on each side! Since the table is very large you can’t have just one tall thing in the center.
As soon as I got to brainstorming I knew that candlesticks would be perfect to incorporate. They would be a great way to fancy it up and keep the hight of everything proportional. I found these pretty wire ones, but they were gold so I sprayed them silver with a mirrored glass spray paint!
I added touches of mercury glass and fur. The fur table runner, I. am. obsessed. with! I also added snow tipped pinecones. I laid these staggered over garland that was intertwined through the candle sticks!
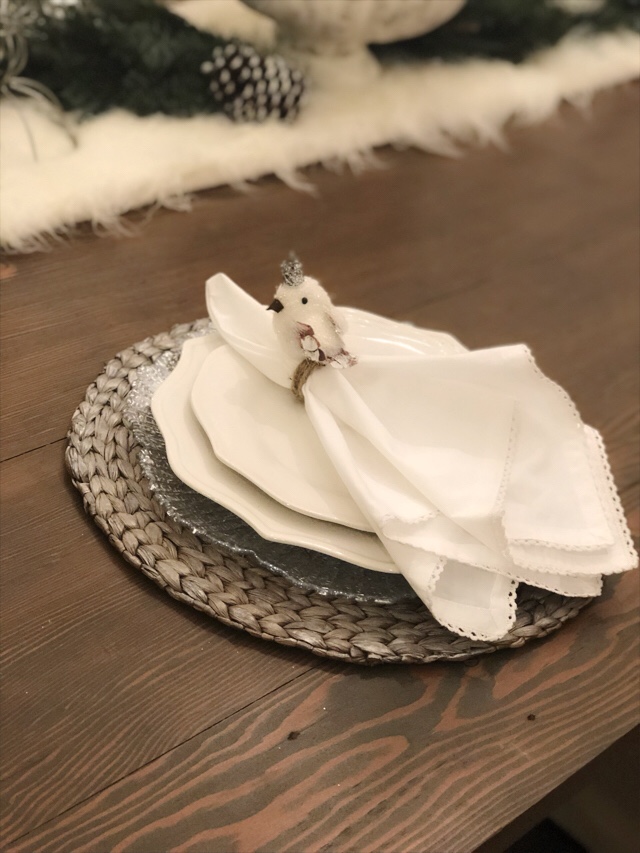
My place setting are all from pier one, they have the best stuff! Depending on what’s going on I add or remove plates for more laxed or fancy looks. I found these cute little birds that had clips on them, I got the idea of using jute twine as a napkin ring because I wanted the birds to stand out, not the napkin ring!
For the chairs I placed small wreaths that I got from hobby lobby! I tied a small thin white bow on them to tie in the white from the napkins and table runner. The trick is to make everything flow.
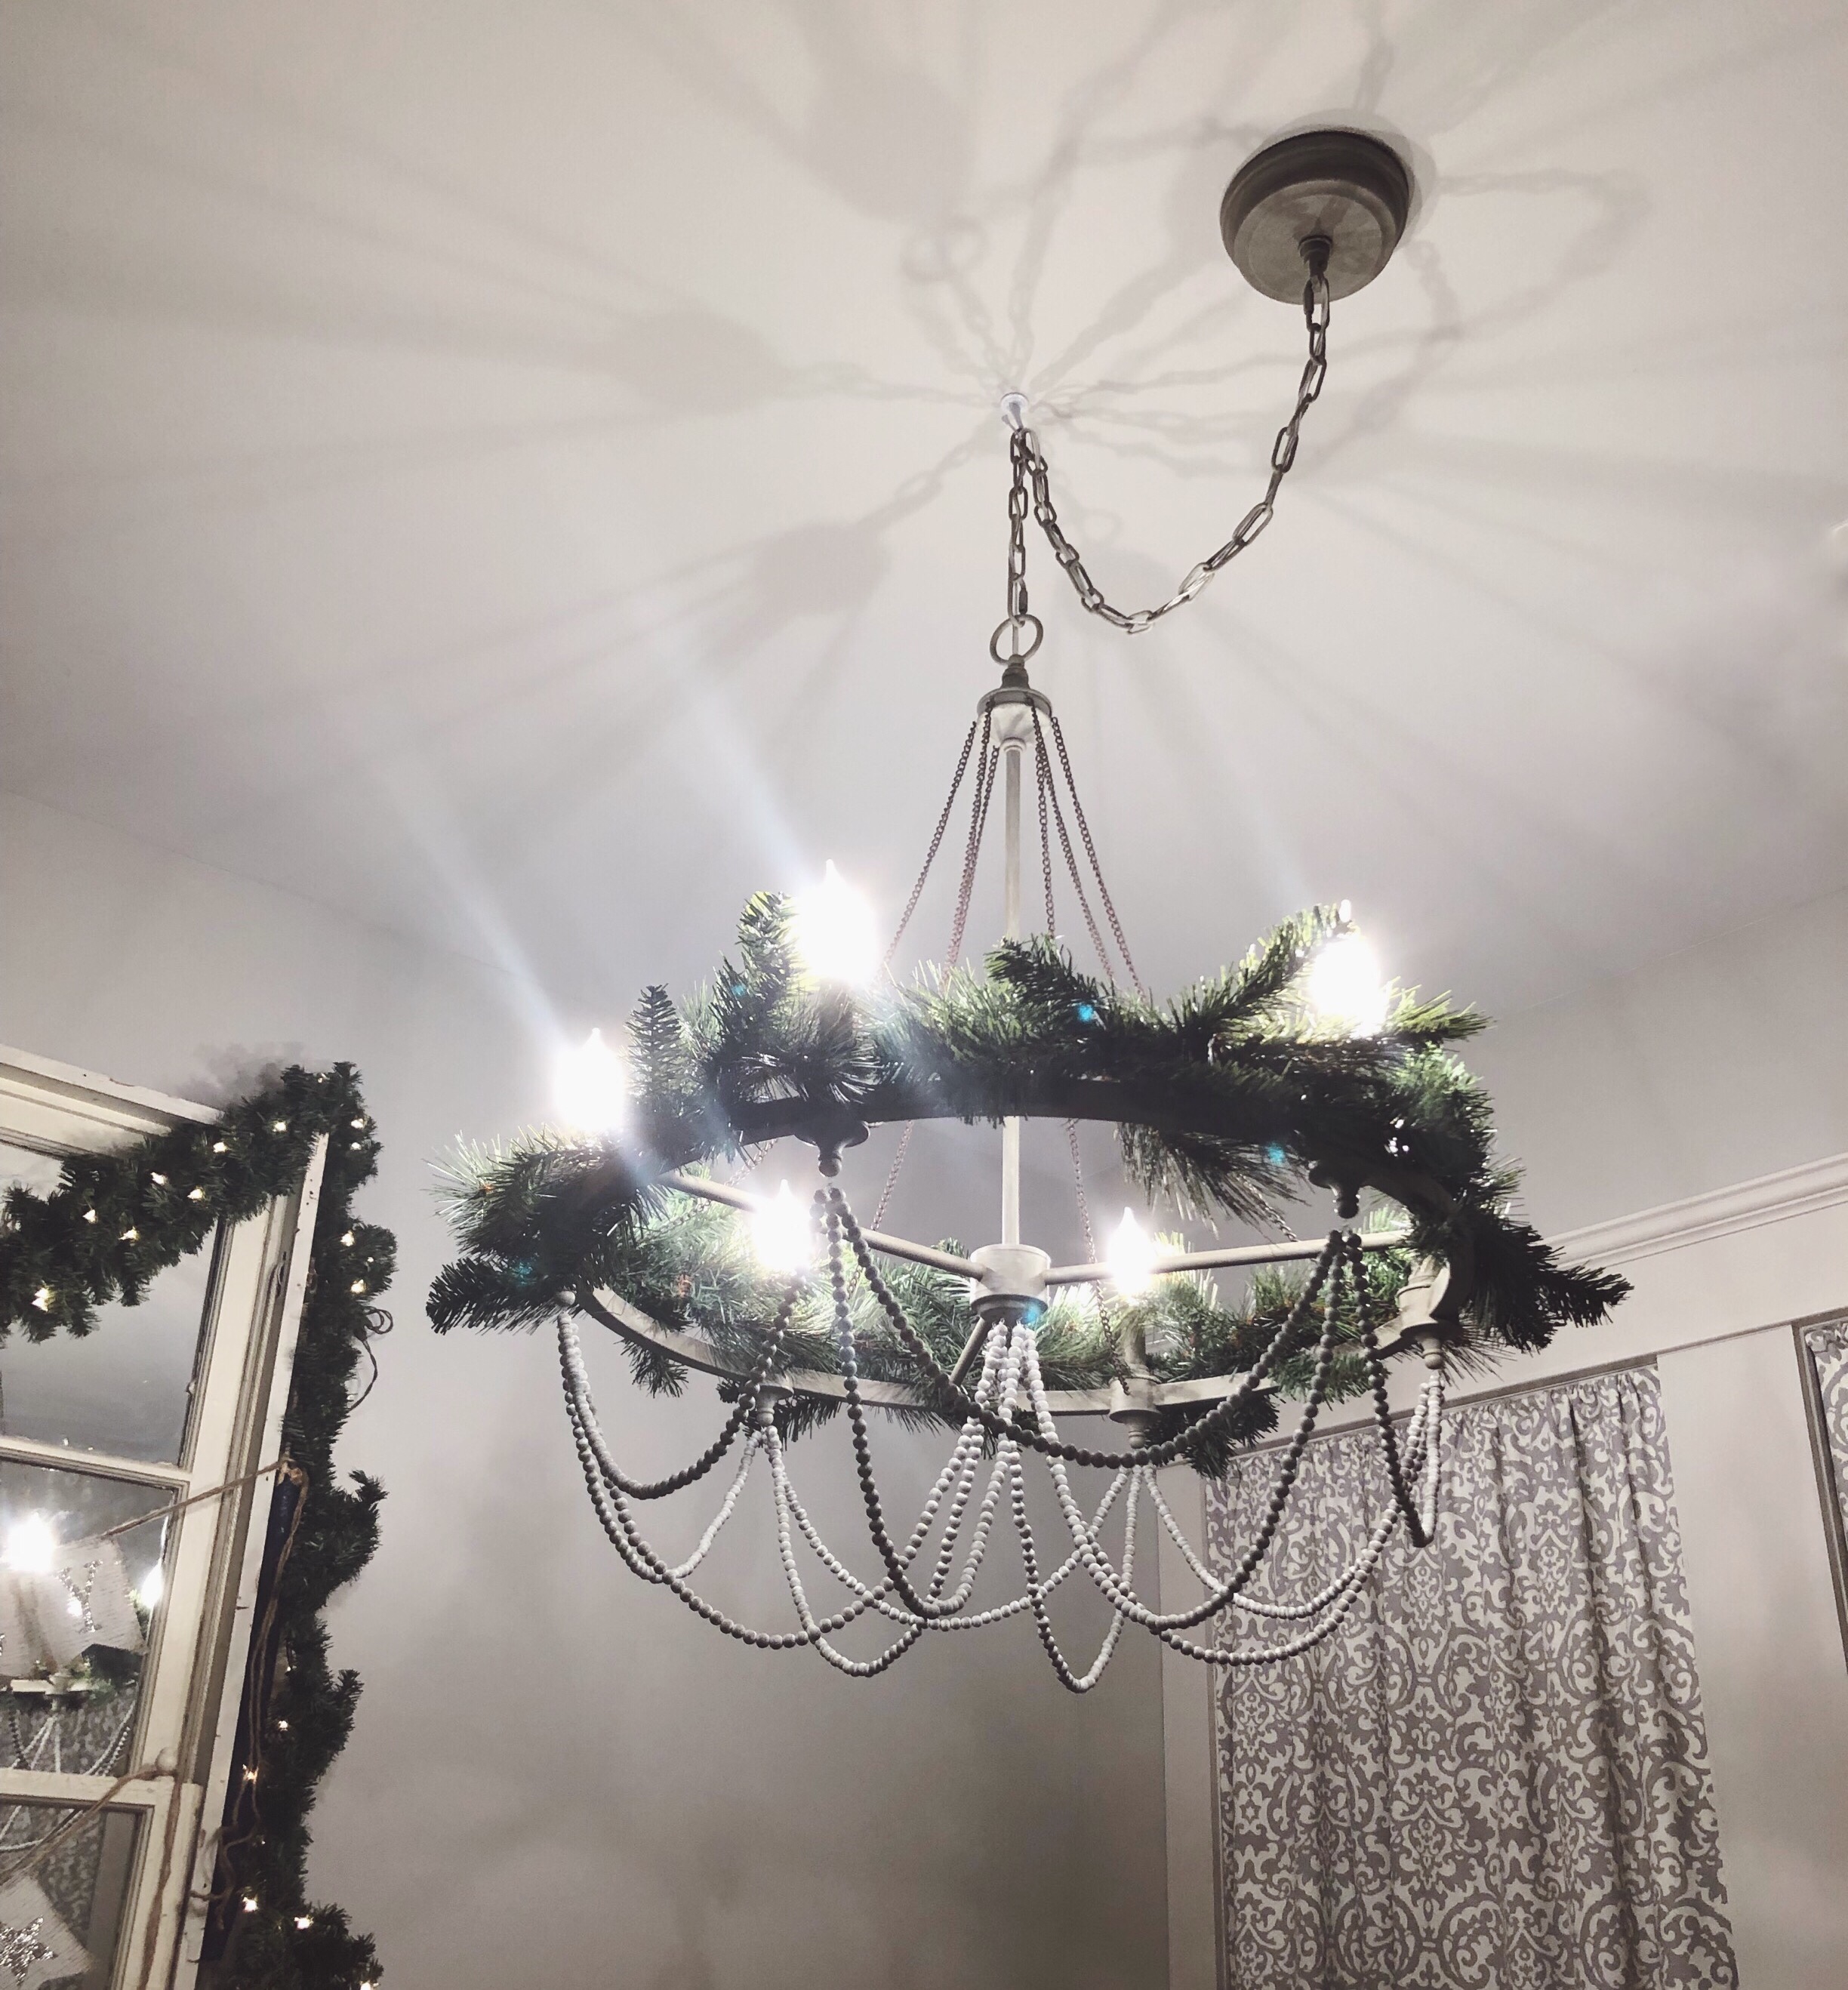
For other greenery touches, I placed faux garland springs around the top of the chandelier. This is something you don’t always see so I thought it looked really cute and different!! Again, touches like these are so simple and inexpensive.
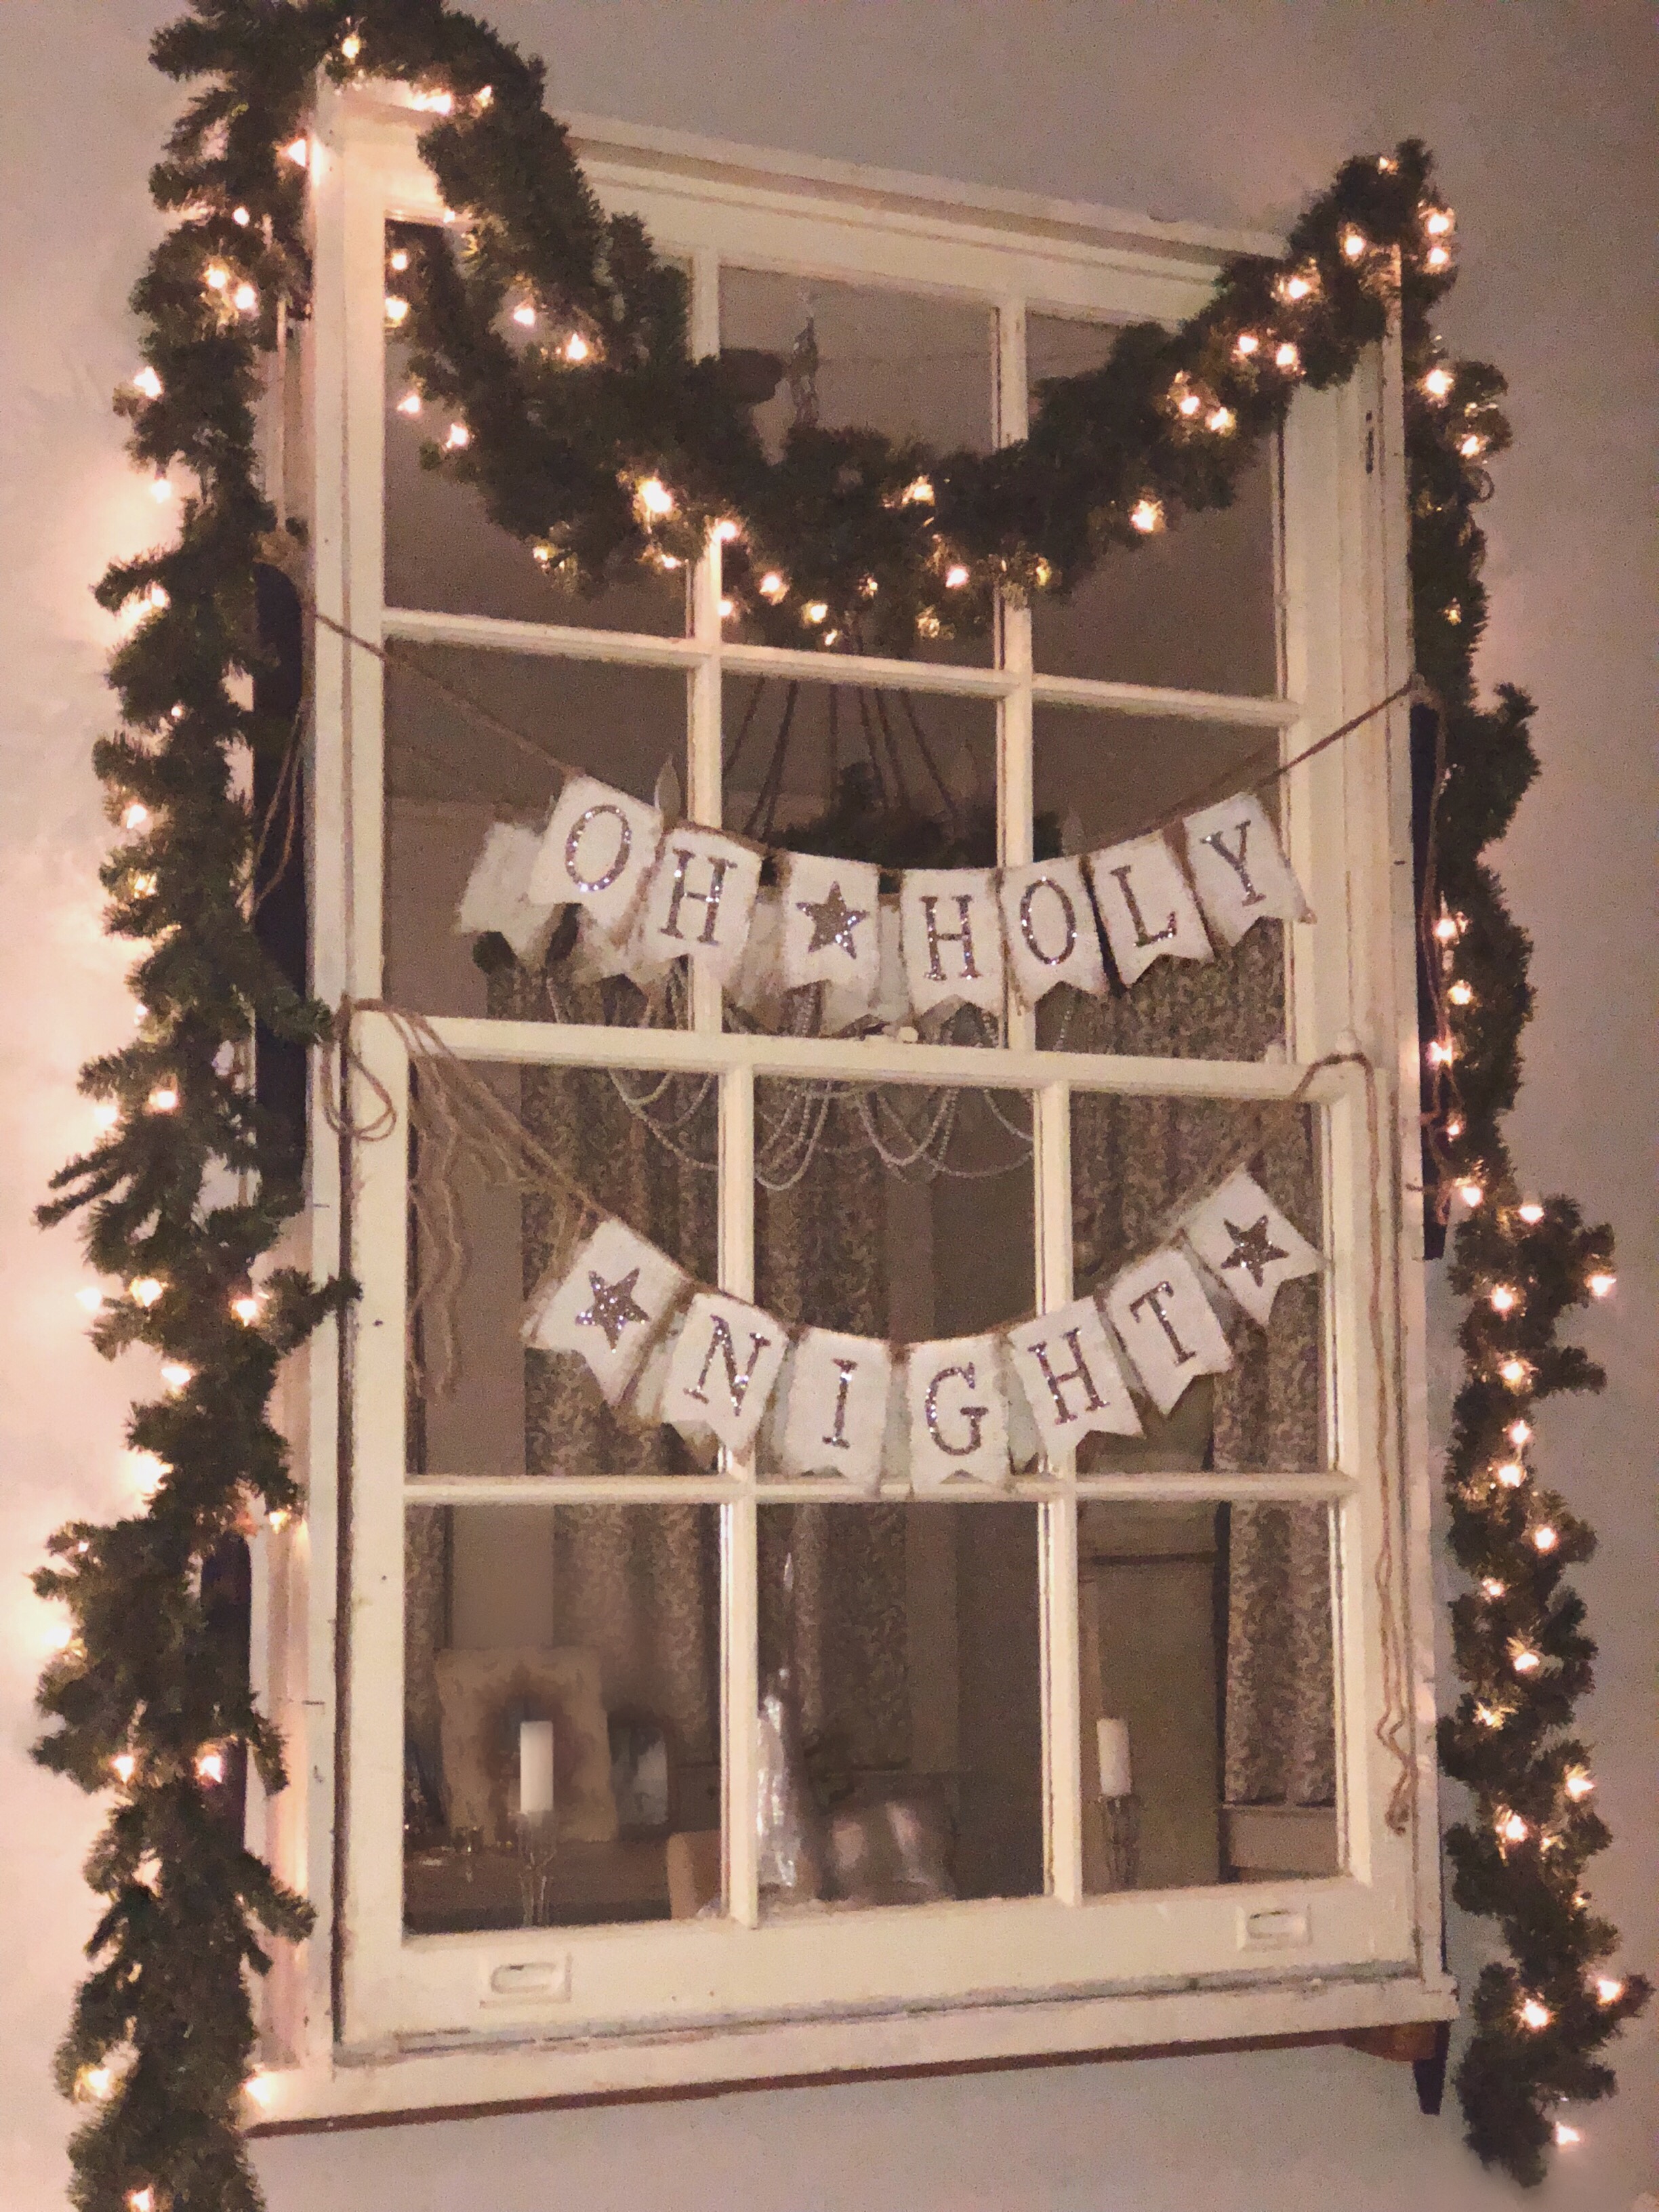
Ryan also has this huge old window on the wall behind the table that he got from an old uptown house he worked on. He changed the glass out with mirrors. This is something that’s a great idea at any time to give a big empty wall a special touch while still making it simple! I placed garland around this and draped one of my favorite little Christmas goodies on it! I got this cute banner from Etsy a few years ago and I always love how it looks!
Hope this post can give you guys any last minute Christmas decor inspiration since I know I got around to it a little late in the game. However these are always great things to keep in mind for next year, and some of the things in this post will go on sale I’m pretty sure once Christmas is over! It’s always good to stock up for next year while the gettin’ is cheap pahaha!
I am linking a ton of products you can use to re-create this look in the 2 sliders below! Scroll though and click the things you like to be directly taken to the page!
Hey y’all! Yay for Wednesday! Let’s make today DIY Wednesday! Pahah maybe I should make that a thing here on the blog every Wednesday!?
First week of December marks the start of Christmas blogging! I’m thinking of sharing lots of recipes with you guys, gift lists, clothes & lots of DIY for around the house!
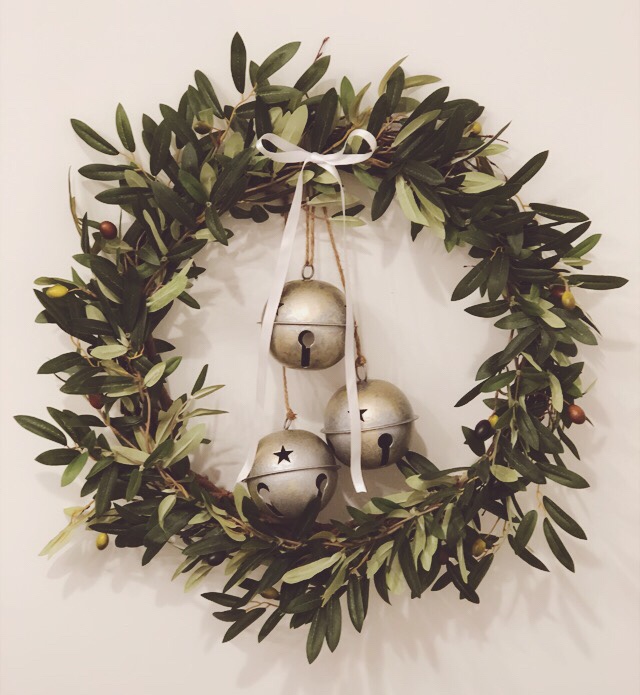
I did these wreaths a few weeks ago but I am finally sitting down to blog about them! I made two because the house has double doors, they look so cute! Id post a picture but Ryan FINALLY broke down and said he would paint the door a more neutral color, so, I am waiting till that happens to share with you guys! Any of my girlfriends know this makes my day and I am extremely excited paahaha! Its the little things right?! Ry thinks I am insane but, I love him for always trying to go along with my craziness! anyway, getting off subject here.. back to it! Blogging about DIY stuff is kinda a pain in the booty because you have to document everything and then go find all the links to similar stuff too! But it’s worth it if y’all enjoy it!!
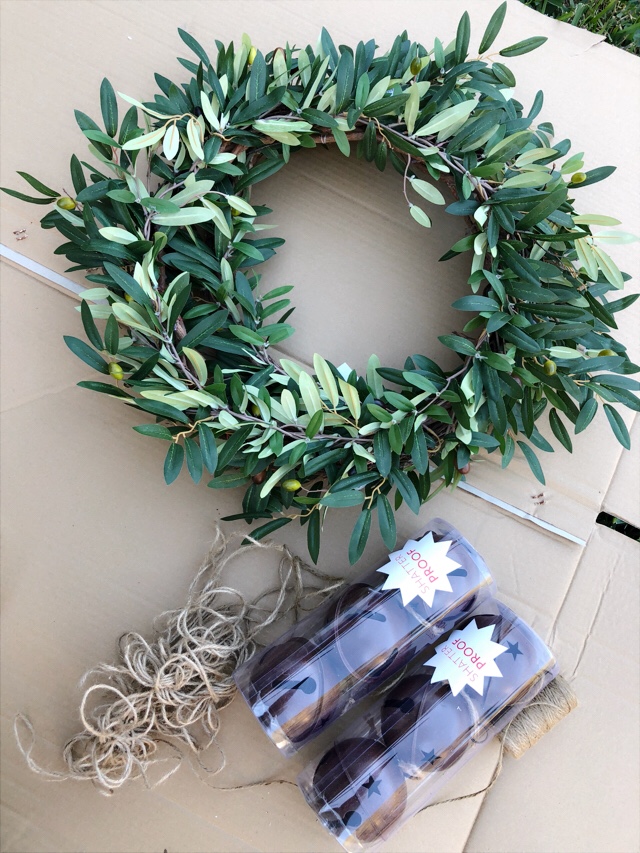
Here’s a list of things you will need, I will link the exact wreaths I used but you could obviously use whatever kind of wreaths you want/have!
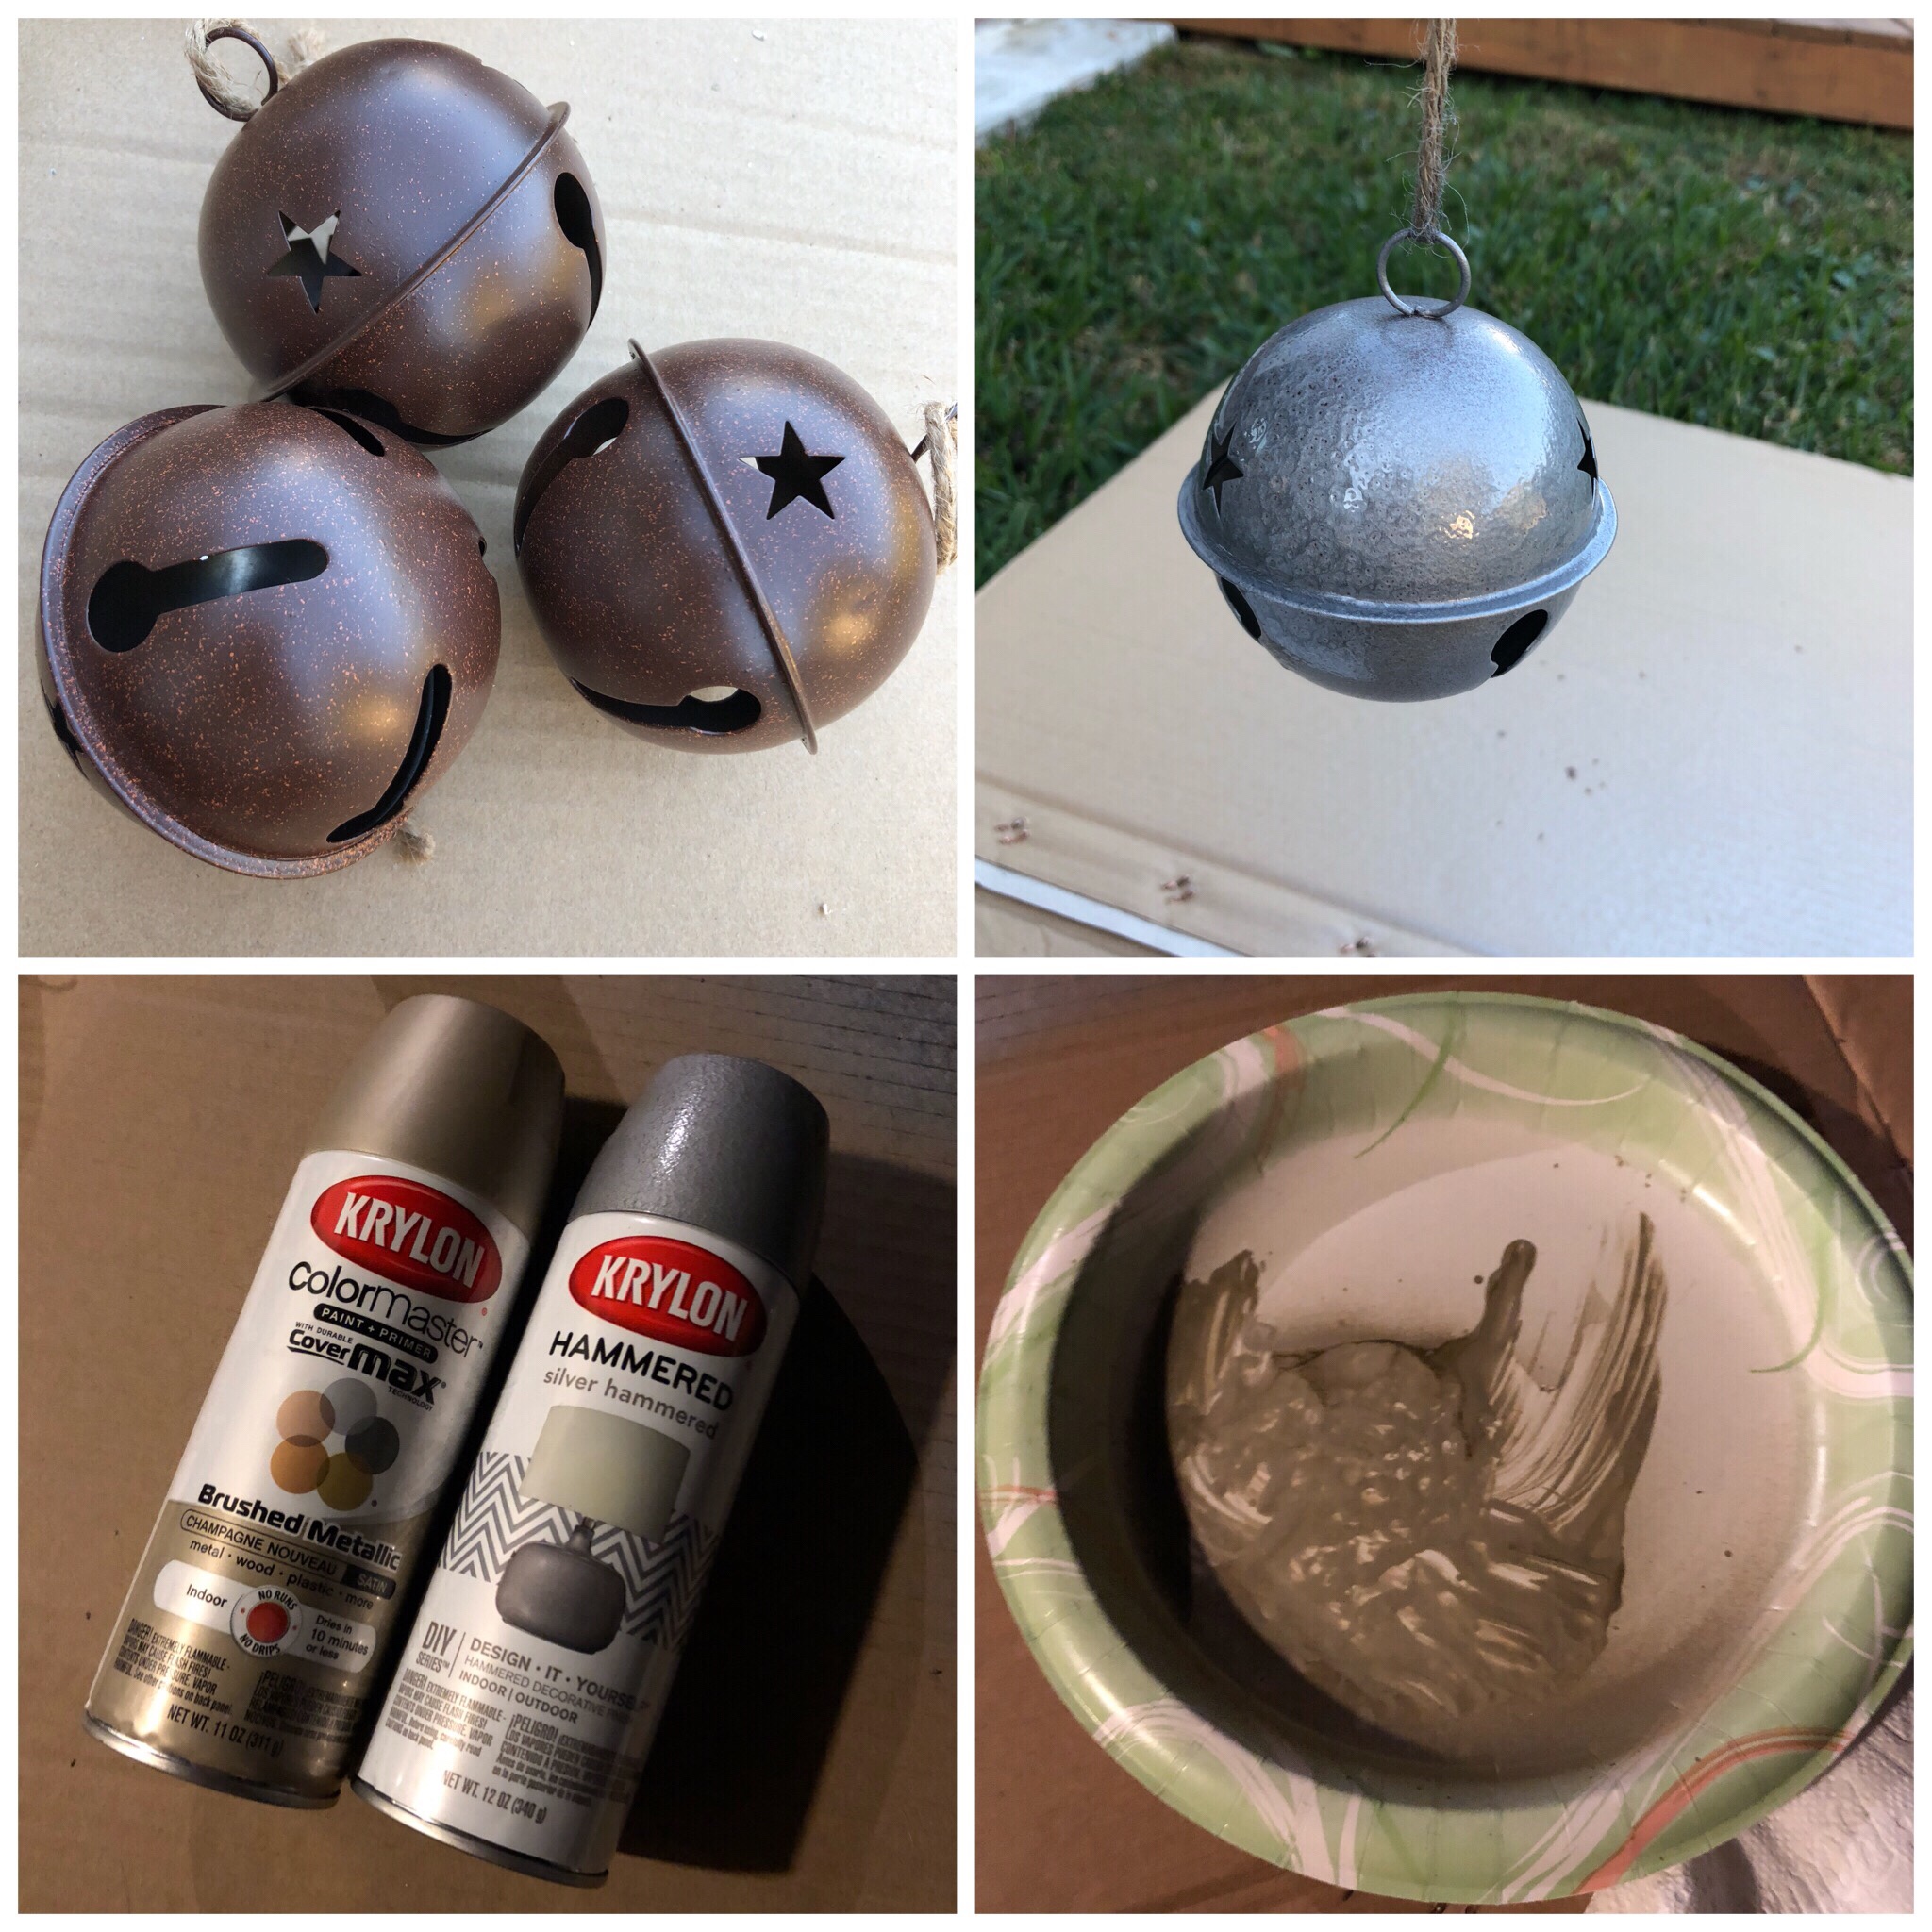
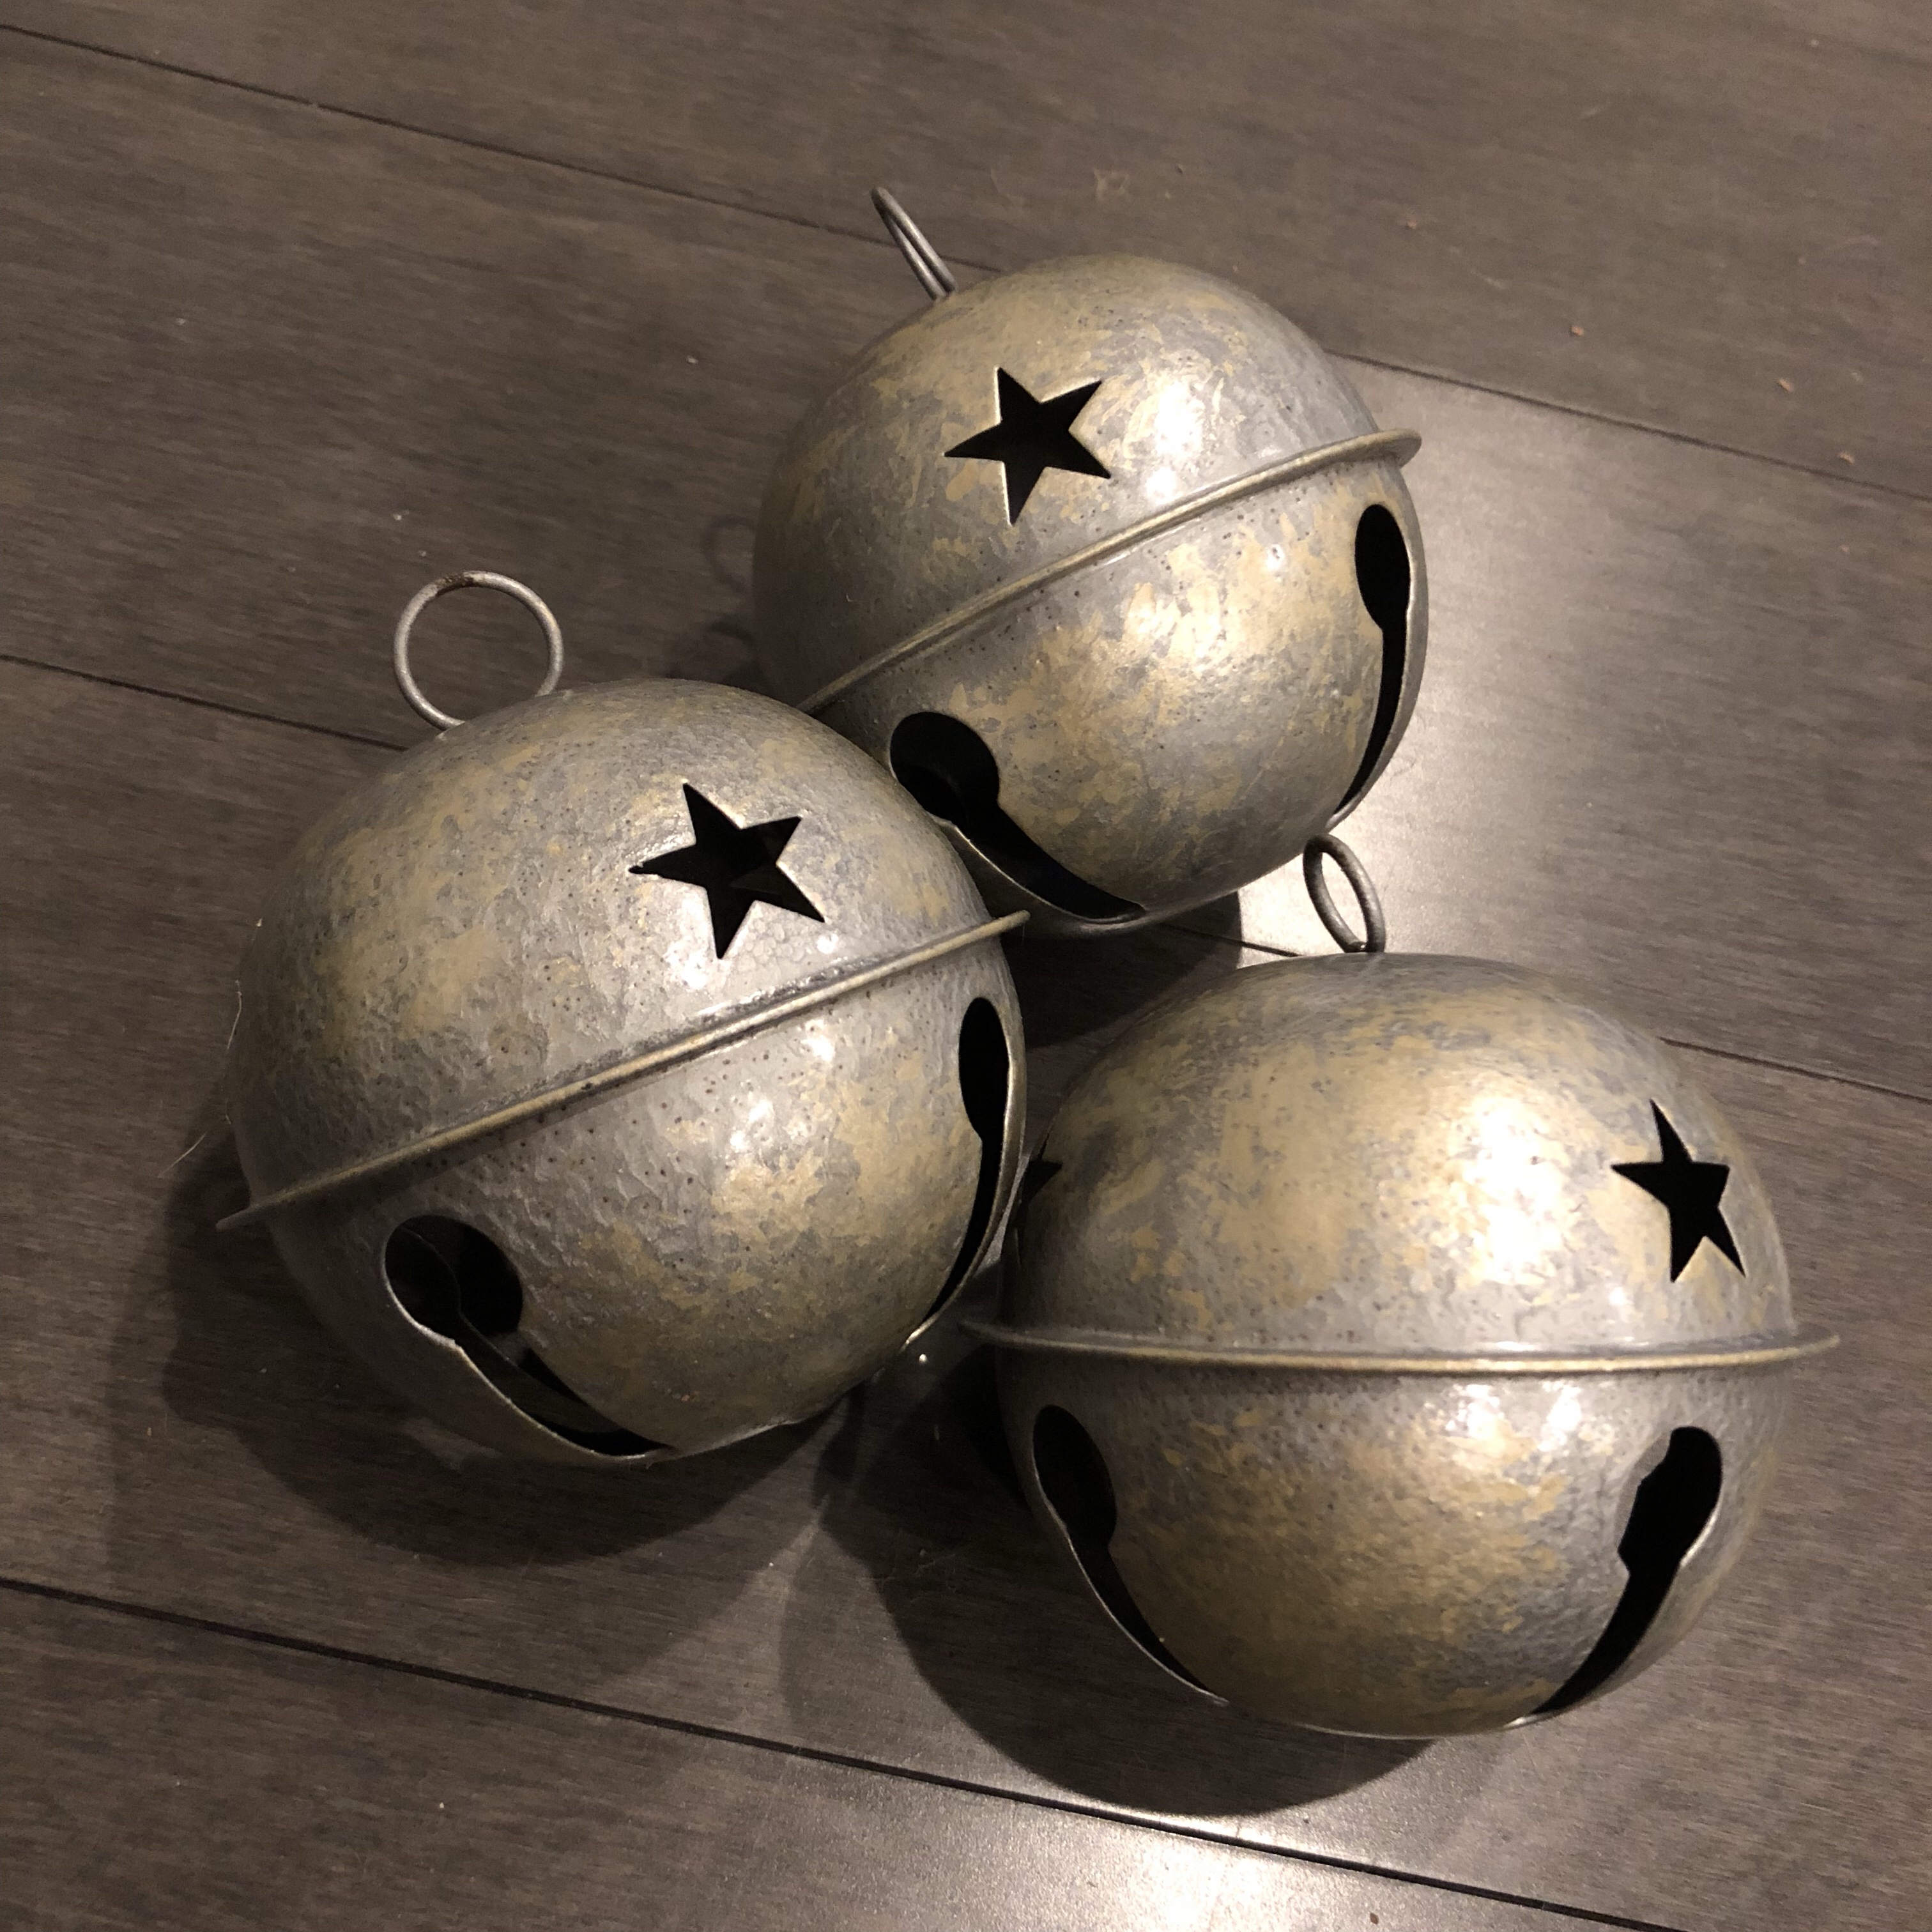
So first, I had to change the color of my jingle bells! I sprayed them all with the silver hammered spray paint, literally hung them on branches in the back yard and let them dry for a few hours & then Ryan had the idea of spraying the brushed metallic champagne color on a plate and using a plastic bag balled up to blot the bells and give them a worn look. We rolled with that idea because it looked better then my sponge idea haha!!
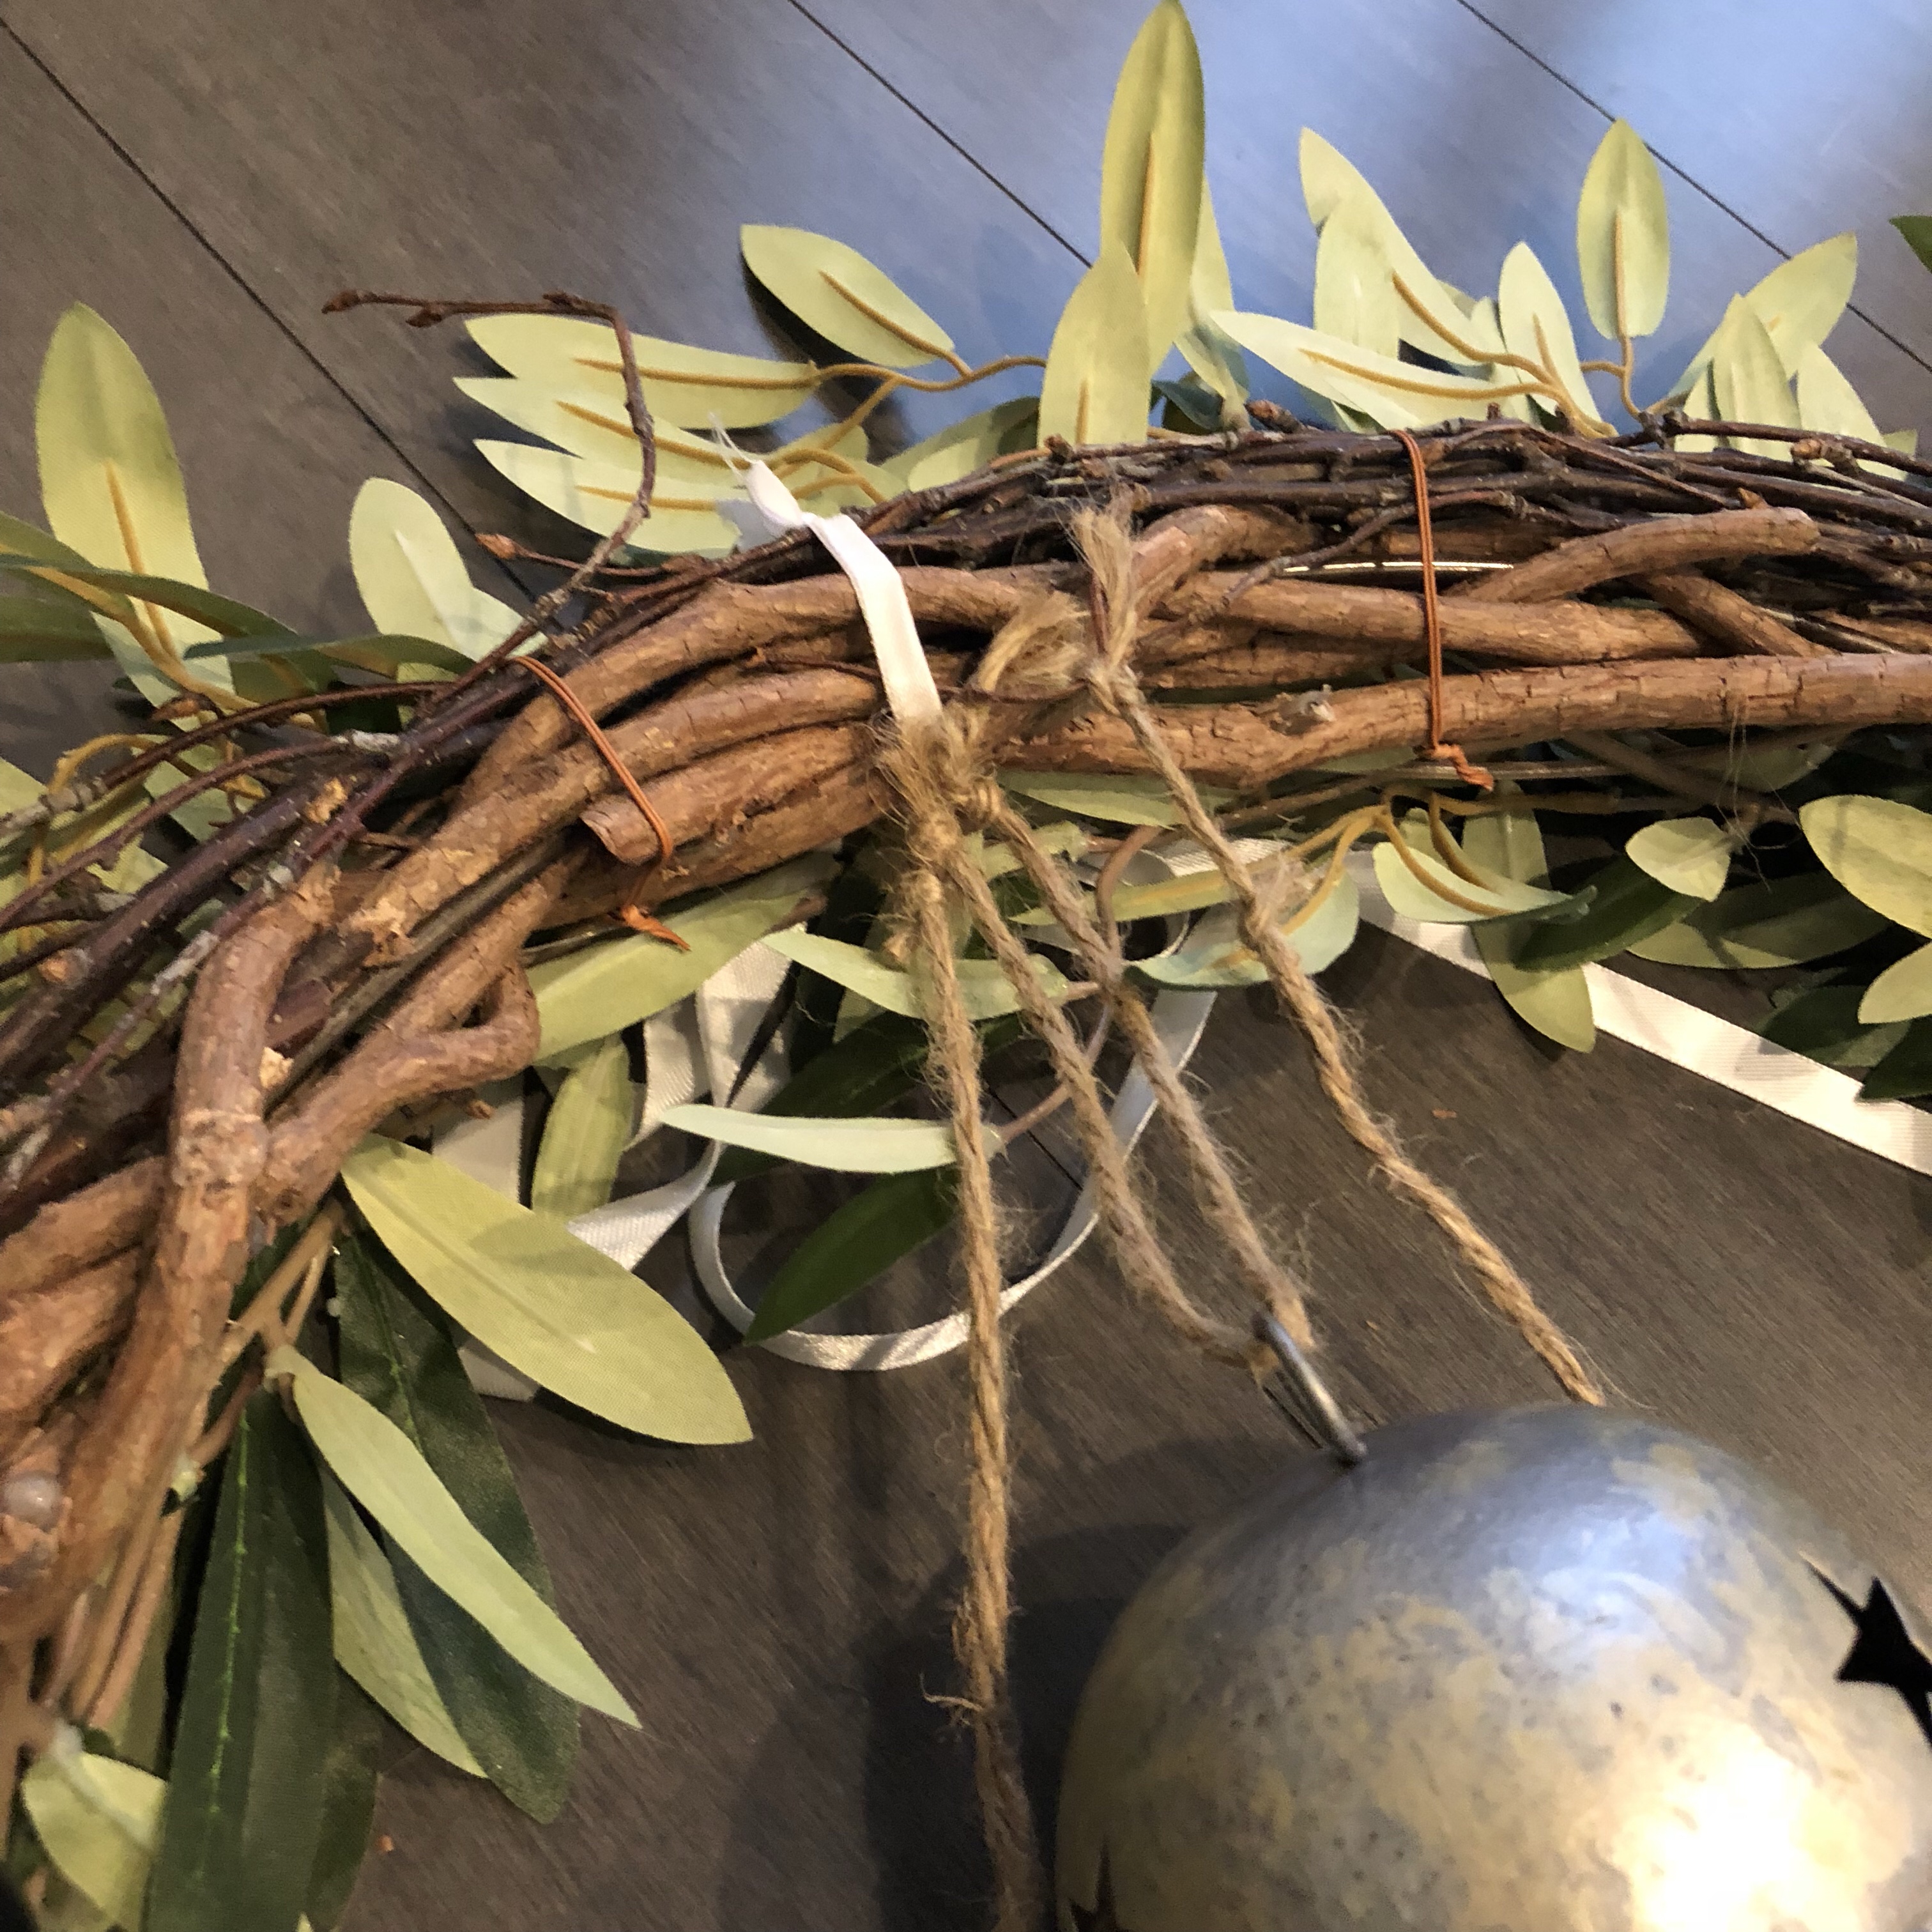
Once everything was dry it was time to work on the wreaths. I took a small piece of white ribbon and tied it in the spot around the top of the wreath that I wanted everything to hang from and the bow to eventually go at the end. This was basically my “base” for everything.
I strung my bells (which I think came out so cute!) on jute string & tied the rope at different levels so the bells hung at different heights!! I pictured the back of the wreath below so you guys could see!
I wanted the bow to be small & dainty, so, I tied a small & dainty bow and called it a day lol!! Of course after all this hard work I found some bells at hobby lobby that could have worked without me coloring them really! They were a little larger butttt the whole point is that instead of going out and spending a trillion dollars on wreaths, you can always make your own! Most of the time they turn out cuter, were cheaper & are original!
Hope this inspires some of you guys to get D.I.Y.y for Christmas! It’s always fun making things your own!
Hey y’all! How’s everyone’s Wednesday going?! Mines been a little lazy! Yesterday I had moh’s surgery to have a little spot of basal cell skin cancer removed right in the corner of my eye! Thank Jesus it’s over & that they got it all on the first try! At the moment I am looking like someone socked me in the face, and wondering how work will go tomorrow with one eye swollen shut pahaha! Debating wether or not people will want me cutting their hair this way but I decided I’ll see how I feel in the morning and go from there! I mostly laid around all day today and slept but I also got to get some Christmas things done around the house in between my cat naps!
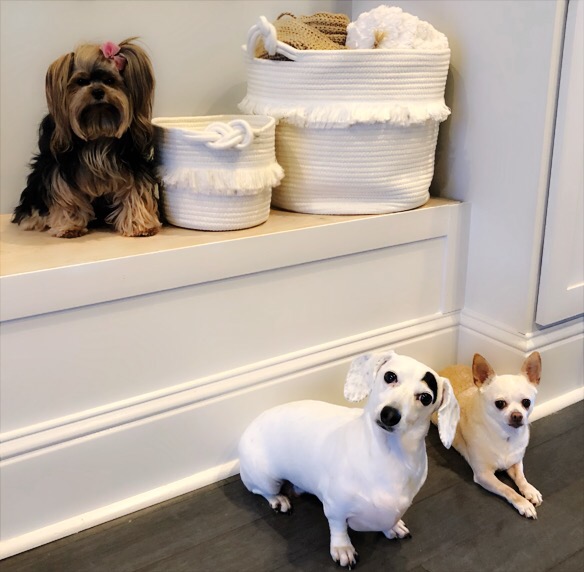
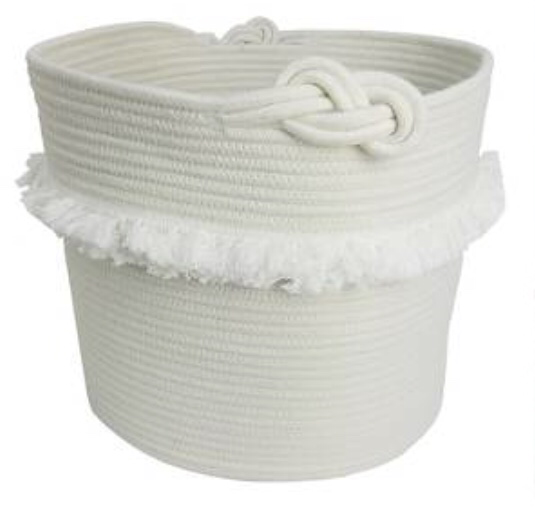
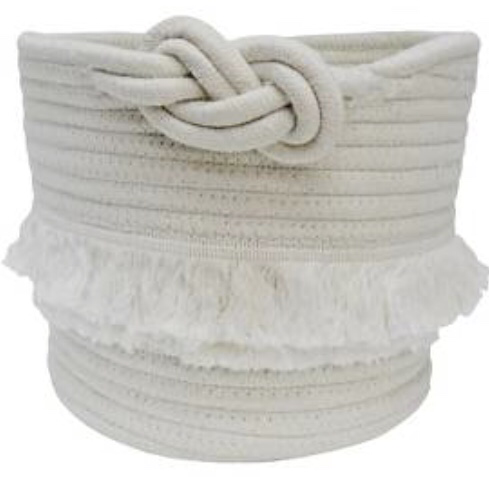
While I was laying around I decided I’d share these cute little baskets with you guys! I am totally obsessed & I got them from target not too long ago! They go with the feel of our house but I feel like you can make them go a few different ways – they have a farmhouse feel to me since they are rope & woven, but the fringe around them almost can give them a girly/dainty feel too! They have a sweet look to them so it would be fabulous in a kids room to throw toys in as well or even in a baby’s room!
I have one in the den filled with rolled up blankets and I have a smaller one in my hair room upstairs that sits on my vanity filled with brushes & important hair stuff!
I love this find because they are cute/trendy yet easy to style since they are white AND because they are under $20 – Good looking home accessories don’t have to cost a billion bucks! Linking them down below for y’all!!
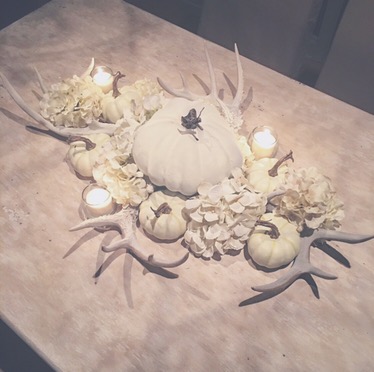
Hey y’all! So, I am clearlyyyyy a girl who is obsessed with tablescapes, I decorate my table for pretty much every holiday! Any reason to decorate and I am all about it!
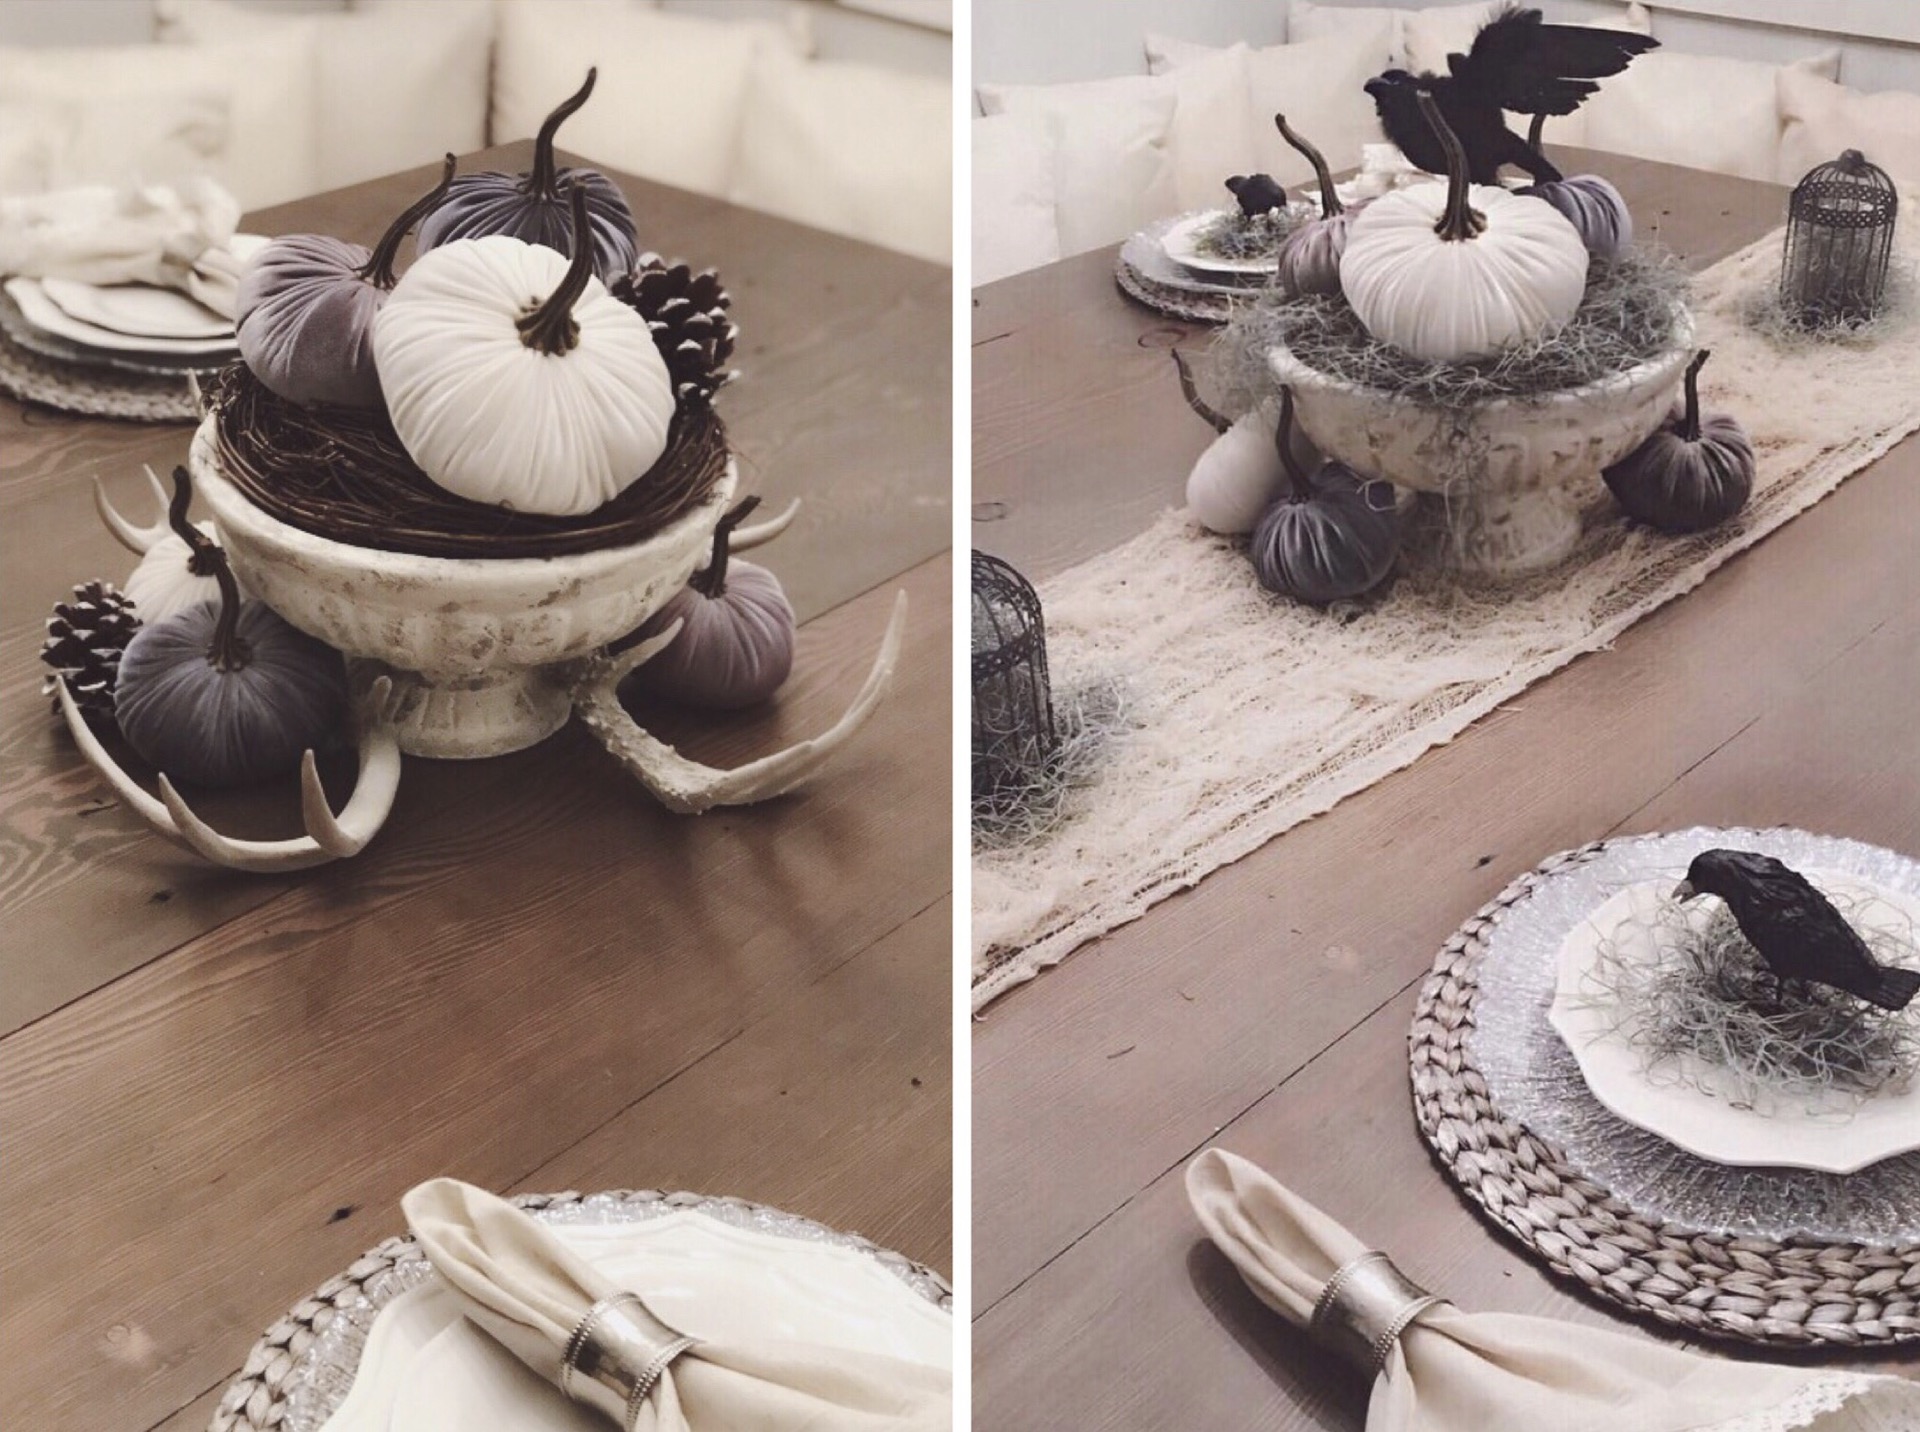
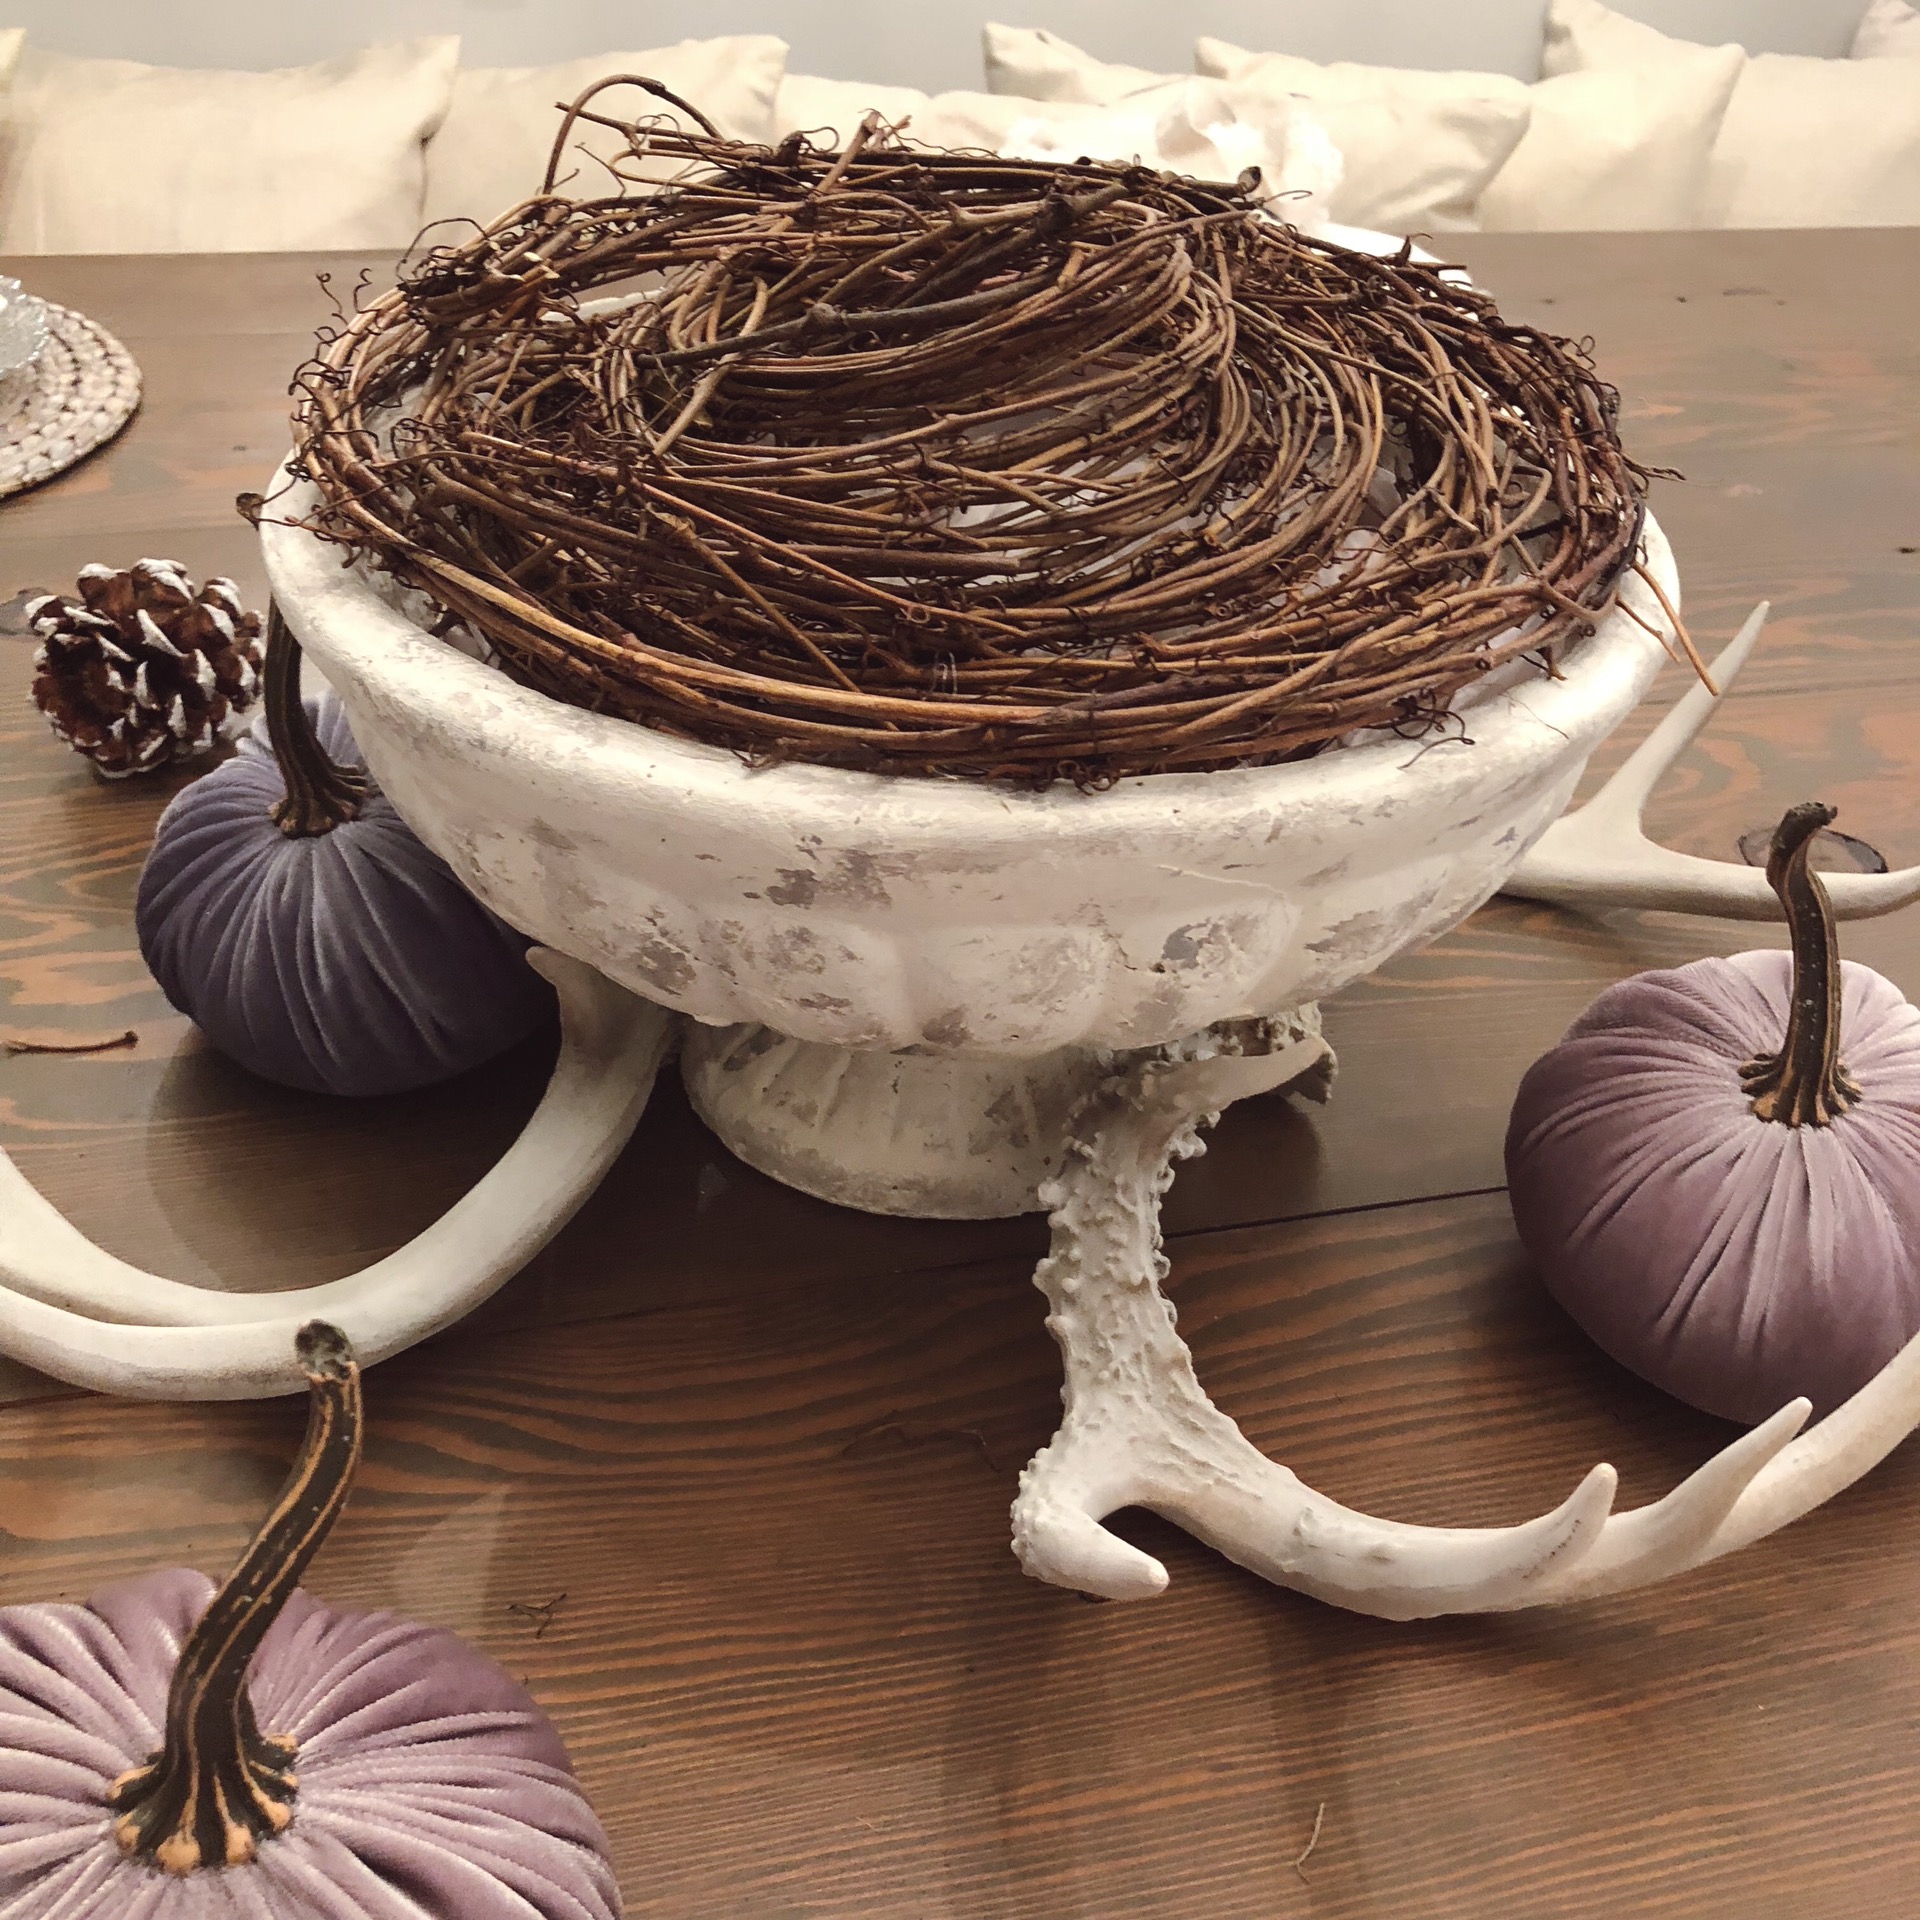
I was pretty obsessed with my Halloween table this year! Velvet pumpkins, crows, birdcages & lots of moss! Moss is a Halloween favorite of mine, it’s spooky & super cheap when your momma lives in Destrehan! Rhonda gets me moss every Halloween!
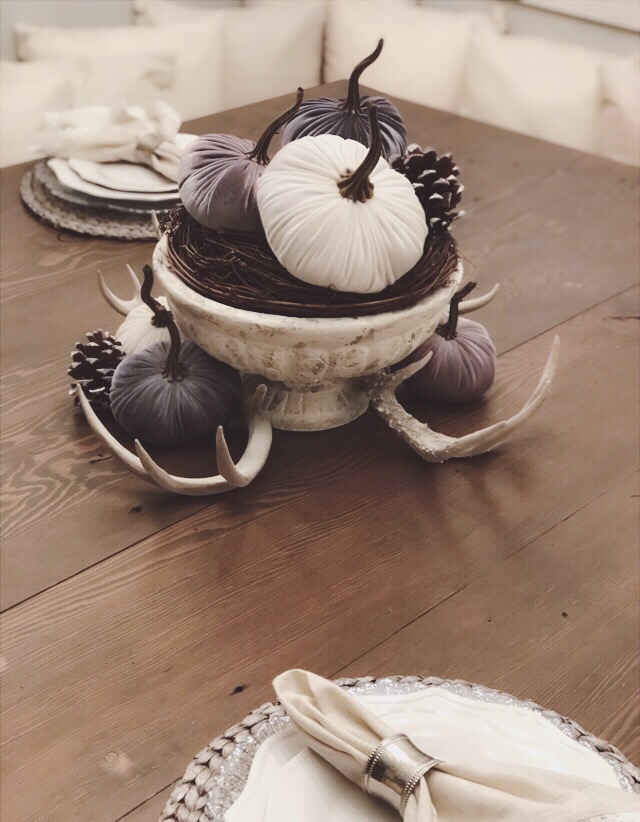
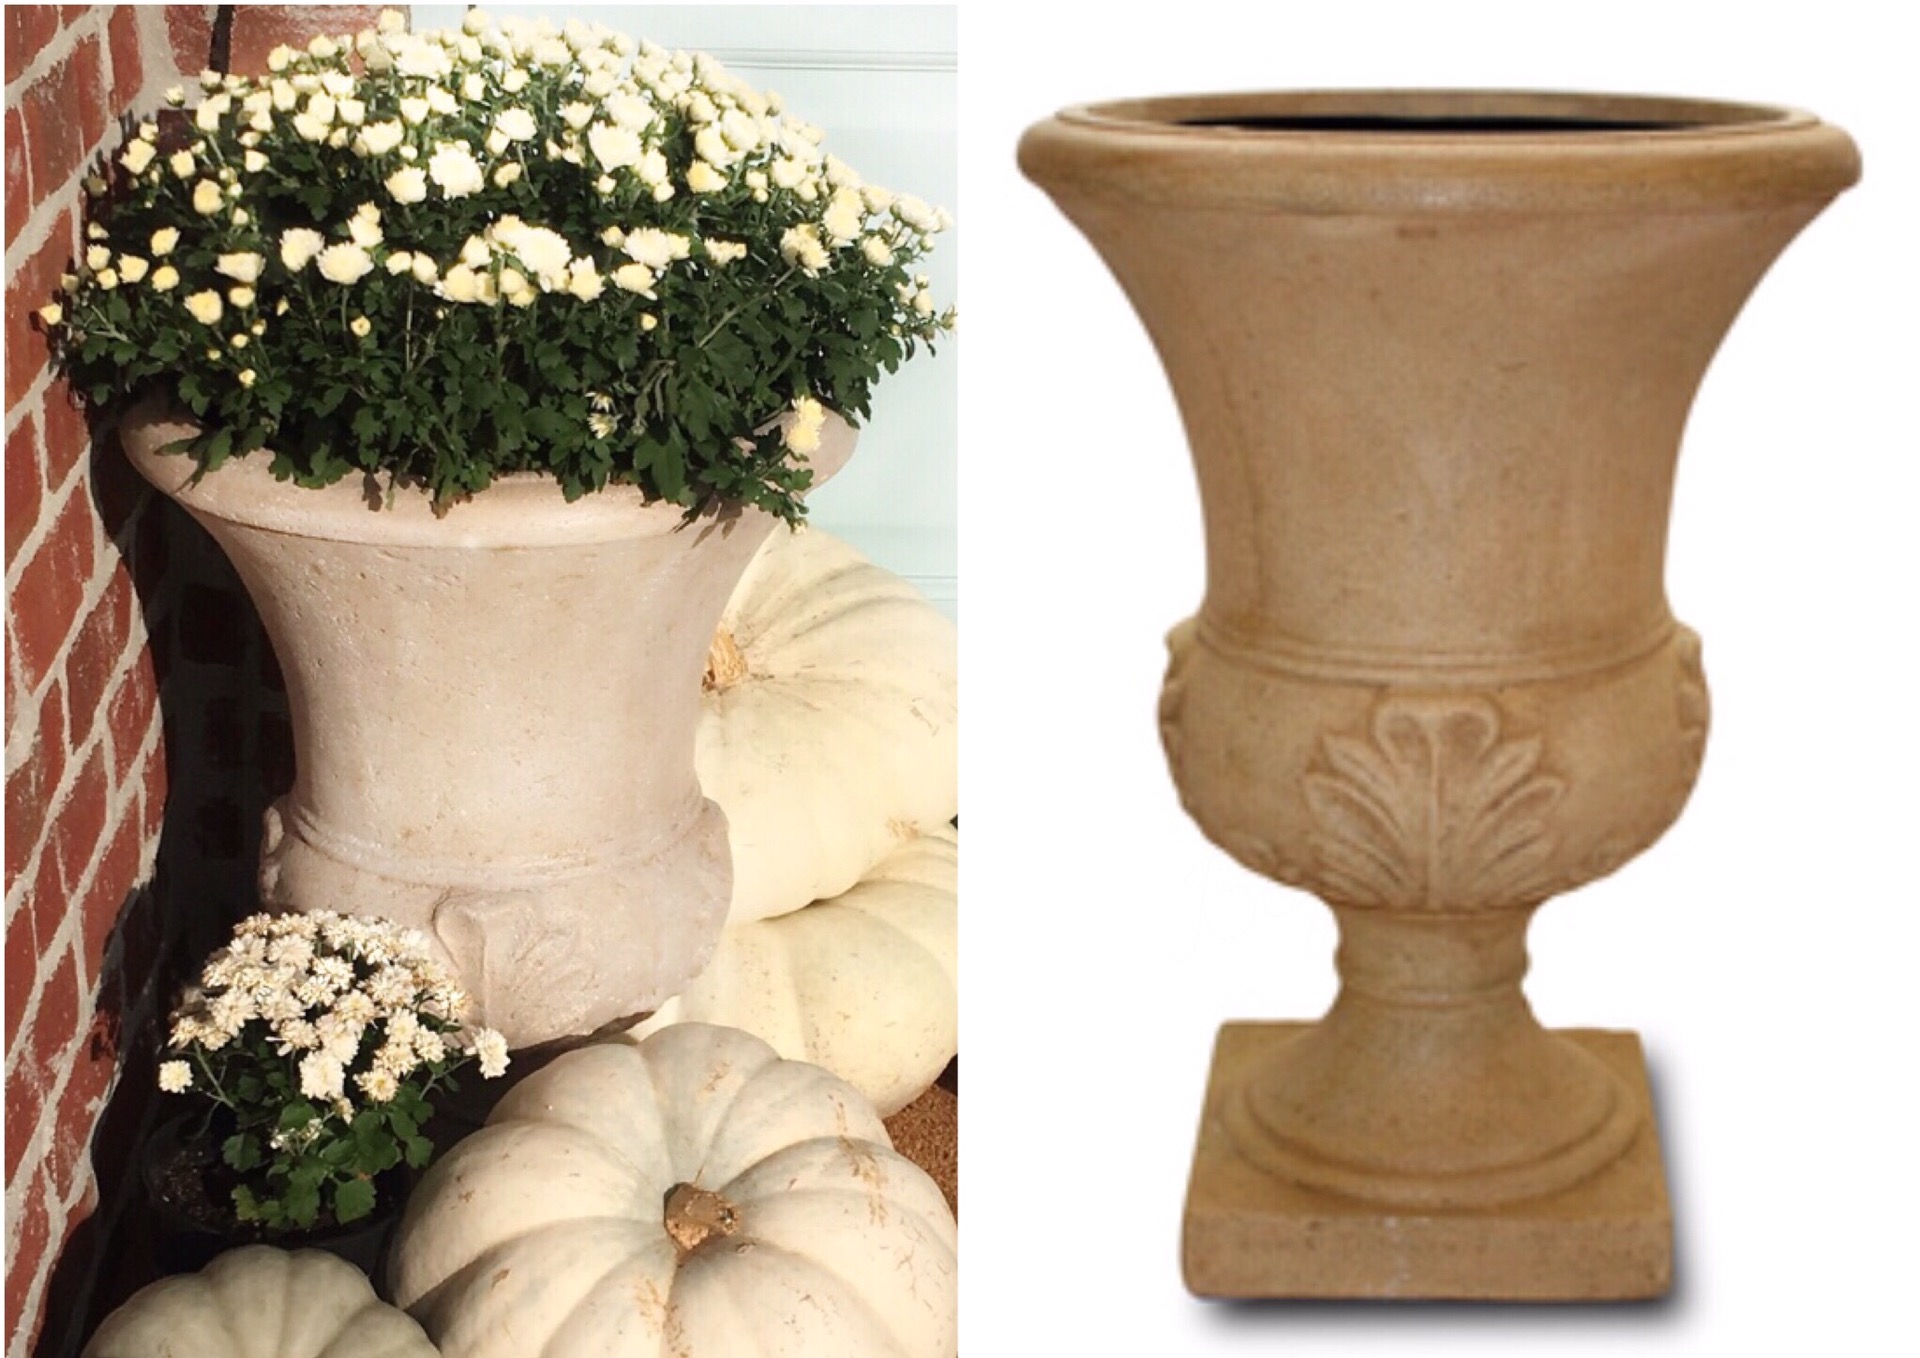
I was on a big hunt for a nice size white urn that wasn’t like $300 bucks for the table, everything I found was super expensive, too fancy, or a yellowishy cream/grey color! I had my eye on one from wayfair that I loved everything but the color, so with the help of Ryan we painted it white with Annie Sloan chalk paint, and then he kind of sponged gray chalk paint on it I’m pretty sure but I wasn’t around for that! He is the best because he entertains my little projects! I’ve linked it here from wayfair, it was around $50 and with the help of the paint its something I know will get a lot of use for all holidays or any kind of décor around the house!!
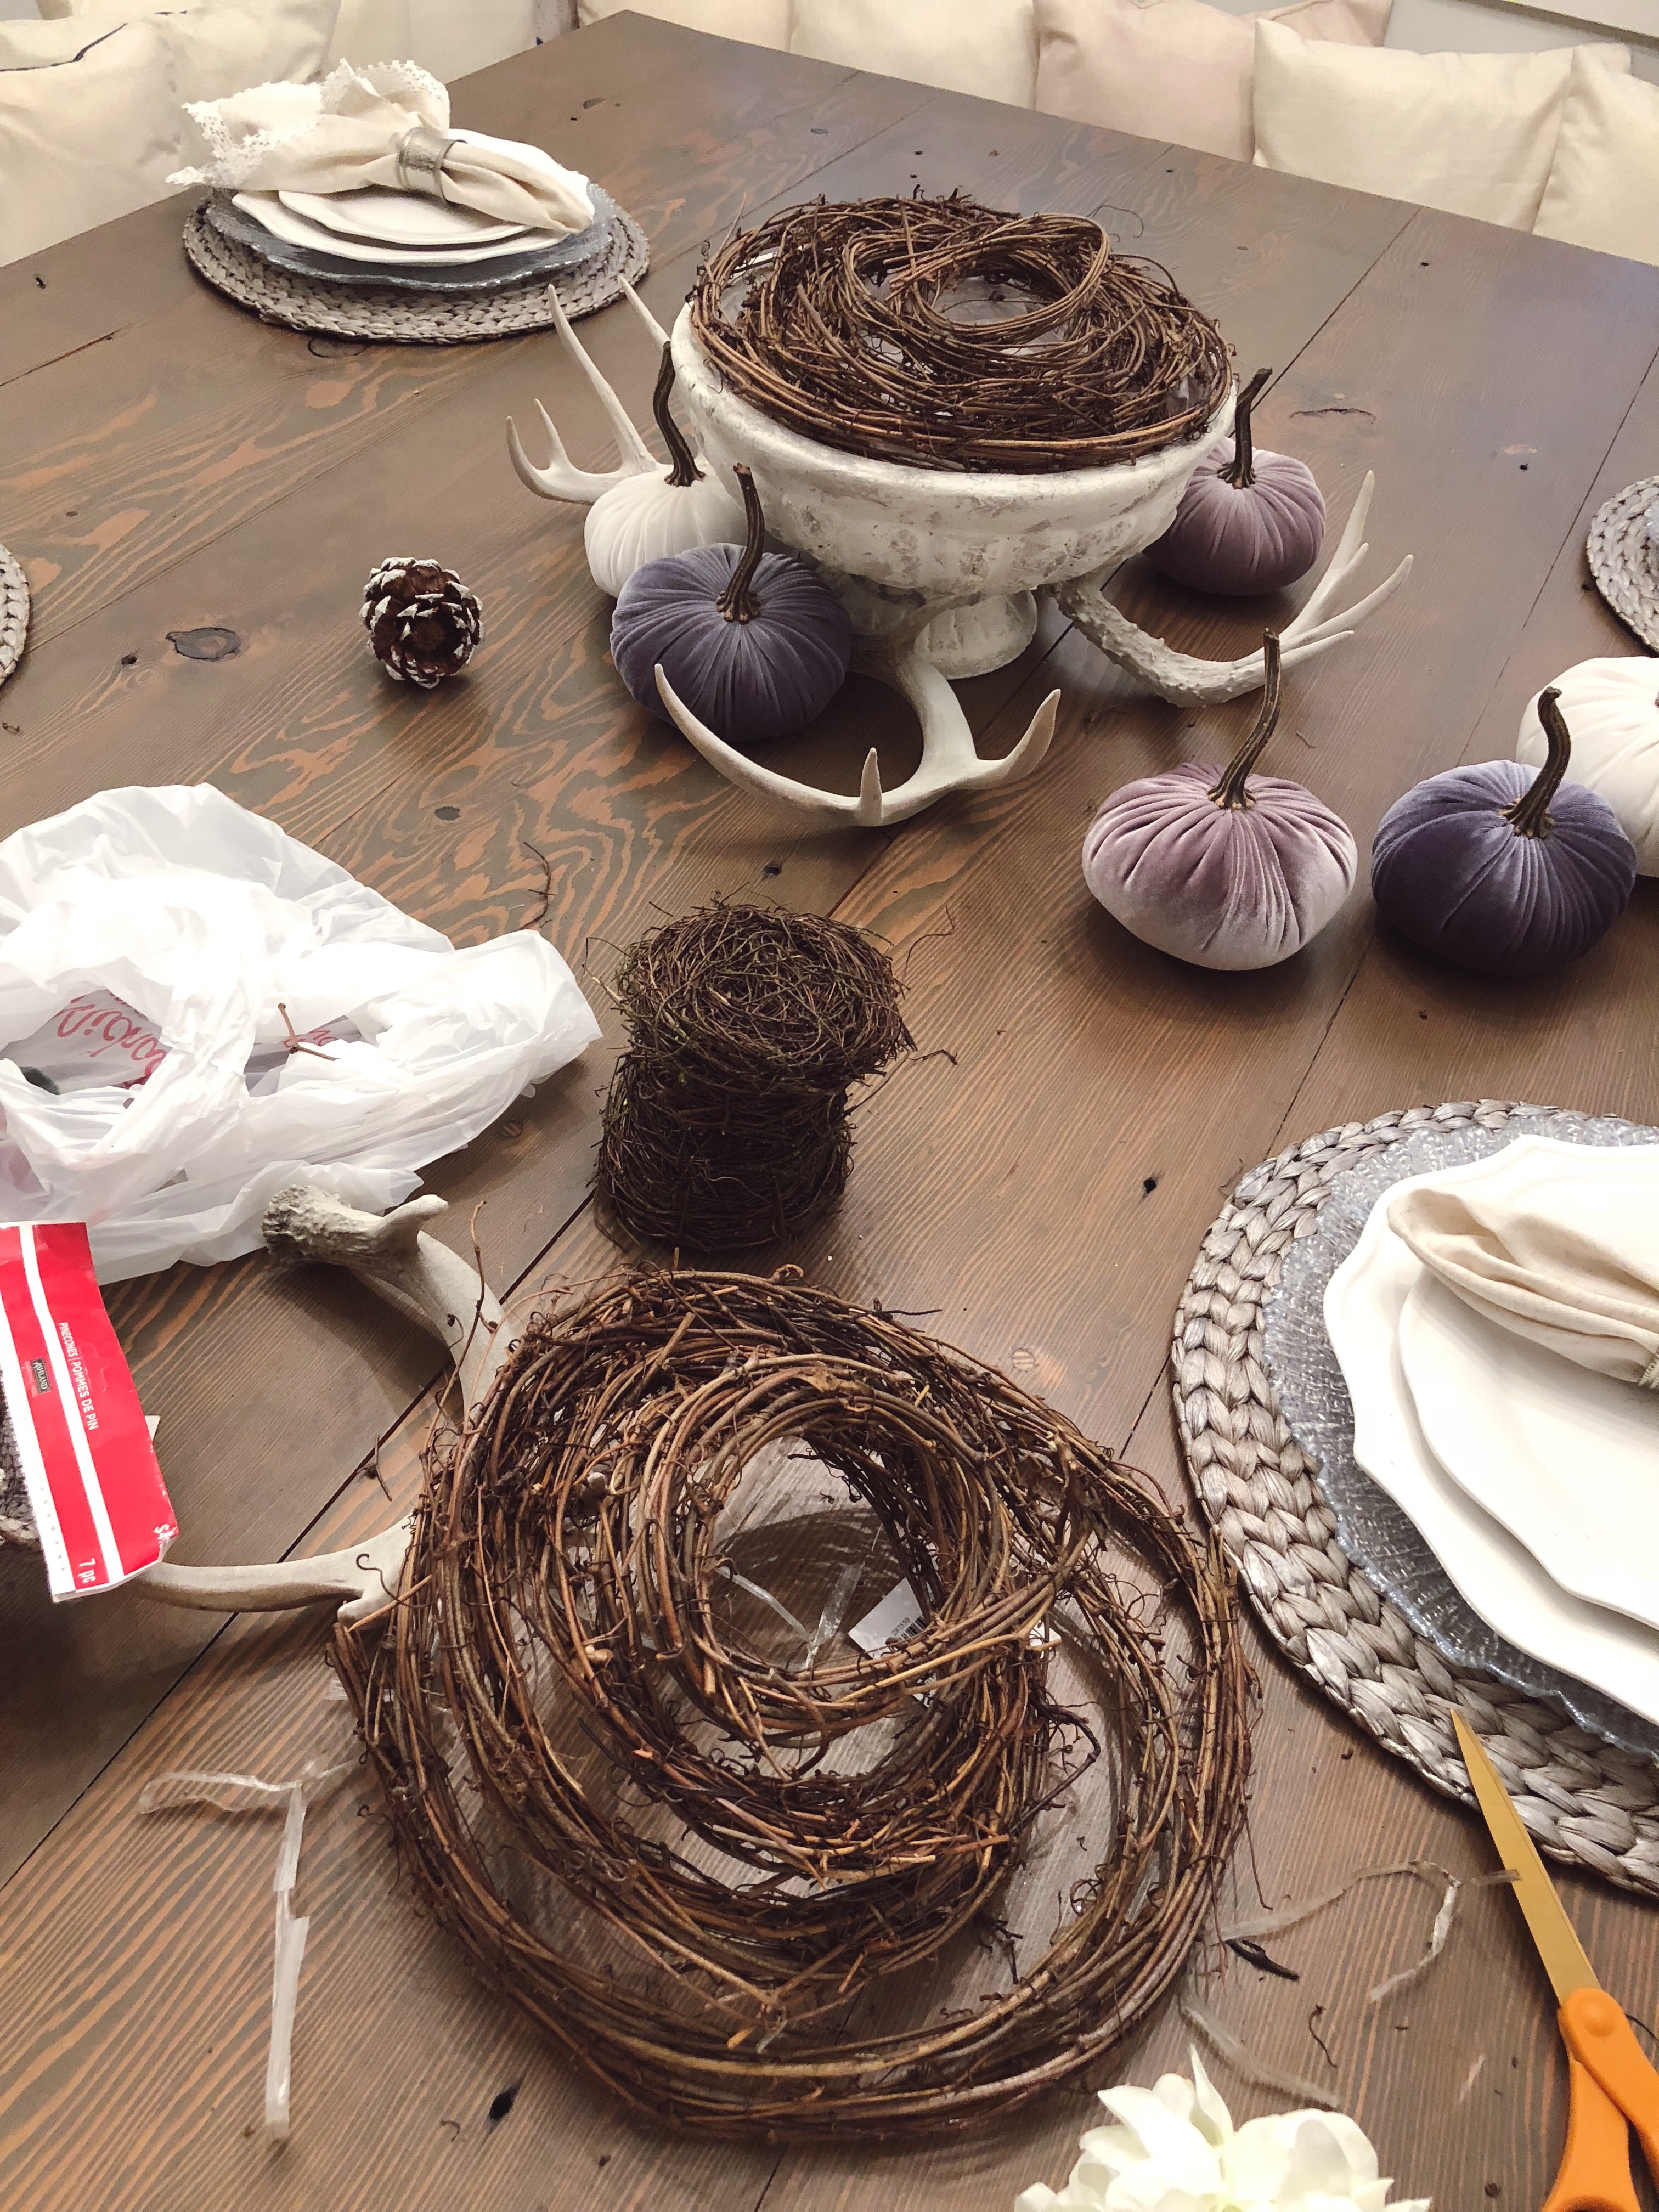
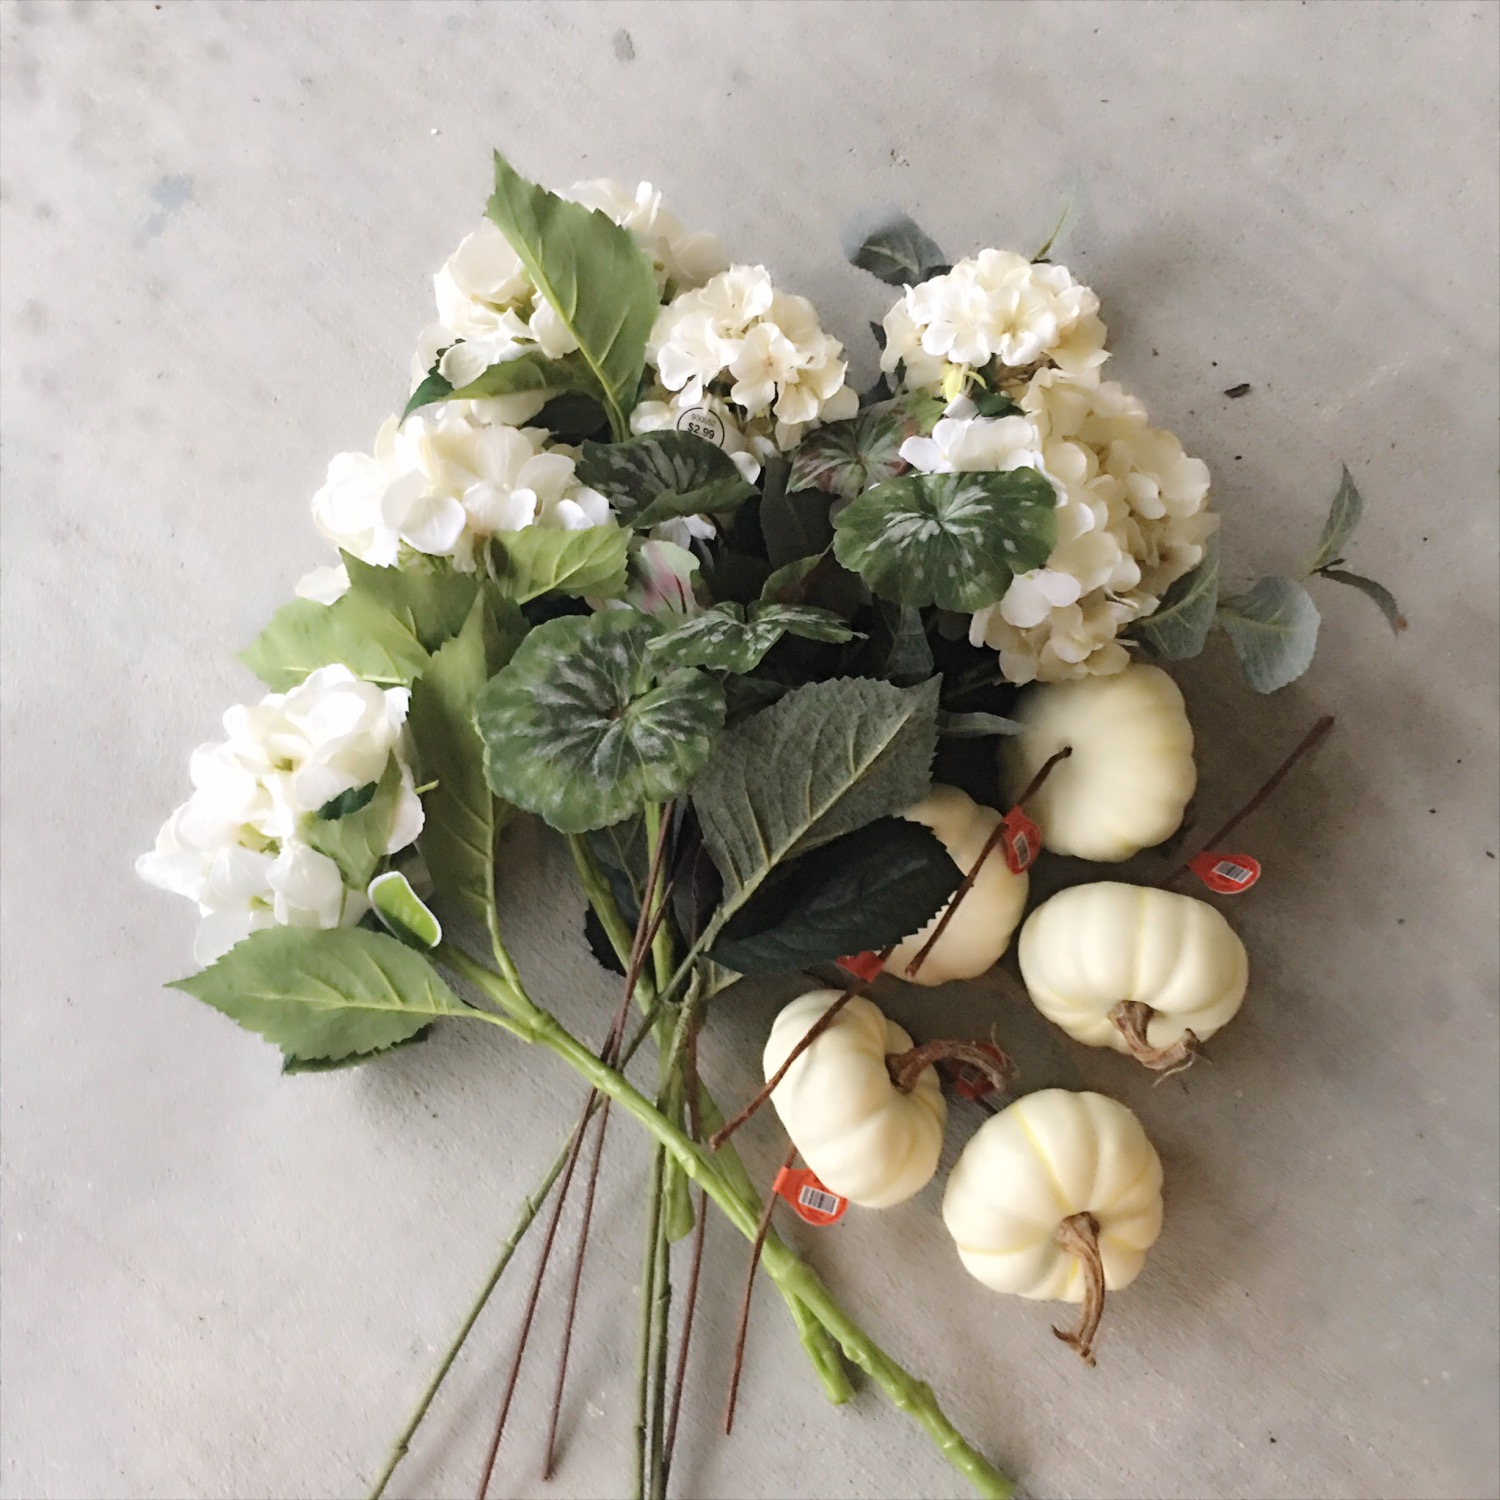
So to go from spooky to more of a thanksgiving/fall feel I wanted to lose the moss and bring on more fall foliage! I wanted to keep my velvet pumpkins, of course, as the main focus and also reuse deer antlers I had previously got (I’ve posted that in a previous post with links but will link more options again below). I thought of replacing the moss with leaves but wanted to keep things more simple because of the velvet pumpkins. Branches or pinecones popped in my head, I ran to michaels and found both! I decided to grab pinecones with white tips and figured I would use them around the table if they worked, using the branches as the urn filler!
I’ve linked a list below of things used in this tablescape and will also link a few sites for velvet pumpkins ranging in price as well as my place settings from pier1.
I filled the urn with the branches and replaced the pumpkins leaving some on the side to look like they spilled out! The branches were easy to bend and break to help me fill in under the pumpkins and to help prop them up! I added a few pinecones to fill in empty space and placed the antlers around the urn. I also added dinner plates on top of my charger to dress it up a little more!
Overall this didn’t cost a lot because I’ve collected some of my decor over time! The velvet pumpkins are costly but they are something you will be able to use over again – and, I think they are a good investment because they double as Halloween & Fall decor! The antlers are a good thing to have around as well because I pull them out for Christmas as well!!
When I posted staining my front door planter on my snap story I had a ton of people ask where I found it and what I was staining it with, so, I figured I’d to a blog post and give you all the scoop!
Truth be told I searched for a planter online and around town for a few weeks and didn’t find anything I loved that wasn’t like over $200 bucks (because let’s be honest my mom and dad have always said my special talent was finding the most expensive thing in the room to buy!). I ended up running to Lowe’s in a last stitch effort to not spend that and found the perfect size/look I wanted & of course didn’t love the color, but for $50 I figured I could doctor it up somehow! I’ve linked it HERE for anyone who has asked!
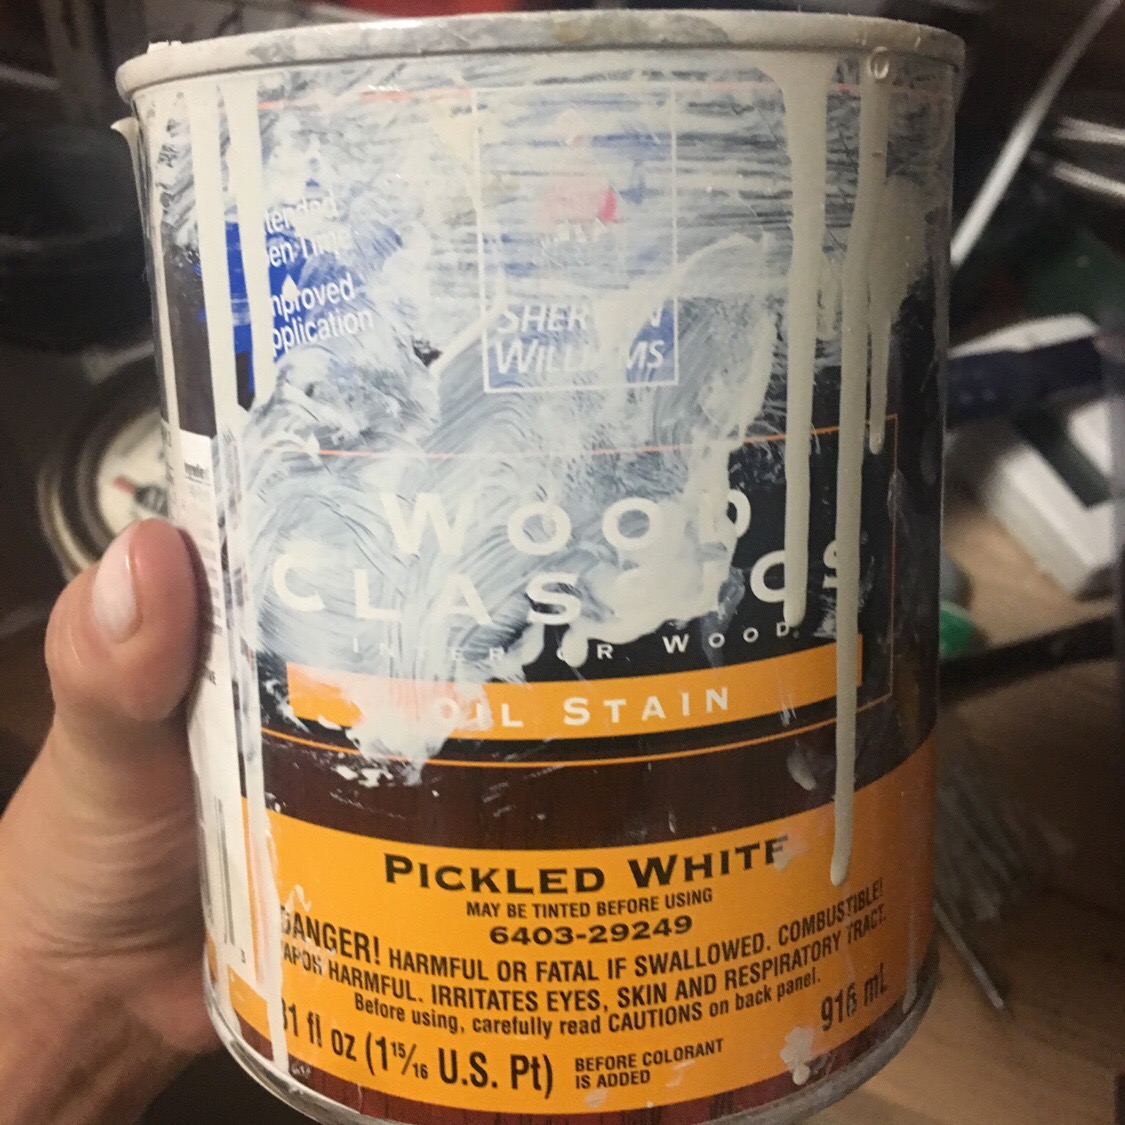
Recently moving into Ryan’s I’ve discovered the power of white wash (my mans house is gorgeous, but he’s a man and likes manly darker colors, so I’ve had to put my white mark on a few things, I like to think he knew what he was getting himself into) pahaha! I’m telling you I got this stuff from Sherman Williams, I’ve just about thrown it on everything I could and am pretty impressed. I didn’t know how it would do on the fiber glass but it worked out fabulously. I’m telling y’all we’ve put it on wood (obviously), table coasters, vases, like EVERYTHING!
Anyway, I couldn’t find the exact link for the stuff but I have a picture of the messy can I use. It’s pickled white oil stain from their wood classics line. You mix it up real good, take a paper towel, blot it on the surface your staining and then fairly quickly take some kind of fabric (old t-shirt, or towel) and rub it around/wipe it off till your getting the color your looking for. If you use the paper towel to wipe it, the paper towel falls apart, so go for the fabric! If you just want a light wash one time is good but if you want a more opaque look you can layer after about 4 hours. Side note: be careful with this stuff, it’s called a stain for a reason, it stains concrete front porches too, oops!
below is the side by side – so you can definitely see the difference the white wash makes! I call it a white wash that’s probably not the correct term but that’s what it is to me so we’ll just roll with it!
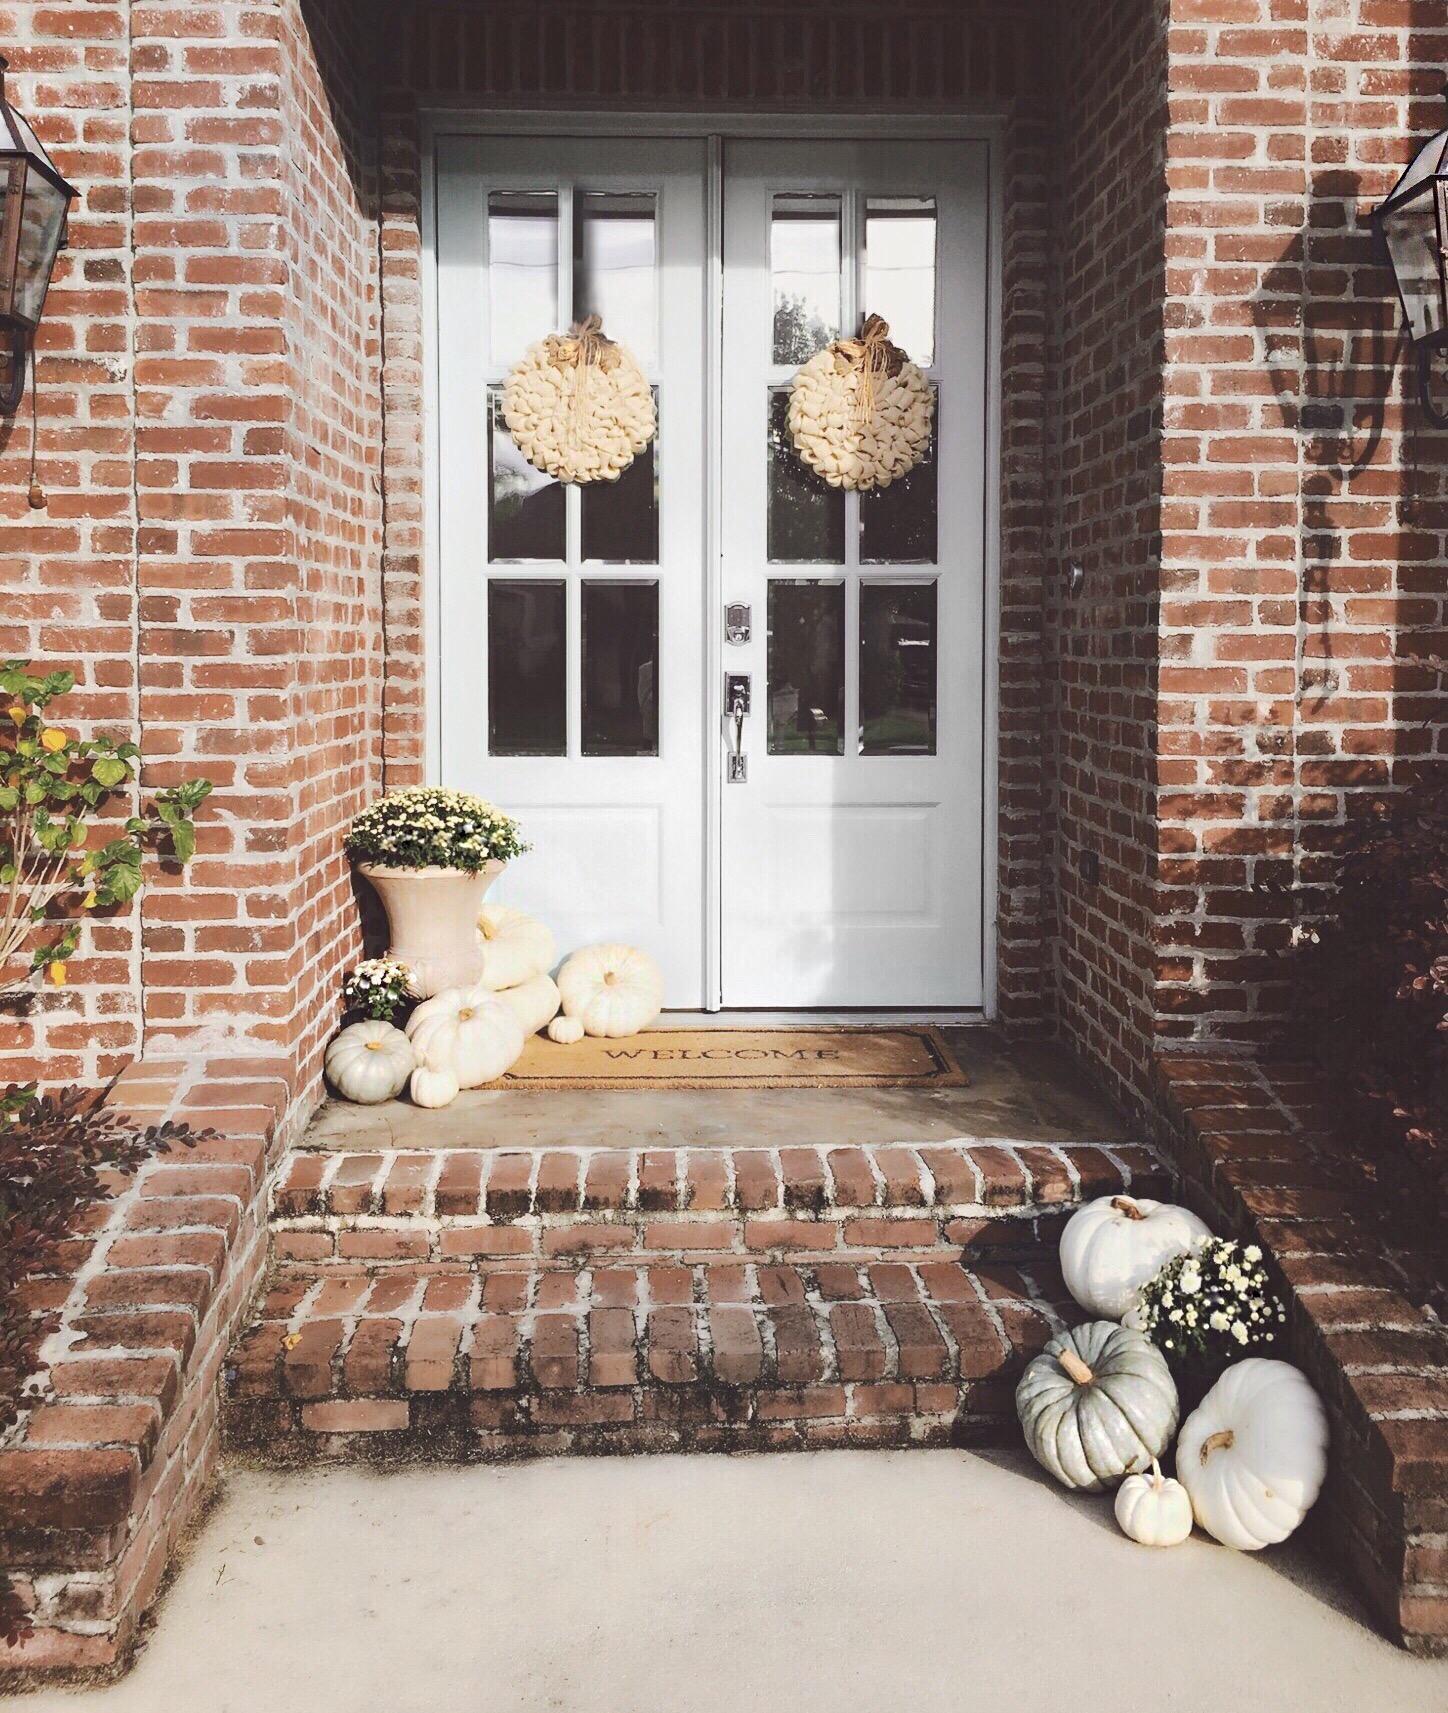
Another side note for people who ask about the pumpkins, Whole Foods & Trader Joe’s are the place to go! Someone told me dorignacs had white pumpkins and I headed there grabbed a few and was looking at them in my basket like “these suck for $8.99”, so I put them back and was like whatever I’ll spend the extra money at Whole Foods for big pretty white ones! Helllllooooo I get to Whole Foods and they are $6.99! Moral of the story Whole Foods had bigger, prettier, pumpkins for less & dorignacs should be ashamed of themselves for trying to get inoccent little pumpkin lovers to spend more on crappy pumkins! Pumpkin prices add up when you want a billion covering your porch! Trader Joe’s are the same price & the gray pumpkins are also from whole Foods, they have all kinds of different colors and sizes! I got front porch crazy every year with mums & pumpkins! Though I always seem to kill the mums! For those looking Lowe’s was the only spot I found white ones, Home Depot had a ton of different colored ones as well!
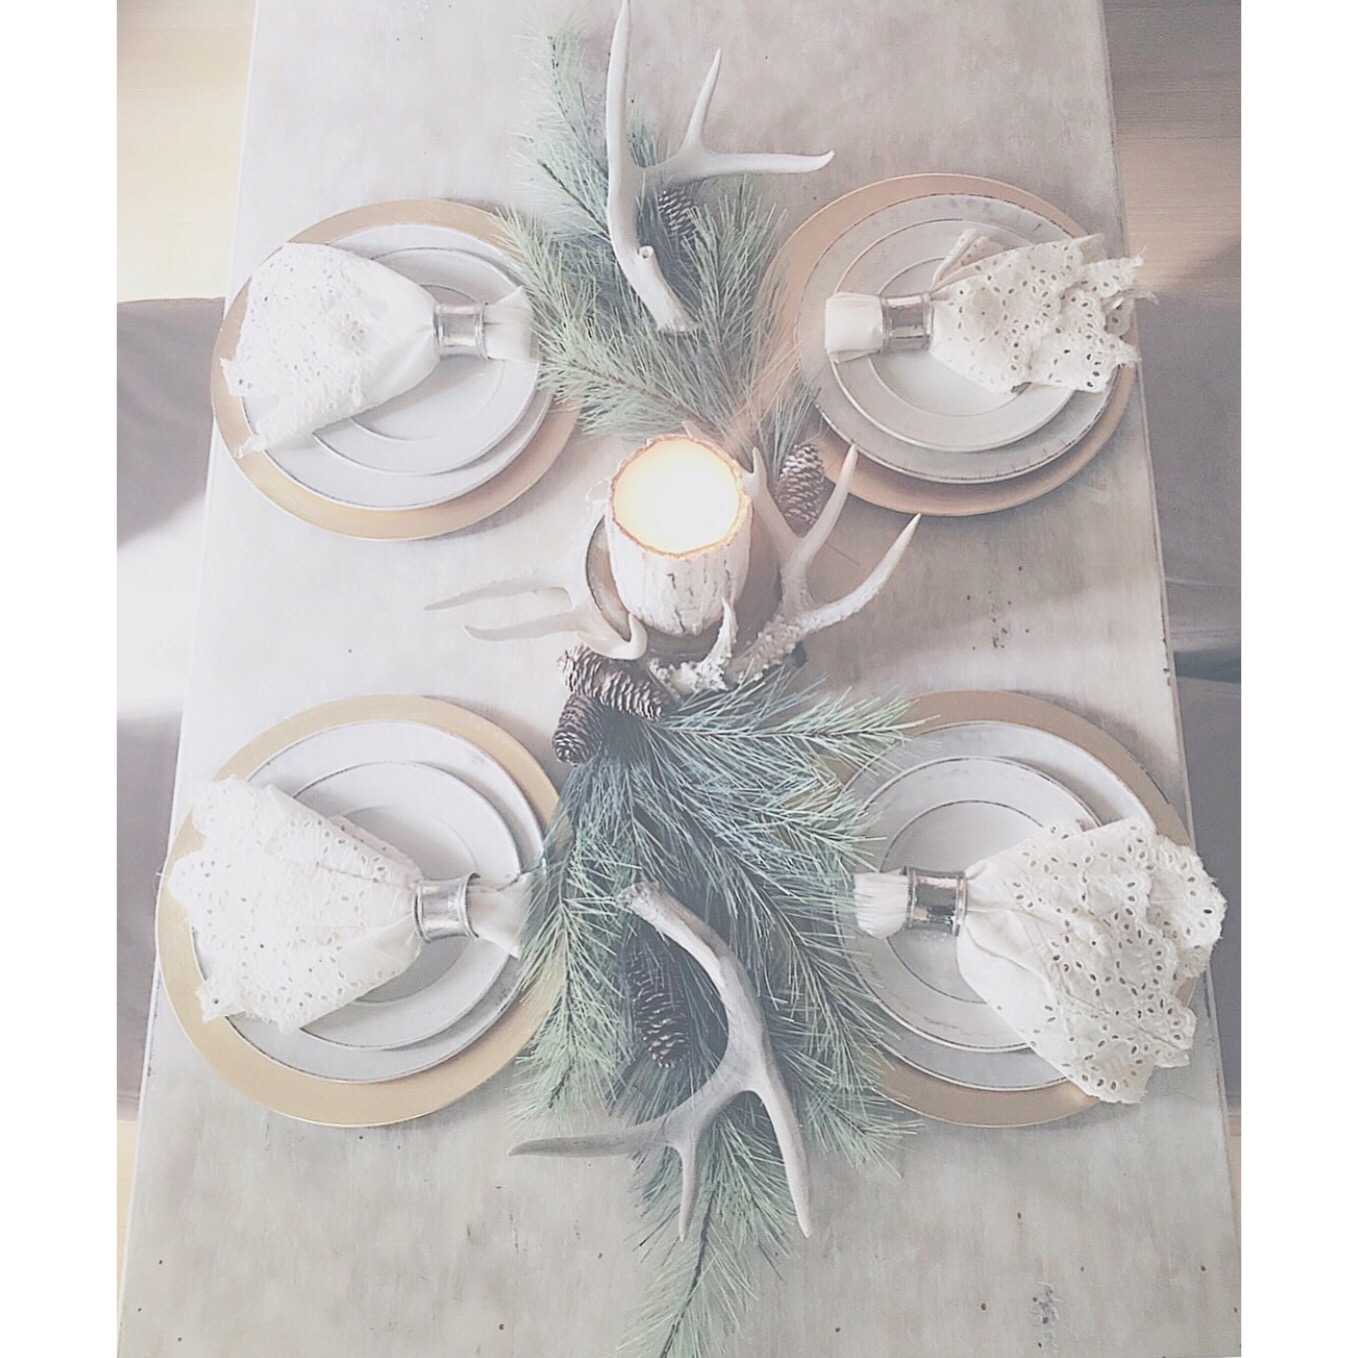
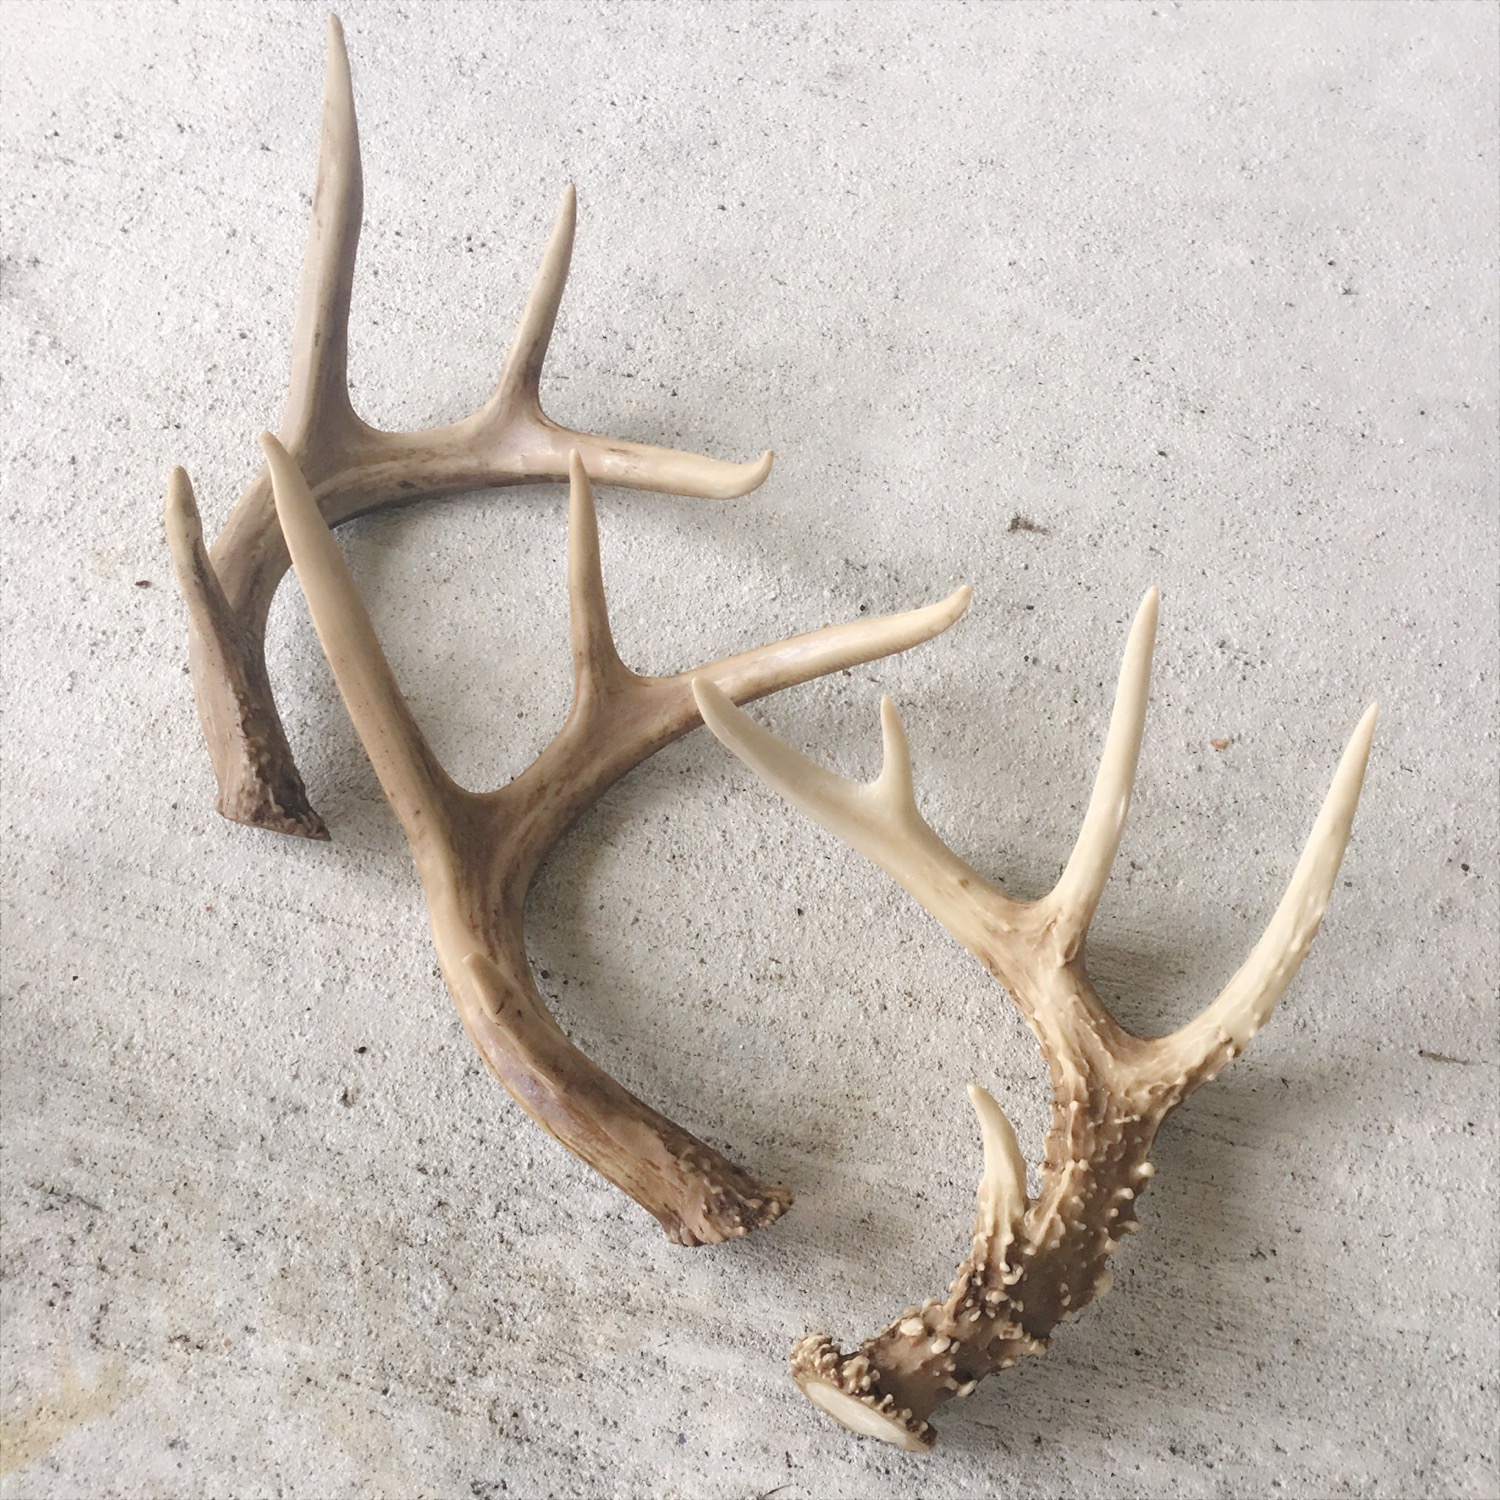
Merry Christmas people!! Incase anyone is bored tonight and needs something to read while they are laying in bed all stuffed I decided I’d post a blog! Everyone loves deer antlers, especially when they are fake and no sweet animals were hurt in the making! These look so cute on the table for center pieces or use just one for decoration somewhere in the house!
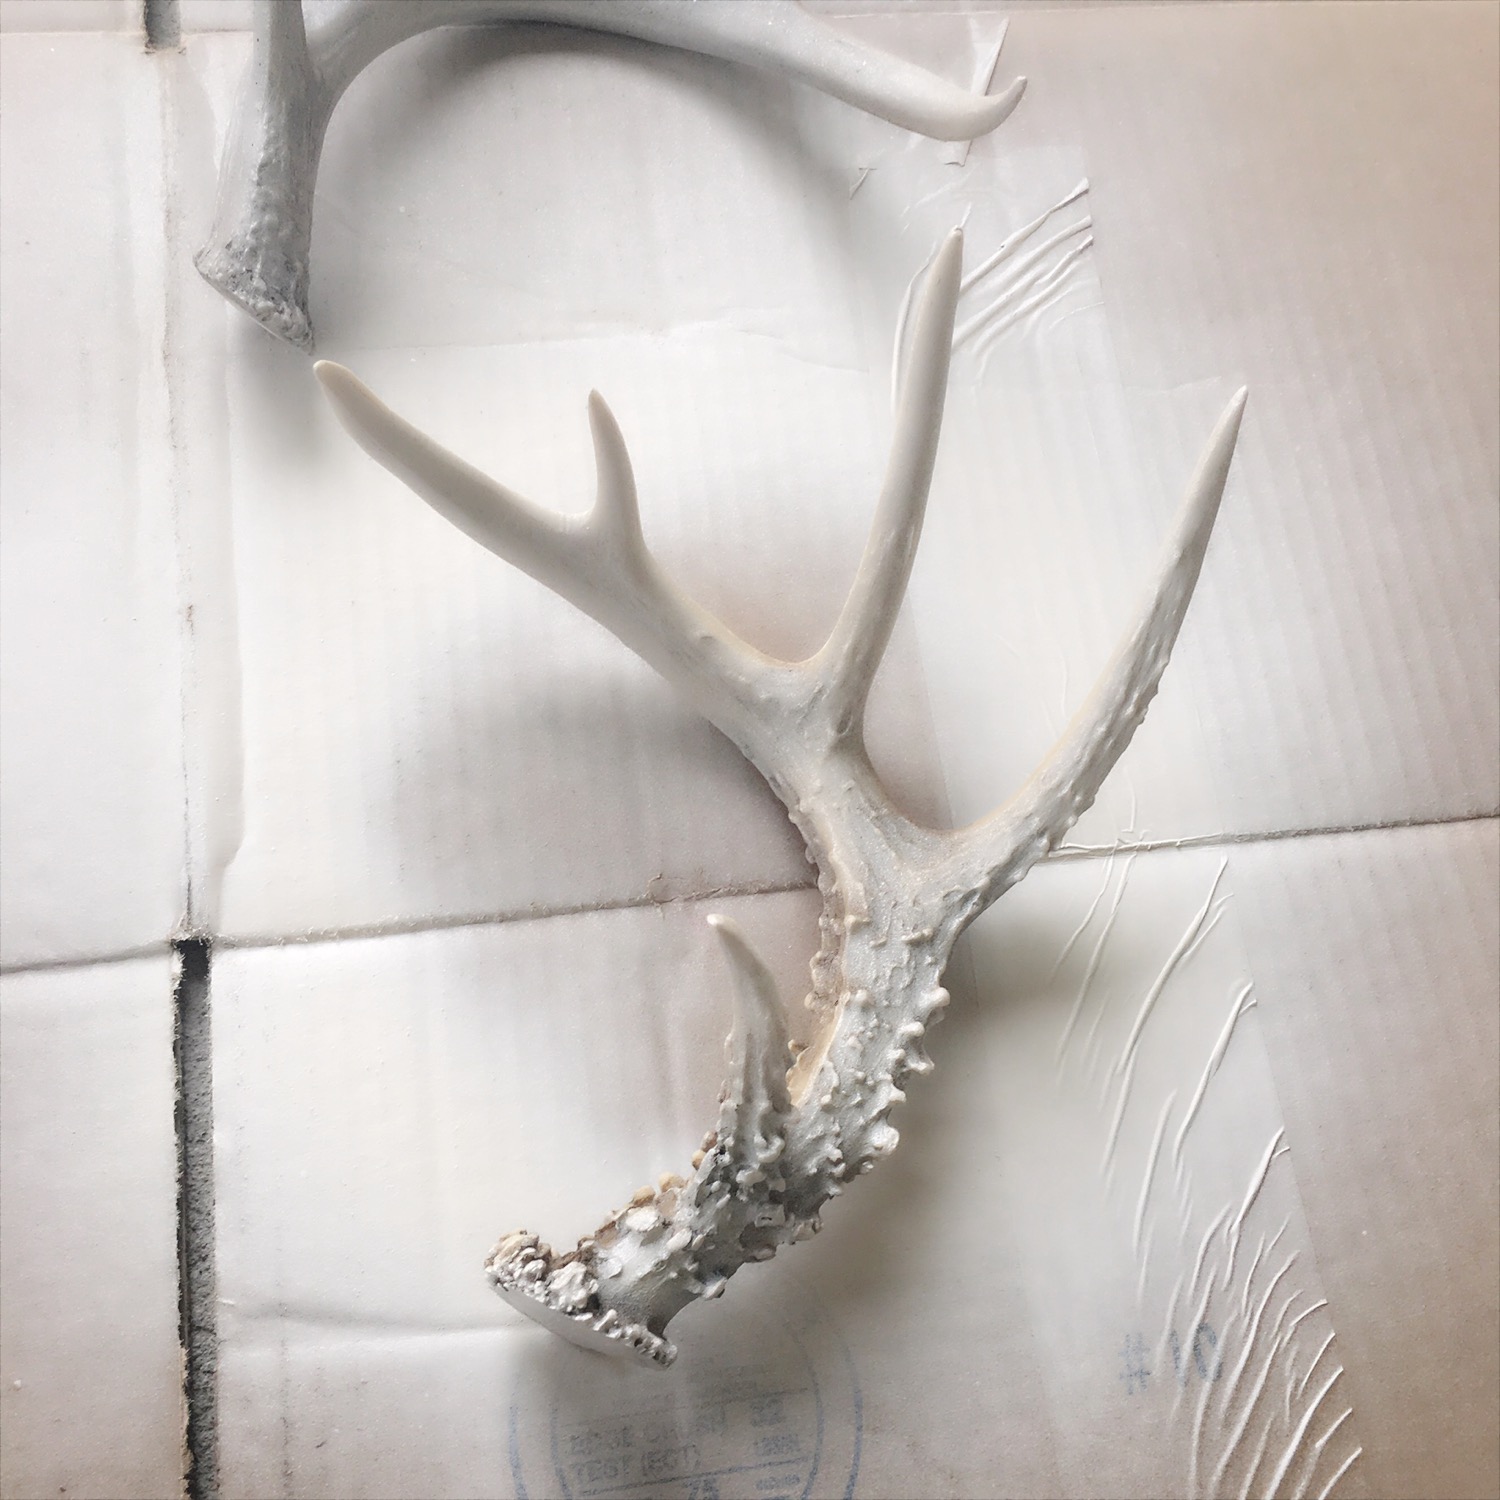
These are super easy, I ordered two types of antlers from amazon that you can find here and here. Then I sprayed them with a chalky finish spray paint in white which can be found here or at lowes\home depot! The trick to spraying them and having them still look natural is to hold the spray paint further away and almost try to just mist it in certain spots, (your trying to make little bits of brown still come through).
I’ve used these for both my fall tablescape and now Christmas and have gotten a ton of complaints. I place greenery around them that you can get from any craft store and call it a day!